Tag Archives: cheese

Making Cheese at Ballymaloe Cookery School

17 Aug

One of the wonderful things about going to Ballymaloe Cookery School is that you really get a chance to understand where food comes from – how its sourced, how it is produced, and sometimes… you even get to see the entire cycle. Its a very humbling process, and incredibly powerful. It makes you stop and think about the food that you eat, and how important it is for body, mind and soul to try and eat as cleanly and carefully as possible.

While I was at Ballymaloe, I dont think I ate very many things that were processed. The milk came from the Jersey cows on the farm, and they provided some of the butter, the buttermilk, and the cheese that we ate too! And we got a chance (if we wanted to) to make our own cheese. Mine is still awaiting me at Ballymaloe … I will pick it up in a few weeks and sample it. I cant wait!

Cheese making is a very zen process. Its all about feeling the milk turning into cheese, and knowing when each step is complete. A group of us gathered in the milking shed to help Tim turn milk into a cheddar style cheese… and it was such a powerfully beautiful process…

You can make cheese on the stovetop, but Ballymaloe has a very cool industrial sized container that heats the raw milk very slowly to the correct temperature.  After making sure we had all washed our hands, put on aprons, and hairnets (can you imagine finding a stray curly hair in your cheese?!), Tim added a vegetarian rennet to the warmed milk. This made it solidify … he then checked the temperature.

Making cheese!

When he felt the curd was at a proper temperature, he felt it by dipping his hands into it. He told us that once you start making cheese regularly, you can begin to get a feel for when its ready to be cut. There is a smoothness, a responsiveness to it that happens only at a certain moment.

He then got out what looked to be a massive square metal tennis racquet, and started cutting the curd into smaller chunks. This is when it got fun!

with a big metal tennis racquet!

The curd started separating from the whey – the liquid obviously inherent in milk. Once the curd had been cut by the metal tennis racquet apparatus, we were allowed to plunge our hands into the container and start squeezing and separating the curds out. A small tap was opened at the bottom of the container for the whey to drain out.

For the piggies!

I have to say, the process of separating the curd from the whey was very therapeutic. It felt so lovely to be elbow deep in this textural stuff, knowing that this movement was actually part of the making of the cheese. Tim told us that cheese makers have wonderful skin on their hands! I can believe it … the feeling of dipping into the vat was soft, smooth, warm, comforting. And cheese is a live thing, so you have to treat it with respect, no squeezing too hard, or sudden movements. It was beautiful.

No wonder cheesemakers have such young looking hands!

Once most of the whey was drained off, we started packing the curds into round plastic molds, with holes that allowed drainage. Each of us filled one mold full, and then covered the molds with heavy weights.

Making the cheese!

After about fifteen minutes, we were actually able to take the cheese out of the mold, and flip it over. We then covered it again with the weights (and some extra just for good luck) and waited again for another few hours. This process of flipping the cheese over ensures an even distribution of curd, and gets as much moisture out of the cheese as possible.

in their molds

After a day or two, and some regular flipping (my housemate Gina and I traipsed to flip cheese at midnight!) .. the cheese would be removed from the mold, salted, and set in this temperature controlled ripening cave. We had the responsibility of coming to flip our cheeses on a regular basis. They would be ready in about three months!

Yum ..

Very thorough notes were kept about each batch of cheese. When it was made, how it was made, how much milk, temperature, time of day. But this was not the end of the process! Gina and I accompanied Tim to distribute the whey on the farm…

It was like they knew we were coming!

It was like they knew we were coming! They were extremely happy to drink up every last bit of the whey, and Tim told us that it is very good for them.

They loved it!

The little ones loved it so much, they actually got into the trough to drink it. There was a little bit of a fight to drink it all up, so the runt took advantage of the ruckus, and went directly to the Mama source.

being clever

And this was just one evening in Ballymaloe .. magical, full of learning, part of the cycle, and so very wonderful. It taught me so many things … but most of all that I am connected to all that is around me, and if I treat the earth with respect, and a conscious understanding… well, then, the joy is infinite.

Ballymaloe Cookery School – Days 10 – 15

17 May

What a whirlwind week it has been. So many extraordinary stories and voices, such bliss and peace, laughter and light. When I look back over the posts on this blog, I see the trepidation with which I approached this trip. I knew it would be life changing – and when one comes to that moment in time where all will change, there is a pause, a hesitation. But time is inevitable – it keeps moving forward. And as long as one goes with it, with the flow of experience, with the grace of the universe … change is beautiful. And experience is precious.

So this past week has been intense on a whole variety of levels. We had some wonderful visits from cheese and wine makers, as well as Ballymaloe House’s resident sommelier. We had cooking demonstrations from Darina and Rachel, did our chores, changed our kitchens, and cooked our hearts out. Every day we are learning new techniques. We are being pushed to consider timing and rhythm, presentation and plating. Every day we produce food that we sit down as a group to eat together, and we are truly blessed. And this past weekend, I found myself wandering to the regginbrow was to be seen ringsome on the aquaface.  And I returned full of grace.

So here we go. Days 10 – 15 in this magical place they call the Emerald Isle, in a little corner called Ballymaloe.

Day 10 – Blessed are the Cheese Makers and Wine Tasters

Wednesdays are always full on theory – demonstration days. And this past Wednesday, we had a morning of cheese making, and an afternoon of wine tasting.

In the morning, we were introduced to Eddie O-Neill, Dairy Artisan Food Specialist at Teagasc’s Moorepark Research Centre. Eddie is a cheese man pure and simple. He is immersed in cheese making and can easily explain the science of milk – and cheese – in an accessible and yet scientific manner. Eddie was fascinating, enthusiastic, passionate and totally immersed in the magic of turning milk into cheese.

Eddie and Darina

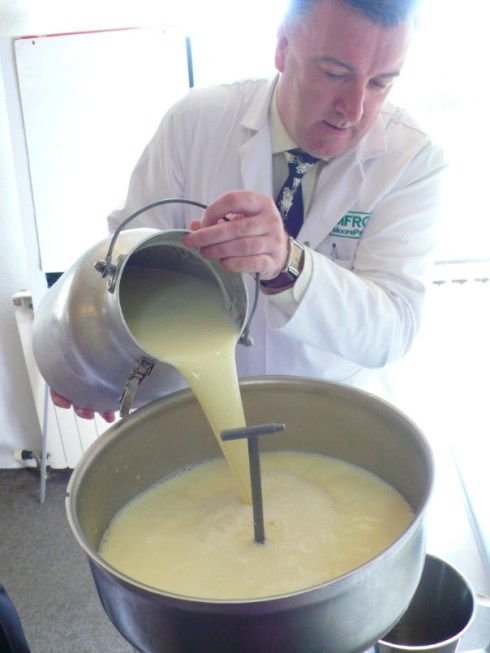
We were given a brief and thorough overview of the different kinds of milk, fat content, and methodologies of treating milk. Eddie showed us how to separate the cream from the milk – and from this process, all else follows! He used the gorgeous raw milk from the Jersey cows at Ballymaloe.

Separating the cream and the milk

From that point, we were taken on a whirlwind tour of cheesemaking. Eddie and Darina made butter, yoghurt, labne, buttermilk, srikhand, cottage cheese, mel y mato, paneer, ricotta, couer a la creme and a gouda! It was completely overwhelming, and they would never have been able to accomplish so much without the sure, strong preparedness of the fabulous Emer who was working with them. Once you understand the chemical reactions of milk to heat, to enzymes, to agitation and time, it all doesnt seem quite so difficult. But it was a lot of cheese making going on, and it all looked delicious!

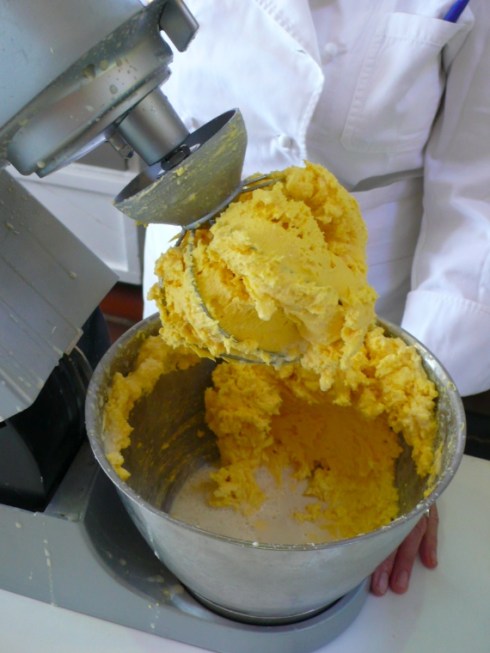
The butter was made with the rich Jersey cream – whipped past whipped cream stage, into butter stage. It was washed and cleaned, cooled and patted into little balls. Incredible!

Jersey Cream, whipped into butter, ready to be cleaned, cooled and eaten! The white liquid at the bottom is whey.

Eddie went through the complex and precise process of making a Gouda type cheese with us. He heated the milk, added the rennet, waited a certain amount of time, and then cut the resulting set milk, and stirred for a set amount of time to release as much of the liquid as possible. It may look mundane, but there was something mystical about the entire process.

Making the Gouda-type Cheese - cutting the curds

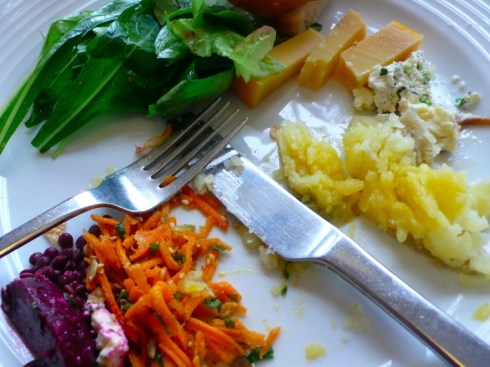
And then … before we knew it, it was time for lunch! Wednesdays are the only days we do not cook – so our instructors cook for us. We feasted on the various cheeses that had been made, the first of the new potatoes, and some gorgeous salads (the carnivores also had a roasted piece of bacon, which smelled fantastic, I must admit). I was enjoying the tastes and textures of my lunch, when I looked down and realised how beautiful the colours were, how fresh and clean everything looked. When you are surrounded by such bounty, your body feels healthy and clean and nourished. It is beautiful.

My Multi-Coloured Nourishing Lunch

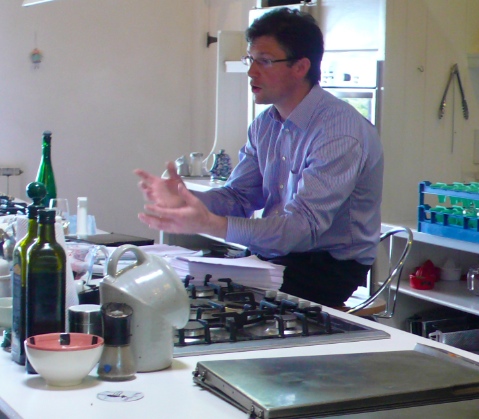
In the afternoon, we were introduced to Colm McCan, the Sommelier at Ballymaloe House, winner of the Sommelier of the Year award, and our lecturer for the next 12 weeks in the intricacies of wine. He is passionate and funny, and gave us a an in-depth introduction to the world of wine. He introduced us to various white wines – including our first tasting which was an alcohol-free wine! He wanted to ensure that we understood that while he could teach us about the different varietals, introduce us to the rituals and techniques of wine, and guide us through the various established types of wine… our perception, our taste, and our own sense of what we liked and did not like were in the end, intensely personal.

It was a great session, and while I didnt actually drink any of the wine, the intricacies and depth of flavour that Colm introduced us to were fascinating and thought-provoking.

Colm McCan - Sommelier at Ballymaloe House

Day 11 – A Quiet Day

On this day, to be honest, I felt a bit squiffy. I went in in the morning, with my order of work completed, and started gathering together my ingredients. But I just didnt feel “right” and I told Annmarie, my instructor. She immediately told me to go home. Ballymaloe has a very strict policy that if you feel unwell, you dont cook. They dont want students passing on viruses or illnesses to each other, and so off I went, back to the quiet cottage at the top of a tree lined drive. I fell into bed, and slept the morning and through lunch. It felt strange not to cook, but obviously, my body needed to just stop for a moment.

In the afternoon, we had our first demonstration from Rachel Allen. She has a wonderful way about her, funny, quick, and sure, passionate about food, and open to questions and comments from the peanut gallery. It was a pleasure to learn from her.

R & S Cooking Demo

Days 12 & 13 – The Ringsome on the Aquaface

The next day, last Friday, I felt good enough to cook in the morning. I made a white soda bread, a French Peasant soup and a gorgeous almond tartlet with fresh raspberries. The French Peasant soup’s original recipe called for blanching and frying cubes of bacon, and as a vegetarian, I did not particularly want to do this. I thought about possible substitutions, and decided that the soup might taste good with dried mushrooms instead of the bacon – they would give the same smokey note, without the meat. One of the best things about Ballymaloe is the personal interaction with our instructors, who are there to guide, mentor and grade us. But they are also very open to our suggestions, and Annmarie was happy to let me try out the substitution. It worked really well, and instead of chicken stock, I used a combination of the porcini mushroom soaking water and vegetable stock. It was a good, simple, delicious soup, and I was happy with the process.

However, I did not stay for lunch, or for the afternoon demonstration. Instead, I went on an adventure – to the seaside – to West Cork – with an old friend. We stayed at Incheydoney Resort. Its a strange place – it feels like an Italian cruise ship from the 1970’s in the form of a hotel. The food there is dire (as we found to our common dismay on Friday night) but we redeemed ourselves with a meal at Deasey’s by the water in the pretty village of Ring the next evening. Sublime food, wonderful balance, and a perfect setting.

But beyond the food, and the hotel … there was pure bliss. I have no words to describe it so I will let the poets and the pictures say it for me.

Did the sea define the land, or the land the sea?
Each drew new meaning from the waves’ collision. 
Sea broke on land to full identity.
 

Seamus Heaney

I watch 
the sea
your hands
the waves
seep into my bones
 
the sky descends
we sleep in blue
 

Eileen Carney Hulme

Day 14 – Drifting Back

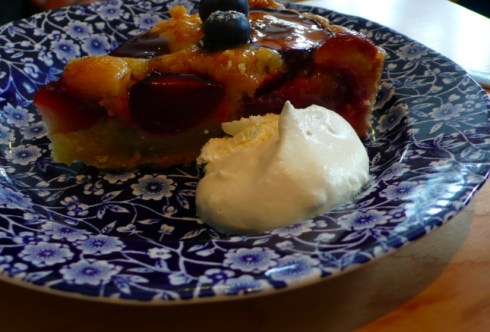
Sunday saw me coming back to my own breath, and drifting back into the beautiful life at Ballymaloe. M and I went to an antiques fair where I picked up a tiny silver rattle for my newest godson, and a gift for my hostess in Provence later this summer. We stopped at the Ballymaloe House Cafe and had coffee and lemon curd cake and a beautiful plum tart. I hope we will make both of these during our time here!

Perfect Plum Tart at Ballymaloe House Cafe

Then the other M and I went for a little outing, and fed Ms. Piggy some organic apples and pears. She was glad to see us again, and I think this may become a regular Sunday visitation. Kind of like church, but better. 🙂

Ms. Piggy by the Pub after her organic apple - Happy Piggy

All in all, a blessed and bright weekend.

Day 15 – Monday Happy Monday

And Monday rolls around, and we are back – at school, cooking our passion. New assignments, new partners – I like this rotation. It keeps us on our feet, challenges us to find our way around new kitchens and spaces, and ensures we work with new people every week. R and I are partners this week, and I like his chilled out style. He is relaxed and calm, good natured and knows what he is doing.

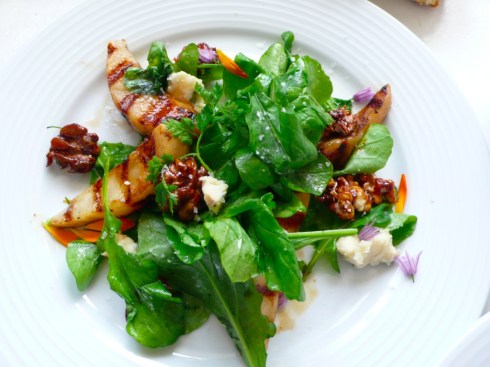
On this day I made vegetarian stock, another (very good) white soda bread, a mint sauce (for the lamb that my partner was roasting) and a salad of Crozier Blue Cheese, wild rocket, chervil, caramelised spiced walnuts and chargrilled pears. The salad was stunningly pretty, with many delicious layers of flavour  and texture – salty, sweet, fresh, tart, crunchy, creamy. It was quite complex to make. But it was one of those dishes that offered a lovely meditative space. I spent time on my salad leaves, cleaning each leaf, and gently coating it with dressing. I melted ground spices and sugar, and slowly caramelised toasted walnuts. I peeled a juicy pear, and grilled it over fire. And I scattered petals over the salad and rejoiced in balance and beauty.

Salad of Crozier Blue Cheese, Char Grilled Pears and Caramelised Spiced Walnuts

And I was thrilled with my Irish Soda Bread. It came out beautifully – perfect texture, and lovely deep slashes to let the faeries out!

My Lovely Little Baby Soda Bread

In the afternoon, we had a surprise visit from Niel Ellis, one of South Africa’s top ten most influential wine makers. Colm introduced him, and he spoke to us about the wines he makes, and the importance of handing down knowledge from generation to generation. What struck me the most was the intimate relationship he had with the land, and his connectedness to how it affects all growing things.

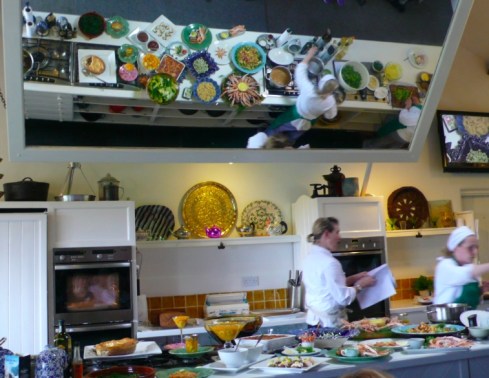
And then later, Rachel gave us another demo. It was an amazing array of food – from a lesson on prawns and how to cook them (including prawn bisque, prawns on brown bread, etc) to moussaka and shepherd’s pie to chutneys to mangoes with lime, banana and passion fruit.

What Rachel Cooked

It was quite the spread! And tomorrow morning, I will be making a vegetarian moussaka, a dessert of mango and lime, a brown Irish soda bread, and a spiced apple chutney (the last one in tandem with R). So I best go and do my order of work before I doze off … and wake to another bright and beautiful day at Ballymaloe.

Happiness abounds. All is light.

O’Gourmet Food Hall Vegetarian Tartiflette

22 Apr

Sometimes, inspiration comes from the most surprising sources. I was wandering the halls of O’Gourmet recently, wondering what I could make for a tantalising, delectable meal. I saw M. Seb (the cheese and wine maestro) … and stopped to have a chat. We walked into the cheese cave, and I started asking him to tell me about his favourite dishes – something that I (as a vegetarian) could make and enjoy. “Tartiflette!” he said, with great enthusiasm and excitement. This traditional Savoie dish is a layered potato gratin, given unctuousness and warmth from Reblochon cheese, cream, onions and lardons. Hmmmm. Lardons are pork fat, fried until crisp on the outside and melting on the inside .. and decidedly un-vegetarian! (But M. Seb is French, so I forgive him for being confused!) … However, Reblochon is a gorgeous, creamy raw-milk soft cheese made from the day’s second milking (when the milk is said to be creamier and richer). It is nutty and velvety, and has a soft lusciousness that is hauntingly beautiful.

So, I was definitely interested, and I decided to try and think of a new take on tartiflette that would keep all that rich depth of flavour, and at the same time elevate it to new heights. I had some black truffles (also from O’Gourmet) that I decided to use in place of the lardons, and instead of onions (which would overwhelm the truffles), I used delicate and yet sturdy leeks. This is not a vegan dish – it just cannot be – but it is warming, full of love, easy to make, and joyous. You should serve it with a sharp green salad – arugula or young spinach – simply dressed with a lemon vinaigrette. You need the balance of something clean and bright to offset the richness of this meal. But oh, its worth it. Smooth and comforting, imbued with the scent of truffles, this vegetarian tartiflette is an instant classic.

Its as good cold as it is warm, and can easily be assembled the day before, covered, refrigerated and baked a few hours before you want to serve it. Do try and let it sit for at least 20 minutes before serving – this allows the bubbling cream and cheese to solidify a bit and sink into the potatoes. Bake in a large ceramic ramekin or pot, and enjoy. It soothes the soul while pleasuring the senses. Such a wonderful combination!

Serves 6 – 8 (and wonderful as leftovers!)

  • 1 tbsp butter
  • 1 tbsp olive oil
  • 2 leeks, sliced thinly (white and light green stalk only)
  • 1/4 cup white wine (I used a Sauvignon Blanc)
  • 4 – 6 large waxy potatoes
  • 1 Reblochon cheese, refrigerated (or even frozen for a few minutes), rind removed
  • 2 – 3 black truffles, sliced thinly
  • 1 cup creme fraiche
  • 1/2 cup cream
  • Salt and pepper

You can prepare the leeks up to two days in advance. In a large frying pan, melt the butter and olive oil together over medium heat. Slice the leeks thinly, and rinse them under running water to remove any grit. Saute the leeks in the melted butter until they just begin to sweat and soften. Pour over the 1/4 cup white wine, and season with a bit of salt and pepper. Allow the leeks to simmer / saute, stirring every so often, until they just begin to colour. Raise the heat to medium high, and brown the leeks for a few minutes. Transfer the leeks to a small bowl, and allow to come to room temperature. You can refrigerate the leeks, covered for up to two days.

Peel the potatoes, and slice thinly. Submerge in water as you work so the potatoes do not brown. Bring a large pot of water to the boil, and quickly drain the potatoes from their water bath, and tip into the boiling water. Allow the potatoes to soften (but not fully cook) – about 10 – 15 minutes. Drain, and let cool for a few minutes.

If you are baking the tartiflette immediately, preheat the oven to 200 C / 400 F, and prepare a baking sheet by lining it with parchment paper. Place your large ceramic ramekin or pot on top of the baking sheet (this will protect your oven should the cheese/cream bubble over – and it will!). Whisk the creme fraiche and cream together, and season lightly with salt and pepper. Ladle about a tablespoon or two of the cream mixture into the bottom of the ramekin. Place a layer of potatoes over this, a scattering of sliced truffles, a few thin slices of Reblochon cheese, and a sprinkling of leeks. Over all, spoon about 2 tablespoons of cream. Repeat these layers until you run out of ingredients – or reach the top of the ramekin – whichever comes first! Reserve about 5 – 6 thin slices of Reblochon to scatter over the top of the dish.

Do note that you can cover the ramekin at this point and refrigerate up to 24 hours. I would highly suggest that you bake the tartiflette at least 2 hours before serving. This will give it sufficient time to set up.

Bake the tartiflette in the hot oven for at least 1 hour, and up to 1 1/2 hours. The tartiflette is ready when the top is bronzed and bubbling, and the potatoes are soft and yielding to a knife. Do not be alarmed if there seems to be an inordinate amount of liquid and cream bubbling up. Remove the tartiflette from the oven, and allow to rest for about 20 minutes (and even up to an hour) before serving. The cream and cheese will settle, and you will have a wonderfully solid potato gratin.

Serve with a bright, sharp salad for a wonderful and loving meal.

Twice Baked Caramelised Onion Cheese Tarts

27 Feb

This is a complex, work intensive dish, but the results are nothing short of spectacular, if I might say so myself. The rich buttery puff pastry holds a wonderful creamy base laden with succulent deeply wine-y caramelised onions. Topped with melted raclette, the tart is complicated, delicious and very satisfying. These were created as a tapas for the O’Gourmet Food Hall Spanish red wine tasting, and were paired with a beautiful, organic Crianza 2005.

The onions were caramelised in an entire bottle of Crianza 2005, and cooked down into a thick jammy muddle for four hours. The puff pastry is simple, if you an find an all butter prepared puff pastry. If you cant, there are some amazingly easy recipes for foolproof puff pastry made with your food processor available online. Dont, under any circumstances, use puff pastry that is made with vegetable fat – it ruins everything!

Part of the problem with tarts of this kind is that even though the top bakes up gorgeously, the bottom is often underbaked. I solved this problem by baking the tarts as per normal, letting them cool for a few minutes, taking them out of their muffin tins, and flipping them over onto a baking sheet. I then baked them again in a very hot oven for about ten minutes, until the bottoms were golden and crisp, and just as delicious as the tops! We must always have balance in cooking…as in life.

I used raclette in this tart – a smooth very creamy melting cheese, often added to fondues. The cheese is rich and salty, yet mild. It compliments the onions, without overwhelming them. Baked into the tart the raclette melds with the onions and savoury custard into a molten cheesy joy.

You can serve this tart warm from the oven, or at room temperature within 24 hours. The recipe for the onions makes more than you need. Any extra can be used as the base for a magnificent pasta, a grilled cheese sandwich, or to spark your cooking imagination!

Makes 20 medium sized tarts. Do adjust for your own crowd!

Twice Baked Caramelised Red Wine Onion Tarts with Raclette

Caramelised Red Wine Onions

  • 1 cup (2 sticks – 16 tbsp) butter
  • 8 cups (approximately 8 – 10 medium) yellow onions, sliced in fine half rings
  • 1 bottle red wine (I used QV Crianza 2005)
  • 1/4 cup red wine vinegar
  • 1/4 cup balsamic vinegar
  • 1/2 cup light brown sugar (organic if possible)
  • Pepper and salt

In a large, heavy pan, over medium low heat, melt the butter. While the butter is slowly melting, prepare the onions. Peel, cut in half (from stem to root), and slice thinly. I always keep root intact to hold the onion together while I slice it.

Once the butter has melted, add the onions, and toss so that they are covered completely by the butter. Add about half a bottle of wine, the red wine vinegar, balsamic, sugar and a lot of pepper and a bit of salt. Stir well to combine, and cover the pan with a tight fitting lid. Reduce the heat a tad, and allow the mixture to simmer, stirring every ten minutes or so for about an hour.

By the end of an hour or so, the onions should be stained dark red with the wine, and quite soft. Remove the lid, add the remaining wine, stir well, and allow to cook down for another three hours or so, stirring every half an hour to make sure the onions dont burn. You can judge when you feel they are ready, but do try and give them as much time as possible. They will turn a deep dark wine red.

When the onions are ready, take off heat, and allow to cool to room temperature. Taste and adjust for salt and pepper.

These may be kept, covered, in the fridge, for up to 3 weeks.

Assembly

  • 5 to 6 sheets all butter puff pastry (enough for 20 squares to fit muffin tins)
  • Caramelised onions
  • 4 eggs
  • 2 cups cream
  • Salt and pepper
  • 300 gm raclette or other melting cheese, sliced thinly

Preheat the oven to 180C (350F). Spray a muffin tin pan with non stick spray (I used an organic canola oil). Line a large baking sheet with parchment or baking paper.

The puff pastry should be quite cold, yet malleable. If you have made fresh puff pastry, make sure you pop it in the freezer for about 5 minutes before cutting it. Cut the puff pastry into squares larger than the width of the muffin tin and place one square in each. I like the squares with the edges rough and untamed. I tend to like these tarts look rustic, but if you prefer an ordered tart, by all means cut big rounds.

Pierce the pastry with a fork all over (particularly the bottom), and bake in the oven for about 10 – 15 minutes until light golden.

Meanwhile, whisk together the eggs and cream, season with a bit of salt and pepper, and place in a pouring jug.

Once the pastry has been baked to golden brown, remove from the oven and let cool for a few minutes.

Place a tablespoon or more of the caramelised onions in each tart, and pour over the custard mixture. Bake again in the oven for about 1o minutes, and then remove and top the tarts with the sliced raclette or other melting cheese. Bake again for a further five minutes or so, or until the cheese has melted and is starting to bubble, and the custard is just set.

Remove the tarts from the oven and allow to cool for about 10 – 15 minutes. Remove from the muffin tins, and place onto the prepared baking pan upside down. Bake in the hot oven for a further 5 – 10 minutes, or until the bottoms are crispy and browned.

Allow to cool for at least 10 minutes before serving, or serve at room temperature within 1 day.

Enjoy!

Spicy Cheese Crackers

27 Dec

I really dont like the crackers that you can get at the stores. They taste like they are full of chemicals. And when the process of making crackers is so very simple, its a wonder that we buy them at all. This past Christmas, I was going to dinner at Jobby’s house. I wanted to bring some lovely but simple things, as I had been immersed in cooking these last few days. I decided on a raspberry-gooseberry fool, which is just whipped cream, scented with vanilla and a touch of icing sugar, folded into cooled stewed raspberries and gooseberries. That sweet tart cool creamy combination is beautiful – and it takes minutes to make.

I knew Jobby would probably make her wonderful hummus. So crackers were a good addition – and they are delicious enough to eat on their own. Unfortunately I did not get a photograph because Nana chowed down more than half before we even left the house! But suffice to say, these crackers are wonderful – such a complex blend of flavour. You could spice them up with anything you like, but I used chili powder, mustard seeds, and English mustard powder. The combination is divine, spicy and cheese-y all at the same time. The crackers are crisp and flaky and can be cut into rounds, squares, or whatever your heart desires. Poke a few holes in them, pop them in a hot oven, and watch them brown up and puff a little. Beautiful.

These crackers will keep, in an air tight box, for about a week, but if you have a Nana around the house they wont last!

Makes about 100 crackers, depending on how you cut them

  • 1 cup bread flour (OO flour)
  • 1 cup polenta
  • 1 tsp salt
  • 1 tsp baking soda
  • 1 tsp chili powder
  • 2 tsp mustard seeds
  • 1 1/2 tsp English mustard powder
  • 1 cup cheese – cheddar/parmesan mix
  • 3 tbsp cold butter
  • 1 cup buttermilk

Preheat the oven to 190 C (375F).

Line a baking sheet with parchment paper.

In a large bowl, combine the flour, polenta, salt, baking soda, chili powder, mustard seeds and English mustard powder. Toss to combine.

Grate the cheese over the flour mixture, and stir well.

Grate over the cold butter, and stir again, gently.

Pour over the buttermilk, and combine. Turn the dough out onto a working surface and knead, gently until it all comes together.

Form the dough into a ball, and refrigerate, covered for about half an hour.

Once the dough has rested and cooled, divide it into quarters.

You can now roll the dough out very thin, and cut it into shapes, or roll the dough into a log, and slice very thinly.

Arrange on the baking sheet, and using the tines of a fork, poke a few holes in each cracker. This is optional, but it will help keep the crackers flat and less puffy.

Bake for about 8 – 10 minutes, or until the crackers are golden and cheesy.

Let cool for at least 10 minutes before gobbling up!


O’Gourmet Food Hall Asparagus & Mushroom Tart

19 Dec

The other day, I bumped into my friend, MsTina, as I was wandering the halls of O’Gourmet. She took one look at my face, and just laughed. I was wandering in a haze of sensual delight, in one hand a spoon, from tasting the oils and vinegars at Vom Fass, and the other hand rubbing together together a bit of Betong ginger – fresh, organic and local and with a scent that has to be experienced to be believed.

I am truly enjoying my weekly sojourns to O’Gourmet because of the quality and variety of ingredients. Inspiration seems to be everywhere. I love all the gorgeous glass bottles of sauce and spice and everything nice. I could just stand and look at all the enticing spices and nuts, tasting this and that, for ages. And dont even get me started on the vegetables! They are so beautiful! Displayed as if in a museum, with the choicest and most perfectly chosen pieces offered up for your pleasure. The woman in charge of the fruits and vegetables, Miss Heng, is a master at knifework, and so she prepares all the produce with an eye to pleasing the visual palate. When I am there, I can be inspired in an instant!

This week, my eye was caught by the most beautiful trio of asparagus – white, green and purple. Asparagus is an fascinating vegetable. Grown above ground, in full sunshine, it turns green, but cover it a little, so that only heads peek above, and the limited amount of chlorophyll it consumes means that the asparagus turns out purple. And grown completely underground, and harvested in the early dawn, so that very little light affects its growing, asparagus is clean pure white. Each tastes different – the white can be very sweet, the purple a kind of calm middle ground, and the green has that traditional nutty lemony flavour.

I decided I wanted to make an asparagus tart – but then I was captured by the gorgeous leeks and the creamy and fresh mushrooms – both white button and portobello. So I decided that I was going to make a tart which incorporated everything. I thought I would use phyllo pastry dough so it would be a rough, freeform tart, and I would place the asparagus and the mushrooms in alternating blocks of intensity on the pastry. From Vom Fass, I sourced gorgeous scented truffle oil for the mushrooms, and a bright, brilliant lemon oil to finish off the asparagus.

Now the only decision was what would form the cushion upon which the veggies would sit in splendour. I wanted the process to be simple – as complex as these tastes are, putting together this tart only takes a few minutes. So, of course, a consultation with M. Sebastien at the cheese room was in order (along with a few heavenly tastings of cheese!). He decided on a Crottin de Chavignol to pair with the asparagus. It was a master step. Crottin de Chavignol is perhaps the most famous of the goat cheeses. Its created, to strict standards, in a tiny village in the Loire valley. Its creamy, nutty, slightly tart – and perfectly balances the delicacy of the asparagus. For the mushrooms, we decided on a Pecorino al Tartufo – a young pecorino, stuffed to the gills with truffles. The scent was overwhelmingly blowsily lush, and I could have purred with happiness right then and there. To bind them together, I decided on using a little cream cheese (and in a bold move), some Delice de Bourgogne – a gorgeous cow’s milk cheese which tastes like organic cream imbued with sunshine and hay. Its like a brie, but less strong – its centre was crumbly and yet yeilding, and the edges were thickly creamy. What a cheese!

I would suggest, if you have a good cheese shop, to go, taste, and consult. There are few experiences quite so lovely as the careful contemplation of beautiful cheese. And a cheese master can help you pair cheese – particularly if you tell them exactly how you will use it – with various vegetables and foods. If you are making this tart from what you can find in the market, I would look for a good parmesan or pecorino, some goat’s cheese and a great cream cheese. This recipe is definitely adaptable – use your own cooking intelligence, your sense of taste and balance, and it will be gorgeous!

While this recipe is simple, there are a few steps to be followed. Because of the phyllo pastry, you want to make sure that the ingredients are not wet, otherwise the pastry will be soggy. Most, if not all, of the work can be done before hand. Prebake the pastry for ten minutes – it can be kept in the fridge up to 2 days. Mix and mash the cheeses, and keep covered in the fridge until ready to use. And blanch the asparagus (they live longer in the fridge if slightly blanched) and prep the mushrooms up to three days in advance. Assembly of the tart takes minutes (particularly if youve already baked the shell), and once baked, the tart can be kept in the fridge, for up to two days, reheated in a low oven, covered, just before serving.

Serves 8 – 10 people as a starter, 4 – 6 people as a main course

Balsamic mushrooms

  • 1/2 cup dried mushrooms – I used black trumpet
  • 1 – 2 tbsp truffle oil or olive oil
  • 1 tbsp butter
  • 1 leek, finely diced
  • 2 cups mixed mushrooms – about 4 – 6 portobello and 4 – 6 button – peeled and finely sliced
  • Salt and pepper to taste
  • 1/4 cup red wine (or Fre red alcohol removed wine)
  • 2 – 4 tbsp best quality, aged balsamic vinegar
  • Salt and pepper to taste

Place the dried mushrooms in a bowl, and cover completely with boiling water. Let stand for ten minutes while you prep all the vegetables. Once the mushrooms have softened, remove from the water with a sieve in a scooping motion. I dont drain the mushrooms because the silt from the mushrooms tends to come with them, so I simply scoop them out of the water they have been softening in.

Place the softened mushrooms in a saucepan, cover with water, and simmer over medium heat for about 15 minutes. Drain and chop roughly. Set aside.

In a large frying pan, over medium heat, melt the butter into the oil. Add the leek, and saute for about 5 minutes, or until the leek has softened, and turned glossy.

Add the fresh mushrooms, half a cup at a time. You want them to saute, and quickly lose their water without becoming soggy. Stir well after every addition, and season with salt and pepper.

About half way through your mushrooms, add the red wine, increase the heat to high, and let the mushrooms absorb the wine and bubble away. It shouldnt take too long for the wine to almost completely evaporate.

Add the rest of the fresh mushrooms, adjusting seasoning, and stirring well. Allow them to saute till almost dry, and then add the balsamic. This will caramelise the mushrooms and bring out their dark sweet quality.

Add the reserved chopped dried mushrooms, adjust seasoning, and allow to cook for about 5 minutes on medium high heat. Taste and adjust seasoning if needed, and set aside until at room temperature.

These mushrooms can be used in pasta, salad, sandwiches – whatever strikes your fancy! They will keep for 3 – 5 days in the fridge, well covered.

Asparagus

  • 1 bunch of asparagus – 6 – 9 stalks if large – if you can get a mixed colour variety, do so – it looks dramatically gorgeous!
  • 1 tbsp lemon oil or olive oil to finish

Prepare the asparagus. Wash clean in running water, and then take each stalk, and snap near the base. It will snap naturally – the base bits can be frozen and used for soup or a pasta sauce base at another time.

Place the asparagus in a large bowl, and cover completely with boiling water. Allow to sit for a few minutes, until the asparagus has turned bright green. This really depends on the thickness of your asparagus – if you are using the thin delicate type, this may only be a few seconds, thicker varieties will need 3 minutes or so.

Remove the asparagus from the boiling water with tongs, and place in an ice water bath immediately. Or place in another bowl, and run very cold water over.

Asparagus blanched in this manner can be dried well, and then frozen until ready to use (up to 3 months), or refrigerated up to 3 days

Cheese Base

  • 100 g + 100 g cream cheese
  • 75 g + 75 g Delice de Bourgogne or other soft white delicate cheese (or cream cheese)
  • 2 x 6 g rounds Crottin de Chavignol (or other good goat’s cheese crottin)
  • 100 g Pecorino al Tartufo (truffled pecorino – or other good pecorino or parmesan)
  • 1 tsp lemon oil (or olive oil)
  • 1 tsp truffle oil (or olive oil)

For the asparagus cheese: Place 100 g cream cheese in a small bowl. Cut the rind off the Delice de Bourgogne (if using), and mash into the cream cheese using a fork. Cut the rinds off the Crottin de Chavignol, and mash the cheese in as well. Add 1 tsp lemon oil or olive oil, and taste. Cover and reserve in the fridge for up to two days.

For the mushroom cheese: Place 100 g cream cheese in a small bowl. Cut the rind off the Delice de Bourgogne (if using), and mash into the cream cheese using a fork. Grate or crumble the Pecorino al Tartufo into the bowl, and mash to combine. Add the truffle oil and taste. Cover and reserve in the fridge for up to two days.

Phyllo Tart Case

  • 1 package phyllo pastry
  • 3 – 5 tbsp butter, browned and melted
  • 2 tbsp olive oil

Phyllo pastry is very difficult to make by hand because its so thin and delicate. Purchase a good quality phyllo from the store, and treat it well, and you will be fine. Defrost in the fridge for a day before use, or for 2 hours at room temperature. When you unroll the phyllo, place on a board or in a jelly roll pan, and cover with a damp cloth.

Preheat the oven to 170C (350F), and line a baking sheet or jelly roll pan with parchment paper.

Melt the butter in a small saucepan, and allow it to just brown a bit. This will add immeasurably to the flavour of the finished product. Add the olive oil and mix well. Let come to room temperature.

Place one or two sheets of phyllo pastry on the parchment lined sheet, and brush gently with the butter/oil mixture. Gently place another layer of phyllo over and brush with the butter/oil mixture. Continue until the entire package of phyllo pastry has been finished – usually about 15 – 20 layers. Sometimes I double the layers of pastry between brushes of butter and oil.

Create edges along the sides of the tart by folding inward about an inch, along all four sides. Prick the internal pastry with a fork, gently – otherwise the phyllo will puff up.

Bake in the oven for about 10 – 12 minutes, or until lightly browned. Cool to room temperature, and reserve, for up to 2 days, tightly wrapped in the fridge.

Assembly

  • Pre-baked Phyllo Pastry Tart case
  • Asparagus Cheese Mix
  • Mushroom Cheese Mix
  • Asparagus
  • Balsamic Mushrooms
  • Olive oil to finish – or lemon oil (for asparagus) and truffle oil (for mushrooms)

Preheat oven to 170C (350F). Make sure everything is at room temperature.

Look at the tart case. It should be a large rectangle. In your mind’s eye, divide the rectangle up into four quarters. Working from the bottom up, spoon asparagus cheese in the left lower quarter, mushroom cheese in the right lower quarter, asparagus cheese in the upper right quarter, and finish off with mushroom cheese in the upper left quarter.

Layer the asparagus over the quarters which hold the asparagus cheese, and spoon the mushrooms over the mushroom cheese. Finish off with just a little dribble of oil.

Bake for 35 – 45 minutes in the oven, until the cheese is bubbling and burnished, and the pastry is a dark golden brown.

Allow to sit for 5 minutes before serving, or serve at room temperature.

Will keep in the fridge, fully baked, tightly covered, for up to 2 days. Reheat in a gentle oven, covered in tin foil to avoid burning, for about 20 minutes.

Enjoy!

O’Gourmet Truffled Macaroni and Cheese

6 Dec

I love macaroni and cheese, the beautiful pasta, coated with a creamy blanket of cheesy indulgence. The crispy top, making way for a melting interior. Whats not to love? Well, some varieties of mac and cheese are plainly unappetising, made from over processed, pasturised ingredients that have all the life and soul taken out of them (once youve seen that orange glow, you will never forget it!). I wanted to make a different kind of macaroni and cheese – a sensuous, indulgent meal, ripe with scent, taste, texture and balance. This macaroni and cheese is slightly wicked, a tad naughty, and very memorable. It can be served at a celebration – birthday, New Years, holidays of every kind – or just because you want to say I love you. Honestly, they will get the message!

A dish like this needs to be in part based on thought and consideration, and in part on pure inspiration. So I wandered the O’Gourmet Food Hall to see what might present itself. First under consideration was the pasta. I decided on La Collina Toscana pasta, made in Italy, and rather than macaroni, a conchiglie shape – like a small conch or sea shell. Gorgeous, naturally dried, hand crafted pasta, with a shape that has the same benefits of macaroni (the curved tubular shape catches and holds sauce well), and yet has a more elegant look to it. But of course, I dont want to be proscriptive, so use whichever pasta strikes your fancy!

I feel that macaroni and cheese can sometimes be a tad overwhelmingly rich, and I noted some gorgeously fresh organic baby spinach, so I decided to include a surprise nestled in the depths of the pasta – bright clean spinach, sauteed with white onion, and candied, caramelised garlic. I wanted to make the garlic a little differently from the original Ottolenghi recipe I used, and so decided that instead of water, I would use wine! But then, I saw Fre wines – alcohol-removed wine. Yes, honestly!

I read the taste tests, and while there is definitely something missing (the alcohol!), there is a unanimous agreement that the taste is still there… somewhat! I thought that it might be very interesting to try cooking with this non-alcoholic wine. Would you get the same taste, roundness of flavour, haunting notes of fruit and honey and sunshine, as with regular wine? I decided I would use the Fre premium white wine in the sauce, and the Fre premium red wine in creating the caramelised garlic (in place of water in the original recipe). I found that there was certainly a hint of winey flavour to the sauce and garlic, but that depth of flavour, the resonance of the wine, the layers of scent and taste, were not as fully realised. I think the next time I make this pasta, I will use regular wine, but when I am cooking for those who have issues with alcohol in their food, I would most certainly go back to the Fre. And again, if you prefer cooking with wine, please, go ahead and give in to the urge 😉

And finally, truffles. I felt that truffles added to the cheese sauce would elevate this dish into a celebratory, special meal. I looked around, and decided to layer the different truffle tastes – starting with the amazingly hedonistic truffle oil from Vom Fass, which I used to permeate everything from the spinach to the garlic to the cheese sauce. I seasoned everything with truffle sea salt, and finally, I found Himalayan truffles (tuber indicum), an inexpensive (relatively) jar of black truffles from the Himalayas. I loved these truffles. They were easy to work with, and imbued the pasta with their own truffled scent – not quite as all inclusive as European truffles, which seem to have the reach and depth of durian, but with their own nutty, dark, rich flavour.

And when I spoke to M. Sebastien in the cheese room, he suggested that I use a Brillat-Savarin (a triple cream, soft, brie-like cheese) which had been layered, and thus completely permeated, with truffles. I used organic white cheddar and a beautiful aged crumbly parmesan as well, but I promise you, when I sliced open that Brillat-Savarin, and saw the thick soft melting consistency, and smelled that unique combination of cheese and truffle… well, I wanted to rub it all over me! Incredibly luxurious and such a beautiful addition to the pasta.

This dish looks like a lot of work, and it certainly will take a couple of hours of cooking. But a lot can be done ahead of time – the garlic can be candied and caramelised in about half an hour or so, and can be stored in the fridge for about 2 weeks. The spinach can be sauteed and kept, covered, in the fridge for 3 days. Even the cheese sauce can be made the day before (though I would whisk in the egg at the last minute), and combined with the pasta just before baking. I served the dish with a simple salad of bitter arugula (rocket) and ribboned organic carrots, with a dressing of balsamic, truffle oil and soy sauce. It was a bright counterpoint to the luxury of the main course.

This truffled macaroni and cheese is worth the work and the care, the loving sourcing of beautiful ingredients. The result is a gift to the people you love, and to yourself.

Serves 6 – 8 people

Candied Caramelised Garlic (adapted from Yotam Ottolenghi’s Plenty)

  • 2 cups Fre premium red wine (or a good red wine)
  • 1 1/2 cups garlic cloves (about 2 heads – 30 cloves or so)
  • 2 tbsp + 1 tsp truffle oil
  • 1 tbsp caster sugar or light brown sugar
  • 2 tbsp best quality balsamic vinegar (I used a 25 year old balsamic from Vom Fass – it was astonishing!)
  • 1 tsp herbes de Provence or mixed Italian/French herbs
  • 1/2 tsp truffle salt (if you have it – otherwise a good sea salt is fine)

Combine the red wine and garlic cloves in a medium saucepan. Bring to the boil over medium low heat, and simmer for about 5 minutes.

Drain the red wine from the garlic cloves, reserving the red wine for later. Clean the saucepan well and dry it, and place the garlic cloves and the truffle oil into the saucepan together.

Saute the garlic in the oil for about 5 minutes or so, on medium high heat, or until the garlic has softened, released its intrinsic garlic scent, and become lightly browned.

Measure out about 1 1/2 cups of the red wine, and combine with the sugar, balsamic, herbs and salt. Pour over the garlic in the saucepan. Be careful, because it will splatter a bit.

Simmer on medium high heat for about 15 – 20 minutes, or until the liquid has almost completely reduced, and the garlic is dark red, sticky, candied and caramelised. Take off the heat, and pour over the remaining 1 tsp of truffle oil.

This candied garlic will keep in the fridge, covered for at least 2 weeks, but you will probably eat it before then! It can be an astonishing addition to salads, soups, risottos, pastas, sandwiches – just about anything you can imagine!

Sauteed Spinach

  • 2 tbsp + 1 tsp truffle oil
  • 1 cup finely chopped white onion (1 small onion or 1/2 large)
  • Truffle salt and pepper to taste
  • 3 – 4 cups organic baby spinach, washed and roughly chopped

In a medium sized pan, over medium heat, combine the 2 tbsp of truffle oil and the white onion. Saute for 5 – 10 minutes, or until the onion goes glossy, soft and shiny. You dont want it to burn, but you do want it to reach that moment just before it caramelises!

Season with truffle salt and pepper, and add the baby spinach. Raise the heat a little, and saute quickly. The spinach will turn bright green, and will release some of its liquid. This is perfect. Remove from heat, taste and adjust seasonings, and pour over the final teaspoon of truffle oil.

You can reserve this spinach for up to 3 days, covered in the fridge. It also makes a sublime side dish!

Truffled Three Cheese Sauce

  • 1 cup cream
  • 1 cup whole milk
  • Truffles – as much as you want or can afford! I used a 100 g jar of Himalayan truffles plus 2 tbsp of truffle oil plus 1/2 tsp of truffle salt
  • 3 tbsp butter
  • 2 tbsp truffle oil
  • 3 tbsp flour
  • 1 + 1 cup Fre premium white wine (or regular white wine – or even sparkling wine!)
  • 1/2 tsp (or less – to your taste) English mustard powder or Dijon mustard
  • 8 oz (about 2 cups) grated white organic cheddar
  • 200 g (about 7 oz) truffled Brillat Savarin
  • 1/2 cup grated best quality parmesan
  • Truffle salt and pepper to taste

In a medium large saucepan, combine the cream and milk. Grate over the truffles (I used a Microplane zester to shave the truffles very small and fine), and add the truffle oil and truffle salt, if using. Over low heat, warm the cream/milk/truffle mixture until it is just steaming – about 75C or 165F. Stir often. Once the mixture reaches the steaming stage, remove from heat, and let steep for at least an hour. This infusion step is important! It makes sure that the taste of the truffles is all over that sauce.

In a medium large saucepan, melt the butter and truffle oil over medium low heat. Once the butter has melted completely, add the flour, and stir well. This roux will form the basis of your sauce, so make sure that you take your time and cook it well. You want it the colour of light teak – keep your nerve. Dont burn it, but dont let it stay too pale either. I would cook for at least 5 minutes, up to 10, depending on the heat source.

Once the roux has cooked to your liking, lower the heat a bit, and add 1 cup of the white wine, whisking constantly. The mixture will immediately seize up and become very thick. Whisk in all of the steeped milk/cream/truffle mixture, and continue to whisk well. Taste. Add the remaining 1 cup of white wine, tasting every 1/4th cup or so. You dont need to add it all if the mixture becomes too heavily winey.

Sprinkle over the mustard powder or the Dijon mustard, and whisk well to combine.

Bring the heat up to medium low, and sprinkle over the cheddar. Continue whisking the sauce as you incorporate the cheddar into the mix. Taste and adjust seasonings again.

Slice the bottom rind off the Brillat Savarin, and using a teaspoon, scoop it out of its rind. Add to the sauce, and whisk well to combine.

Sprinkle over the parmesan, and whisk well, until the cheese is melted and well mixed.

Remove the sauce from the heat and allow to cool to tepid bathwater heat. Whisk in the egg yolks to enrich the sauce, and adjust for seasoning.

The cheese sauce can be made up to a day of time, before adding the egg yolks. Keep tightly covered in the fridge, and bring to room temperature before whisking in the egg yolks and assembling the main dish.

This sauce would be wonderful served as is, not baked, with angel hair pasta or linguine!

Truffled Macaroni and Cheese – Assembly

You can serve this in individual small ceramic baking pots, bake it in loaf tins (it will fill three tins), or a large enameled baking dish. Your choice – I think it depends on how and who you are going to serve! Individual pots are a very elegant presentation, but loaf tins or a large baking dish bring a casual luxury to the meal.

  • 500 g macaroni, elbow, conchiglie, or other tubular pasta
  • Truffled Three Cheese Sauce
  • Caramelised Garlic
  • Sauteed Spinach
  • Handful of Italian parsley, finely minced
  • 1/2 cup breadcrumbs (I used Panko)
  • 1/2 cup parmesan
  • A few teaspoons of truffle oil to finish

Preheat the oven to 160C (325F), and have your baking pans ready.

Prepare macaroni or other tubular pasta according to the packet directions, in a large saucepan or pot, over high heat, in heavily salted boiling water, but taste a few minutes shy of the time indicated on the packaging. I cooked conchiglie pasta, and the packet said 15 minutes. I cooked it for 11 minutes, to just before al dente.

Drain the pasta, and place in a large mixing bowl. Pour over about three quarters of the cheese sauce and stir well to combine. Taste for salt and pepper and adjust.

Place about half of the pasta in your baking pots/tin/dish. Press down to ensure that the pasta is snug. Ladle about half of the remaining sauce over the pasta. Using your hands, squeeze out the liquid from the reserved spinach, and place it in an even layer over the pasta, leaving about 1/2 inch rim free around the edge of the dish. Stud the spinach with the caramelised garlic – as much or as little as you wish, though i went easy on it. I wanted a spark of intense flavour, but I did not want to overwhelm the delicacy of the pasta. Add the rest of the pasta to the dish, and ladle over the remaining sauce.

In a small bowl, mix together the Italian parsley, breadcrumbs and parmesan, and sprinkle evenly over the pasta.

Bake in the oven for 45 minutes to an hour, or until the pasta is bubbling and hot, and a crisp, golden crust has formed.

Just before serving, sprinkle lightly with the truffle oil to really bring out the scent.

Enjoy the love.

O’Gourmet Food Hall

2 Dec

As a passionate cook and a foodie, I am always on the lookout for places where I can source the best of the best. I truly believe that ingredients matter: the olive oil you use impacts hugely on the final taste of your dish; the nuts, spices and flavourings, if fresh and carefully sourced, can deepen and embolden a meal so much more than wan supermarket choices; and fruits and vegetables of sublime quality are not only a joy to work with, but their colours, textures and flavours make everything just taste better.

I will drive an extra mile to find food of extraordinary quality, to be able to speak with knowledgeable purveyors about their wares, and to sample different and new items. I am lucky though, because I live within a few minutes of what I consider one of the most wonderful collections of food and ingredients in Kuala Lumpur – the O’Gourmet Food Hall at Bangsar Shopping Centre. O’Gourmet has it all – a decadent and seductive cheese room; a bright and stunningly beautiful fruit and vegetable stand; fresh nuts, spices and herbs; the astonishing variety of Vom Fass vinegars and oils; pastas, flours, and grains of just about every description; a thoughtfully curated wine selection; chocolates, cookies, candies and cakes; and prepared foods that are made with care and quality.

O’Gourmet reminds me of a Malaysianised combination of Dean and Delucca, Chelsea Market and Zabars in New York with Harrods and Harvey Nichols in London. Its a Food Hall of quality, with resources from around the world. I have been deeply impressed by the way the way the people at O’Gourmet know their food. For example, Sebastien Le Francois, the resident sommelier and cheese guru, is not only deeply knowledgeable, but happy to make time to talk through selections, options, ideas, pairings. He tells you what he thinks, he explains the relative merits of different cheeses and wines, he talks recipes, combinations, flavours. Wonderful!

Its like a gourmet wonderland of food and ingredients, and I have always regarded a visit to O’Gourmet Food Hall as a thrill, a moment of inspiration and joy – a truly happy day. I can wander the aisles of O’Gourmet for hours. In fact, AngelKitten and I did so just yesterday, marveling at everything we saw. I love the food conversations she and I have together – we inspire each other, fantasise how different ingredients can be put together, find hidden gems and share our excitement. Our day at O’Gourmet Foodhall was pure happy – we marveled at the careful way in which each item is chosen, tasted the oils, sampled the cheeses and imagined different pairings of ingredients… from a gingerbread house with candied and sugared fruits to a hazelnut torte to a truffled macaroni and cheese. O’Gourmet has the resources to provide for all these imaginings and more.

First we stopped at the fruit and vegetable stand. Amazing! Such colour and texture. Such a wide variety to choose from, and so fresh, so luscious, completely delectable. Those fruits, oh my goodness. Tiny perfect apples (we want to candy them for our gingerbread house), comice pears at their peak of ripeness, a beautiful array of berries, tomatoes on the vine, voluptuous dragon fruit, and lettuce leaves so fresh their roots are still attached.

O'Gourmet Foodhall

Such a great selection – and so intrinsically sexy. Onions, cabbage, fennel and mushrooms so perfect that I couldnt wait to get my hands on them, to touch and tease them into recipes and meals. I felt like the little old lady in the movie Tampopo, who gets chased away from the produce section for touching and stroking and feeling the vegetables a little too much!

Luckily there were other things to mark our attention. We wandered through the herbs and spices, dried pastas and grains…Everything is lovingly laid out, like art, and easily accessible. You can sample, sniff, and consider to your hearts content.

O'Gourmet Foodhall

I love the fact that you can look and choose exactly what – and how much – you want – bay leaves, oregano, marjoram, rosemary, mustard seed, mace, cinnamon, fennel, chili, nutmeg, dried pulses, and so much more – all arrayed temptingly, their colours a symphony of choice, and each pretty bottle a really exciting possibility of flavour and illumination. A spark of possibility every where you turn.

O'Gourmet Foodhall

From there, we wandered over to the oils and vinegars. Alongside carefully chosen bottled oils and vinegars, O’Gourmet has brought in Vom Fass – a German company that supplies artisanal vinegars and oils of the absolute highest quality. You can sample everything at the Vom Fass section because of how the oils and vinegars are presented in earthenware casks – and we did! From a stunning wild raspberry vinegar to the sharp brightness of calimansi vinegar to the syrupy dusky wonder of a 25 year old balsamico. From extra virgin olive oils that tasted like sunshine and light to hazelnut oil that was rounded and rich and wild to a truffle oil that was totally imbued with the haunting notes of truffle. Each oil and vinegar can be sampled, and they can be bottled in 100ml and up glass bottles of your choice. We were like kids in a candy shop!

O'Gourmet Foodhall

We wanted to bring all that we sampled home with us, but we tried to be restrained (!) and so we chose three – the hazelnut and truffle oils and the 25 year old balsamic vinegar. I have to admit, when we got home, we unwrapped the oils, and tasted them again. Tonight, I will make a hazelnut torte using some of that hazelnut oil. So beautiful!

O'Gourmet Foodhall

And finally, we went to the cheese room. We stood and sniffed that pungent enticing wild aroma of cheese, we tasted, we looked, and we chatted with the accommodating M. Sebastien. I am so pleased that Kuala Lumpur has a cheese shop of such high quality, beautifully curated and totally tempting.

O'Gourmet Foodhall

And we chose – a triple cream Brilliat Savarin, imbued with truffles. I looked at it and I could feel myself purrrrrr.

O'Gourmet Foodhall

I have been a customer of O’Gourmet for a while now. Each time I am at Bangsar Shopping Centre, I make time to wander and look and touch, to consider some special cheese or a prime flavour ingredient that will brighten the food I am cooking that day. I love that there is always something different, something unique, something deeply tempting.

Because I am so enamoured of the quality ingredients available at O’Gourmet Foodhall, and so inspired to creativity every time I visit, I have decided that I am going to do a weekly O’Gourmet recipe for the next few months. I hope these recipes will excite you with the possibilities inherent in ingredients of perfect quality, and will spark a passion for prime ingredients, treated with love and respect.

O’Gourmet Food Hall is at the East Wing, Ground Floor of Bangsar Shopping Centre, Jalan Maarof, Kuala Lumpur. Tel: +60.3.2094.9966

Visit their website and their Facebook page to be inspired!


Quick French Onion Soup

18 Nov

Quick French OnionI am sick today. There seems to be a bug going around, and somehow, I caught it. I coughed all of yesterday – miserable, tight-chested, and painful. I slept for ages this morning, woke up and decided I needed some soup. But when I went to the kitchen, all I had was 3 onions …  A very sad state of affairs, but I was planning on shopping today! And instead, I am sick!

So I decided to make a French Onion soup. This is not a fancy one, with toasted bread rubbed with garlic, and gruyere cheese. Its basic, simple, warming and deeply comforting. If you have cheese, grate some over your toast, but if you want to keep it vegan, dont add any cheese (or butter in the beginning) at all. It will still taste delicious, and reach all those cold miserable places.

This makes about 4 servings of soup. You could easily double it for a dinner party, and toast a baguette, and pile over some stringy gruyere. Broiled in the oven, its a decadent feast – but when youre sick, as I am today, its just too much effort. I toasted a really lovely dark brown slice of bread, placed it in the bottom of the bowl, and grated some parmesan and cheddar over – its what I had. I then ladled the soup over, and allowed the bread and cheese and hot oniony soup to meld and interact. Beautiful. Comforting.

Definitely feeling a little bit better 🙂

Serves 4. Doubles easily.

  • 3 large onions (about 1/2 kg) sliced very fine
  • 1 tbsp olive oil
  • 1 tbsp butter (or an additional tbsp olive oil if youre keeping it vegan)
  • 1 heaping tbsp flour
  • 4 cups of hot vegetable stock – I used 1 organic vegetable stock cube dissolved in 4 cups of boiling water
  • Salt and pepper
  • 1 slice dark brown bread, well toasted, per serving
  • A bit of parmesan, cheddar or gruyere, grated

Peel the onions of their brown skin, and slice really fine. I used a mandolin for this job, and it was fast, easy and really exact. If you dont have one, use a sharp knife and try and get the onion slices as fine as possible.

Place a medium saucepan over medium heat, and warm the olive oil and butter (or just olive oil) until the butter has melted. Add all the onions, and stir to coat the onions with the oil/butter mixture. Turn heat down to medium low and saute the onions until well browned for at least 20 minutes or so. This is the ultimate trick to this soup – you need to be really patient with the onions. They need to cook and cook and cook until they are deeply brown because this is the basis of the flavour and strength of the soup.

They will let go of some liquid, this is fine, and then they will get glossy and soft. Keep at it. They will start to turn golden, stir a little and let cook further. You want a deep dark brown – teak or coffee with a touch of milk colour. If you prefer a lighter soup, obviously, you can let the onions go only to light golden, but you will miss the deep layered flavours that you would get if you keep your nerve and just keep cooking them. Without letting them burn!

And you dont have to stir all the time. The occasional stir is fine, whilst you make yourself a cup of tea, play with the cat or take some vitamins. Let the onions do their own job. Just keep the heat low and steady, and stir sometimes to make sure nothing is burning.

Once the onions are cooked to your liking, sprinkle over the flour and stir well. Cook for a few minutes to allow the flour to amalgamate with the onions and fat. This will ensure a creamy thick soup without a raw flour flavour.

Pour over hot vegetable stock, stir well, semi cover the pot and allow to simmer for about half an hour. Taste, add some pepper and a touch of salt.

YumMeanwhile, toast your bread till quite dark. Place in a soup bowl (you might have to shove it in there, this is fine), and grate some cheese over. Not too much as it can be overwhelming, but enough to add flavour and interest to the soup.

Ladle hot soup over the toast and cheese just to cover, and allow to sit for a minute so that the soup and toast and cheese get firmly acquainted.

Serve to those needing comfort.

Cheese Scones / Biscuits

16 Nov

Yummy!Oh my goodness gracious. These are so good. So very very good. Fluffy, rich, creamy, cheesy, light and gorgeously tender. Cheddar cheese scones (or biscuits as Americans would call them) are a quick bread – about half an hour from inception to eating. They dont require any special equipment, in fact I prefer to grate the butter and cheddar directly into the flour and mix with the fingers. You need to be quick in order to keep these scones light as air – and there is a little trick. Add the baking powder after you combine the flour, salt, cheese and butter. This will make sure that the leavening agent is given the best possible chance to make the scones really fluffy.

I have always been fascinated by scones and biscuits. They taste so good, and look like they are easy to make… But they are not! It was a long time before I really began to understand the mechanics of how to make these perfectly. If you take your time, let the butter melt, or work the dough too hard, the scones can be thick and lumpy, with little rise. But if you have everything at the ready, dont forget to sift the dry ingredients, and use your fingertips (and cold butter, cheese and cream), then these scones really are quick and incredibly easy.

These are deeply cheesy – and they really reflect the cheese you choose, so choose well – organic aged cheddar is best. These will be a wonderful addition to a party or celebration dinner. They can be cut in any shape or size, though I prefer smaller 1 1/2 inch circles. They are wonderful split and  layered with cheese and tomato jam – or just as they are, especially just baked. They taste pretty phenomenal with a smear of strawberry jam too! Breakfast, lunch or dinner, these scones are deeply satisfying and totally delectable.

Please do note that these are rich and stuffed with butter, cheese and cream. Theyre no diet food, but then I wouldnt eat them every day. They are the ultimate comfort food though. Eating one of these scones, hot from the oven is pure, perfect joy.

By the way, they keep for about 3 days, tightly covered, and reheat well either in a low oven or in the toaster. Though I truly doubt that there will be any left though once your loved ones catch a scent of baking bread and cheese… 🙂

Makes about 18 1-1/2 inch scones

  • 3 – 3 1/2 cups all purpose flour
  • 1/2 tsp salt
  • 6 tbsp (3/4 stick/3 oz) butter, grated
  • 2 cups of good cheddar, grated
  • 5 tsp baking powder
  • Fresh cracked black pepper (optional)
  • 300 ml (about 1 1/4 cup / 10 fl oz) cream/sour cream/milk (I put 2 tbsp sour cream in a measuring cup and then half and half cream and milk)
  • A few tablespoons of milk to glaze (optional)

Preheat your oven to 215C (425F), and line a baking sheet with parchment paper.

Sift together about 3 cups of flour and the salt into a large mixing bowl. Keep the addition flour aside in case you need it to pull the scones together.

Using the largest holes on your grater, grate 3/4 stick of butter directly onto the flour. Using your fingertips, quickly toss the butter into the flour.

Grate 2 cups of cheddar and add it to the butter/flour mixture. Using your fingertips, mix well again. You should have a floury, pebbly, mealy mixture.

Measure out the baking powder, and sift onto the dough mixture. Toss with your fingertips again to combine well. Crack some black pepper into the mixture if you like (I do), and toss again.

Measure out your cream/milk/sour cream mixture. The more cream you add to the mix, the richer the scones will be. I use about 2 tbsp of sour cream, and then make up to about 6 fluid oz with cream, and add milk for the rest. Whisk together with a fork – the mixture will be lumpy from the sour cream, but this is fine.

Pour your cream/milk mixture directly over the flour, and using your hands, knead the milk into the flour until a dough comes together. If its really wet, add a little more flour, a tablespoon at a time. You want a thick soft pliable dough that holds together, and yet feels very tender and delicate. This should take only a few kneads – treat the dough very gently and carefully because you want it to be as light as possible.

Turn the dough out onto a firm working surface and pat into a rectangle or square about 1 1/2 inches thick. Use a round or cookie cutter to cut scones directly out of the rectangle, and move directly onto the baking sheet.

Any left over scraps can be quickly patted together again and recut, but know that if you do this more than once, those scones will be flatter than the others!

Let rest for about 3 – 5 minutes, and glaze with milk if you like (or even 1 egg whisked). This just encourages the top to brown well, but you dont need to do it if you dont want to!

Bake in the oven for 10 – 15 minutes or until light, fluffy and well browned at the top. Dont over bake – they will continue to firm up once out of the oven. Let cool for 5 minutes or so on the baking sheet (though I usually cant resist trying at least one!) and serve immediately, or store tightly covered for 3 days.