Tag Archives: memory

Mangoes Poached in Wine With Pink Peppercorns

11 Dec

with Pink PeppercornsYou know how a sense memory sometimes stays with you long after the remembrance of when or where it was, or even with whom you shared that memory? Or sometimes a sense memory – a smell, a taste, a touch, a sound becomes the touchstone of a time and place in your life. I have that with food. Foufou to me is Ghana – the slave forts, the colours of the women’s dresses, the covered markets – all can be conjoured simply by the taste of that dish. My late father is white toast, butter and sugar. South Africa is Appeltizer, thick brown bread, and snoek pate.

And sometimes, a taste memory just lingers because it was that good. Recently, I had dinner with a dear friend at the new Chinoz in Bangsar Shopping Centre (try their pumpkin and parmesan gnocchi if you go – truly sublime!). And I realised that it was at another restaurant by the Chinoz group, the late lamented Q*doz, where I had fresh mangoes poached in sweet wine with peppercorns. This was probably one of the most powerful taste memories I have ever had. I tucked it away, and carried it with me wherever I went.

Im not sure why it affected me so powerfully, but it was amazing. I usually order chocolate desserts wheresoever I go … Believe you me, I could make a life size model of myself with all the chocolate I have eaten at restaurants over the years! But this night, I was convinced to try the poached mangoes… and what a revelation! Warm, soft, perfumed, the mangoes were rich and gorgeous in their own juices and the sweet seductiveness of the wine. I adore mango, but thought I only liked it fresh until that night. Gently poached in wine, the essence of the fruit was stroked and encouraged to blossom. I wish I could describe the layers of taste. The acidic spark of the wine, the voluptuous sensuality of the mango, and suddenly, the fire of the peppercorns. It was a joyous dish which made my soul sing.

And, as I said, I have carried that memory with me through many other experiences and lives 🙂 And when I encountered the sweet smelling, ripe mangoes at O’Gourmet, I suddenly had the urge to recreate, if not the exact dish, the memory of those flavours. I found beautiful pink peppercorns from Kashmir, treasured like gold, and my absolute favourite Leatherwood honey from Tasmania. I had more than half a bottle of De Matino Sauvignon Blanc left after making my fig and mangosteen ripple, and thus this dish was born.

Its such a simple preparation, and I think one could really be flexible in terms of ingredients. Use a good wine, though, because that taste comes through very strongly. And if possible, try and use pink peppercorns. Their flavour – musky, sweet, faded fire – is unique and wonderful and it perfumes the flesh of the mango, and the deep complexity of the reduced wine in a subtle nuanced way that is a total joy. Black peppercorns tend to be a tad more forthright in my opinion, but they can be used (may be a little more judiciously) here too.

I served this with my goat’s milk cheese ice cream but almost all my tasters said that each dish on its own was so complex, they needed to be served individually. These mangoes, warm from the pan, would do very well with some first class vanilla ice cream. Or, just on their own, with the gorgeous shiny sauce drizzled over. Beautiful!

Serves 6 pax

  • 1 + 1 + 1 tbsp pink peppercorns
  • 1/2 + 1 1/2 + 1/2 cup crisp white wine (I used a De Martino Sauvignon Blanc) – 2 1/2 cups in total
  • 1 large mango, peeled and sliced
  • 1 – 2 tbsp honey

With peppercornsCrush 1 tablespoon of pink peppercorns, and leave the other two tablespoons whole.

In a large pan, over high heat, combine 1/2 cup of white wine and the crushed peppercorns, and 1 tablespoon of the whole. Allow to come to the boil and reduce until you have a very thick wine reduction and the peppercorns.

Lower the heat, pour in 1 1/2 cups of wine, and add the peeled and sliced mangoes to the pan. Simmer the mangoes at the lowest heat for about five minutes, and then drizzle over the honey and sprinkle over the final tablespoon of peppercorns.

Continue to poach, for a further 10 – 15 minutes, or until the wine has reduced a little, and the mangoes have become slightly translucent.

Using a spoon, flip the mangoes over gently, and poach for a further few minutes. Taste and adjust the sauce – you might want to add another tablespoon of honey.

Remove from heat, and pour over final 1/2 cup of white wine.

Serve warm with vanilla ice cream. The mangoes will keep, covered, in the fridge for up to 3 days.

Inspiration

7 Nov

Yesterday, I didnt post, even though I really really wanted to. I had nothing to say, nothing to write, and the things I did cook had been posted already. I had the cookblogger’s version of writer’s block, and it was a bit scary. I sat in front of my laptop, and started to write about… Cook’s Tips? Orange Olive Oil Cake? Nothing inspired me. Nothing made me excited or happy or intrigued. There was nothing to say, really, so I didnt say it.

Today when I woke up, I found I still had that feeling. May be it has something to do with the weather – hot (as always) but slightly damp, overcast and softly raining. Curling up in bed with a good book and a cat seemed like a plan. But I know myself. I am the best (or worst, depending on who you ask) procrastinator in the world. I could curl up with a good book and a cat forever and a day, and be perfectly happy. One of the things this blog has given me is discipline, and there was that nagging empty feeling inside because I hadnt posted.

Its a strange thing, this discipline. I never understood it before, not clearly, but the discipline of writing this blog is a gift I give myself. I feel good when I write a blog post. Not just because I get wonderful responses that stroke my (still slightly fragile) cook’s ego. Not just because I enjoy having a history of my food thoughts and creations. But because something in me has begun to flower and bloom – and the discipline of writing every day is like sunshine and water to that nascent joyous self. It makes me realise I can do anything I set my mind to do – and I can do it consistently, over time, and learn and grow from it.

So after finishing the book, and cuddling the cat – because, after all, I am still me, and I love my sensual lazy creature comfort Sundays… I hauled myself out of bed, had a cup of coffee, and thought about what I should do today and where I should go in order to find some inspiration. And I realised that it was Sunday – and that means the Bangsar Sunday Market would be just beginning and a little wander through all the sights and sounds and colours of that market might just be what my soul needed… and my be even my tummy!

Many years ago, there was a woman who came with her two children and sold the most astonishingly delicious home made vegetarian nasi lemak (with about 10 different dishes to choose from – rendang, char siew, masak lemak – all made with veggie proteins) for the princely sum of RM5 (about USD1.50). I thought I would find her again, take some photos, choose my dinner, and wander home with a meal and a blog all done… but a very friendly gossipy auntie told me the nasi lemak lady couldnt afford the license for her stall and so did not come any more. I almost turned back then, but I am glad I didnt.

The Bangsar Market is on Jalan Maarof, right next to the mosque, in front of Bangsar Village II. Its an open air market with plenty of stalls. Many neighbourhoods have open air markets one or two days a week. Its when the residents can come and buy fresh fruit, vegetables, fish and meats from stall holders who are traders – and who deal directly with farmers and fishermen and the like. This is our version of the western farmer’s markets – and I have been going to market in Malaysia for as long as I can remember. My grandmother used to take my sister and I to the wet market in what is now the very touristy Central Market in the centre of town. I can remember the scents, the textures, the colours, the haggling and bargaining and laughter and teasing as if it was yesterday.

So, since I could not find my nasi lemak lady, I thought a slow stroll through the stalls might re-awaken my mind … and oh my goodness, it did so much more than that! The colours, sights, sounds, textures. Everything conspired to pull me in, to tempt and tease and slowly bring me back into myself. I thought Whole Foods was amazing … but this! Such abundance, such freshness, such textures. Everything was so beautiful, people were so knowledgeable and friendly and I wanted to touch and stroke and poke and sample everything. Instead, I took photos, and these are my inspirations. My grounding, my home…

Bangsar Market

Vegetables of every colour and texture arranged in gorgeous glistening piles … just waiting to be taken home and turned into delectableness!

Green Green Green

Every possible shade of verdant green you could imagine …

Green Green Green

In overlapping patterns of green

Beautiful

And the most delicate shades of smooth cool green

Purple and Green

And patterned green juxtaposed against deep purple … Which brought me to…

Mangosteens

The bruised beauty of my favourite fruits… mangosteens …

Purple Red

And earthy purplered beets… melding into …

Tentacles

The bloodred tentacles of roselle (with a tiny green bug nestled in a petal). And then I move on to sweeter reds …

Pink

The juicy bright pink seductiveness of watermelon … prettier than any lipstick…

Pink

The fragile yet wild blushing pink of the dragonfruit gave way suddenly to sunshine …

Orange


Carrots arranged with pride and care …

Yellow

The patterns of bright bananas (pisang mas) and honey papayas ….

Beautiful

Offset by the jagged symmetry and perfume of luscious looking pineapples.

Everywhere I looked, everything I touched… beautiful. Inspiring. The noise and jostling of the crowd of people. The light soft coolness of the rain cutting through humid heat…

And in the midst of it all… In their own space and silence.

Dog

A woman with a fabulous looking knife, preparing jackfruit, and her dog, kipping a nap in the midst of all the hustle and bustle.

I think … I think I have my inspiration back …. 😉


Suji (Semolina) Cake

2 Nov

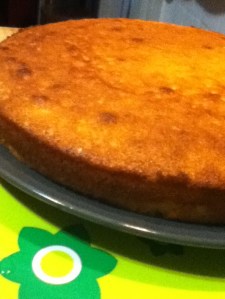
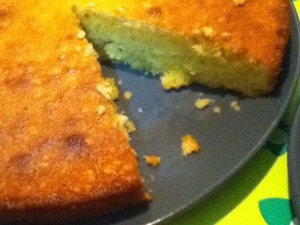
CakeLast weekend, at the family BBQ, my Mak Enda and Kak Manja really enjoyed the lemon bundt cake. They liked its simplicity and charming tartness, the fluffy texture, and as well as the addition of whipped cream and strawberries! But of course, they are Malaysians… and so, they started to dream about the next cake they wanted to taste, whilst reveling in the lemon one 😉

And the cake they wanted was suji (aka sooji aka sugee aka semolina) cake. Suji is the coarse, purified wheat middlings of durum wheat – and it is an extraordinary and much used grain all over the world. The Italians use it to make pasta and pizza and breads. Indians use it to make dosa and uppam. And the list goes on and on. I have posted a recipe for white chocolate semolina pudding that sent some friends into total ecstasies. I love suji, and suji cake is a particular emotive memory for me.

Malaysians (of all races, creeds and kinds) are very attached to suji cake. Its kind of like our version of pound cake. Buttery, fluffy, rich and yet incredibly simple. It is pure deliciousness. The suji cake of my memory has almonds in it – crushed ground almonds, and little chunks of almonds. You can leave them out, but why would you want to? They give the cake a wonderfully grainy texture that stands up to the semolina, and enhances the crumb. We Malaysians serve this little cake at almost all the high holidays, and though many people adorn it (with rose syrup, glazes and icings), I am not in that camp. I like my suji cake plain and unadorned, perfect in its simplicity and golden beauty.

For me, suji cake is the ultimate coffee cake. Its not too sweet, its immensely satisfying and very very comforting. When people taste it they smile, and remember a time when things were easier, less complicated, when they were more connected. Its a cake to give to those you love, wrapped carefully in aluminum foil, knowing that they will appreciate it for its clean loveliness as much as you do.

But know this. Despite its almost stark simplicity, suji cake does have its secrets. You need to soak the suji in butter, sugar and a touch of milk to allow the grains to plump up a bit. Some recipes ask that you do this overnight, but I am too impatient and have found that about an hour will do me. You need to beat the eggs and sugar for at least five minutes to get air into the mix, but also to get a almost puddingy consistency. And you need to watch the cake – the top burns easily, so I almost always put a little foil cap on it for the last half of the baking time. And it really does help if you have a stand mixer, but a hand held, or your own strength will do – it will just be rather tiring!

Follow these instructions closely, and you will have a cake that tastes like home… no matter where you are 🙂

  • 1 3/4 sticks (14 tbsp/200 gm) butter, softened to room temperature
  • 1/2 cup + 1/2 cup fine (caster) sugar – brown or white is fine – and make these scant cups – suji cake is not overwhelmingly sweet
  • 3 tbsp cream or milk
  • 3/4 cup suji or semolina
  • 3 eggs + 2 egg yolks (whites reserved for another use)
  • 2 – 4 tbsp vanilla
  • 2/3 cup all purpose flour (it needs to be all purpose to stand up to the suji and the almonds)
  • 1 tsp  baking powder
  • Large pinch of salt
  • 2/3 cup ground almonds
  • 1/2 cup almond nibs or finely chopped almonds

Start by preparing the suji mixture. In a medium bowl, cream together the butter and 1/2 cup of sugar for about a minute or so, or until light and fluffy and completely combined. Add the cream, and mix briefly – it will loosen up the butter mixture substantially. Fold in the suji by hand, cover the bowl and leave in a cool place to let the mixture really get to combine well for at least an hour, and up to three.

While youre waiting, read a book, play with a child, listen to music or cook something else 😉

Once the hour is up, preheat the oven to 180C (350F) and butter a cake pan extremely well. Line the bottom of the pan with grease proof baking paper, and butter that too. Set aside.

Beat together the remaining 1/2 cup sugar, the eggs, egg yolks and vanilla for five minutes. It would help if you have a friendly kitchen gnome to do this for you whilst you get on with other things (that or a stand mixer!).

In a small bowl combine the flour, baking powder, salt, ground almonds and almond nibs. Just a note on ground almonds. They tend to be rather expensive, so I often pound almond nibs into ground almonds – this is very easy if you measure out the almonds, stick them in a zip loc bag and bash away with a rolling pin or other heavy object. You can also use a mortar and pestle, but thats sometimes more trouble than its worth. Either way, I always use almond nibs for this recipe, without the skins on, and give them a good whack till they are pulverised. Combine the flour mixture well and set aside.

By now, the eggs should have been beaten for at least five minutes. They should have increased in volume, and they will look golden and creamy. Uncover the butter-sugar-suji mix, and get ready to combine everything.

Gently, using a wooden spoon or silicon spatula, fold about half of the egg mixture into the butter mixture. Do this quickly, surely and gently. Fold about half of the flour in, and then add the remaining eggs, and finally the remaining flour, folding gently but confidently after each addition.

Transfer the batter into your prepared cake tin, and bake, in the centre of your oven for between 30 – 45 minutes. Check at about 15 minutes to make sure the top is not burning, and if it is, cover the cake with a bit of tin foil. The cake is ready when a tester goes in, and comes out clean.

YummmLet the cake cool, in the pan, for about ten minutes on a rack. Then turn out onto the rack, and turn right side up again. Cool further, or if you are like me, and your happiness cant wait, serve yourself a slice, warm, crumbly, buttery, almondy, vanillay, delectably evocative, warm from the oven.

This cake will keep, wrapped well in foil for at least 4-5 days in the fridge. But I have never managed to keep it for that long 😉

Vegetarian Baby Birthday Party!

22 Sep

So Queen Z turned 1 year old today (Happy Birthday darling girl!) and since its the middle of the week, we are having her birthday party this coming Saturday. Or rather, her high tea. M + I remember from our own childhoods a simpler time, when birthdays were about bright colours, pretty yet basic food, lots of laughter and running about. Neither of us are too into having a theme for the birthday, though we did tease M’s husband by suggesting fairies, Barbies and glitter pink!

When M and I thought about the menu for the upcoming birthday party, we decided to keep it simple, and bring our own memory into play. I think this is a very important part of birthday ritual. Memories that have resonance for our generation can be passed down to the next through parties like this one. We have a photograph of M’s 1st birthday, a long table set up outside, dogs playing under her high chair, M with her hand smack in the middle of the cake, grinning and wearing a party hat. The table is set with a variety of goodies – cucumber and sardine sandwiches, mee, pretzels, crisps, tiny cupcakes with sugar flowers, carrots and dip, little cocktail sausages. Many people growing up 30+ years ago had birthday parties like this, with games like musical chairs and pin the tail on the donkey.

When we thought about Z’s birthday party, we decided on a vegetarian menu that would be rich with our own memories, and yet updated enough to create new ones.

Since I will be posting several recipes over the next few days which relate to this momentous birthday party, I thought it would be a nice idea to give you the work-in-progress-menu. Any suggestions are most welcome … We still havent decided on the flavour of the cake… but for the rest, a vegetarian celebration for the Queen of our world, Z.

  • Fruit punch + Fresh Juices + Iced Tea
  • Vanilla cupcakes with pink icing
  • Cupcake decorating station for the kids
  • Hummus + Artichoke Spinach Dips with Baked Pita Chips + Carrot Sticks
  • Vegan Cocktail Sausages with Pink Dip
  • Sandwich Fingers – Cheese, Cucumber and Peanut Butter Strawberry + Honey
  • Birthday Cake
  • M+M’s
  • Crisps with Sour Cream Onion Dip

I would also love to make scones with fresh strawberries – tiny pink meringues – biscuits with tomato jam – mini spinach pies… But I have to convince my sister to let me cook! 😉

Food Colouring!By the way, I have done a lot of research about using food dyes (all that pink!) for children’s food. Red#2 is apparently particularly bad for young ones, and so I set about looking for alternatives. I found it in an amazing company called India Tree which creates the most stunningly beautiful products using vegetable dyes. So, for example, in place of the dreaded Red#2, they use concentrated beet dye. Because the dyes come from natural sources, the colours seem to me to be softer, sweeter, more honest. They dont look neon, which I find a bit scary in food these days. And they make every kind of sparkly decoration and sugar, as well as their food dyes. I have ordered a crateload, and will be using them for most of the cooking I will be doing. I will do a review of the products when I am done!

For now though, I will go to bed, dreaming of sweet treats for my beloved niece’s birthday party, and remembering my shared history with my sister. If any of you have suggestions for us, we would love to hear them — before Friday! 😉

Cinnamon Sugar Cookies

11 Aug

perfect happy memoryI wrote in an earlier post about my late father’s love of white buttered toaste with a sprinkle of sugar. He ate it as a treat, even though he could have most any gourmet food he wished. This taught me that food is about memory as much as it is about taste… And one of my earliest memories is staying over at an Aunt’s house, one sharp sparkling autumn day, with my sister. We woke up in the morning, and she offered us cinnamon toast. We had never had it before (I think I was probably 6 to my sisters 4 years), and eagerly accepted.

What a taste. What an amazing combination. White toast, crispy and warm, melting butter, crackling sugar … and cinnamon. Its a dark scent, almost woody and powdery. Hits of spiciness, sweetness, flowers. Its not a description that comes easily, but when you taste cinnamon, especially for the first time, its as if your taste buds wake up. I have always loved the scent and taste of cinnamon, and its warming fragrance brings memory of autumn, cider, Christmas. When I sat down to write about the actual taste of cinnamon, I realised this is another taste which is intricately wrapped in memory for me.

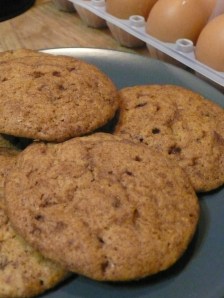
So today, on the first day of the Ramadan, after an exceedingly hot, busy day, I wanted comfort. Food that is a combination of memory and laughter, and wonderful easy taste. I turned to this recipe for cinnamon sugar cookies which I think I have been making as long as I can remember cooking. These cookies are really delicious, quick to put together, and delightful to give away. The recipe makes a very soft dough. Dont over beat it or you will get tough cookies. Just let it sit, in its creamy buttery sugary-ness, and handle with care when you dip in cinnamon sugar.

Enjoy with much love, and the memory of warmth during the cold…

Makes about 32 cookies, depending on how big or small you want them!

  • 3 tbsp fine granulated white sugar
  • 1 – 2 tbsp cinnamon (depending on how deeply cinnamon you like your cookies – I always use 2 tbsp!)
  • 1 1/2 cups sugar – a mix of dark brown, light brown, and white (I use 1/2 cup of each)
  • 1 cup / 2 sticks butter, slightly softened
  • 2 eggs
  • 1 1/2 tbsp vanilla extract
  • 2 1/2 cups pastry flour
  • 1 scant tsp baking soda
  • 1/2 tsp salt

Preheat your oven to 160C.

Mix the 3 tbsp sugar and cinnamon in a little bowl, and set aside. Make sure you combine thoroughly – the sugar will be a dark brown when done. You will roll the cookie dough in this just before baking.

In a stand mixer bowl, combine your three sugars. I usually beat the sugars together to ensure they are combined well. If you dont have a stand mixture, use electric beaters.

Once the sugars are combined, add the butter, cut into chunks. Let your mixer beat the sugar and butter together until very well combined. This could take a few minutes. Just have some patience.

Add the eggs and vanilla, and beat until completely combined. The mixture will be a little soft and fluid. Let it sit for a few minutes minutes. This gives the butter and sugars time to melt into each other.

Combine flour, baking soda and salt in a separate bowl, and little by little, mix into the butter sugar mixture. I use a spoon or spatula at this point as I dont want to over mix the cookies! A tender cookie is one which is allowed to come together of its own accord! Again, let sit for a few minutes before moving on to the next step.

Line baking trays with greaseproof paper.

Using a tablespoon, measure out spoon sized pieces of dough (you can make bigger or smaller, according to your preference – this is just how I like to do it!). I usually get about 8 cookies to a sheet.

Using your thumb, drop the dough straight into the sugar/cinnamon mixture, and gently roll it around to coat it completely. Place on baking tray, and pat down gently, so it is not a ball shape, but a little flatter.

Bake for about 15 – 18 minutes. The cookies will rise, and then fall. They are done when they have turned a slightly darker shade of brown.

Let cool in trays for at least 5 minutes before cooling completely on racks.

You will have a wonderfully soft cookie with a crispy crunchy crust. Perfect balance.

Share! These are too good not to – and you can make sure other people will make wonderful cinnamon memories too 🙂

Happy Birthday Ayah

27 Jul

My Ayah and meToday would have been my beloved late father’s 74th birthday. I celebrated by going to learn how to make macarons, but I was thinking of him the whole day. I miss him more than I can ever say, and yet, I feel him with me all the time. When my sister had her beautiful baby Z, both of us felt his presence, and wished we could have him with us, so he could meet his gorgeous grandchild.

Everything I do, and everything I am, is imbued with his presence, his grace, his essence.

My father was a true epicure. He took great pleasure in all the sensual aspects of life – food, and drink, cigars, and yes, women. He taught my sister and I how to eat, how to enjoy food, how to taste and refine our ideas of what was good. He took much joy from having a meal and good wine with friends and family.

Ayah was a wonderful story teller, a brilliant mind, a sensitive and clever writer. He lived life to the maximum and he passed much too young.

From the time we were young, my sister and I were brought to beautiful restaurants, and ate “like grown-ups” – encouraged to try and taste and order for ourselves. It was an education in enjoying the fine things in life. But my father also was clever about what he consumed and how. He always had fresh fruits for breakfast, always made time for exercise, and when he indulged, he always made sure there was a balance.

One of my favourite Ayah food stories was his immense enjoyment and love of plain white toast, with melting butter, sprinkled with rough grain sugar. My sister and I used to tease him about it – how someone who ate at the finest restaurants would take such sweet happiness in a simple dish. He told us that during the war, when he was a child, he lived in the kampung (rural village) in Malaysia. There were not a lot of supplies and extras. Food and luxuries were scarce. On birthdays, or for very special occasions, children were given a piece of toast, butter (margarine more likely), and sugar. To the end of his life, he felt that one of the greatest indulgences was that simple dish.

This taught me two things. First, that food did not have to be rare or fancy or expensive to be appreciated. You have to know for whom you cook, and what resonates within them. And therein lies the second lesson – food is about memory  – it is so much more than the ingredients, and really about the emotional attachment that we give to what we eat. My father could have had chocolate mousse every day, but that did not make him feel like he was giving himself something special. But a cup of tea, and toast and sugar … now that was indulgence and love, and memory. He honoured himself, and where he came from, and where he was at that moment in time, to pause, to relish, to remember.

toast and butter and sugarSo today, for Ayah, this is my dish. I miss you so much. I love you always.

  • 1 piece of toast
  • 1 tsp softened butter
  • 1 tbsp roughly granulated sugar

While the toast is still warm, spread the butter so that it melts lightly. Sprinkle on the sugar.

Eat with remembrance and love.

Favourite Things (Part 2)

26 Jul

I was thinking just now (when the fire alarm woke me for no fire) about posting a few more of my favourite things. As a cook, I get obsessional. I have favourite knives that no one else is allowed to use, and, for example, I only like using the biodegradable rubbish bags. I only drink Ceres juices (from South Africa of course!) and while I will buy plastic bread, I try and only have organic milk and eggs. Strange, but these are my balances, in my kitchen. Its a pleasure to have been able to develop these choices and learn what balances appeal to me and only me. You would be surprised how much of a struggle it is sometimes to claim my own space. All this musing reminds me of a story …

When I first rented my apartment, I went shopping to fill up my pantry. I get nervous when I dont have enough in the pantry to make at least 3 good meals. Anyway, I stopped at the jam aisle, and flush with that particular pleasure one gets when living on one’s own, tried to figure out what jam I wanted. I suddenly realised… I knew what kind of jam my Ayah liked, my Mum, my sister, my ex-housemate, my other ex-housemate, my ex-husband… I knew what kind of jam was every body’s preference – except for mine. Hell, I didnt even know if I liked jam at all! And then I realised, jubilantly, that now was the time to figure that out…

It might sound like a minor episode, and in reality, it was, but it was also an empowering experience. Shopping truly for myself, and my tastes. For my desires and my comfort. Mindblowing, after a life of cooking and feeding everyone else. I think that is when my commitment to being a vegetarian really sunk in and stuck – because I did not have to do it for anyone else but me.

I suppose the reason I am telling this story now is that this blog is intensely personal as well. I cook what I like, when I like (to paraphrase Steve Biko). I cook to share, of course, and as an extension of my loving for family and friends, but also because cooking is me. And I cook because its what I love, and where my passion lies.

So on to my favourite things. Some may seem very ordinary, but they are indispensable to my kitchen. I couldnt do without them…

Pretty little cheese all in a row

Greaseproof paper / baking paper

Goddess, I love this stuff. I use it every single day, for something or another. Its such a simple kitchen staple, and until I really started cooking on a regular basis, and for my own whim and fancy, I didnt realise how much I used it, and relied on it. I like it better than plastic wrap or aluminum foil because its paper – much more environmentally friendly to throw away (some bits can even be recycled) and much better chemically when interacting with hot, soft, wet or otherwise foods.

I use greaseproof paper to line my baking tins for everything from cookies to roasted butternut. They are a wonderful means of preventing that sticky gooey mess that ends up at the bottom of the tin and that takes hours to clean. They are a brilliant way to ensure that cookies and cakes bake evenly, and dont stick to the pan. I used to think it was a waste to use baking paper on top of a perfectly good baking tin – but I used it once – in response to strict instructions in a recipe – and have never looked back.

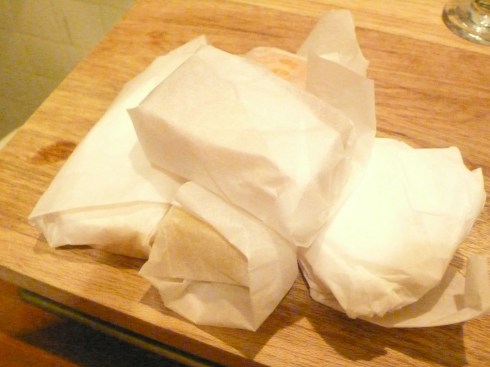
I use it to wrap all my cheeses in comforting, organised little packages. I hate the plastic cling wrap or packaging that most cheese comes in these days. Once the cheese is open, the plastic encourages it to dry out quickly, or even for mold to form. I butter my cheese (I know, crazy, but it works) lightly to keep it moist, and wrap it in baking paper. It is fresh and delicious and there is so much less wastage.

I use it to cover puddings or mousse or soups – anything liquid that will form a skin – when I store in the fridge. This little bit of paper (sometimes I oil it a bit so as to prevent major sticking) prevents the skin from forming, and makes me feel much happier than if I were to cover a hot liquid with plastic wrap. I always worry (I told you I was slightly obsessional) that the plastic will release toxins in reaction to the hot liquid, and that would be bad for the consumers (namely me and those I love).

I use it around my cutting board, and underneath a bowl when grating cheese, to pick up the mess, and make for instant cleanup. Oh I love this stuff. Its simple and inconspicuous, but its a staple I cannot do without.

How do I love thee...

Immersion Blender

I have loads of fun toys and gadgets in my kitchen. Ive got my beautiful and deeply beloved Kitchen Aid Stand Mixer (I saved up for that baby, and have used her a lot), my Cuisinart food processor, and my professional ice cream maker (on sale, and adored). But the one thing that I have found I use all the time is my Kenwood cherry red immersion blender. I bought it on a whim because it was on (another) sale. I thought, this might be fun to play with at some point. When I unpacked it eagerly at home, the plug point wasnt attached, and I am not technical in that way, so I left it until I found a friend who would figure it out for me.

I didnt really think it would get that much use in my kitchen, but to be honest, its the thing I turn to for most of my pureeing, chopping, mashing needs. I made the most amazing blueberry banana smoothie with my immersion blender – in seconds – and it just liquidised all that frozen fruit in the blink of an eye. I make the densest creamiest soups with it, I mash potatoes with it (they come out like silk if you use a deft touch, otherwise they can get a bit gluey), I creamed butternut and spinach for a pie and mixed them with sour cream — all using the immersion blender.

Its such a simple piece of equipment as well. It looks like a … well, now come to think of it, it could be, to a naughty mind, just a little obscene! Its a large wand, with a head that holds rotating slicers. It operates like a food processor, but its much smaller, and because its handheld, much easier to control. Dont get me wrong, I love my food processor. But in part because of space issues, its a big pain in the tukus to take it out of its little storage space. And once I am done, the food processor involves a lot of parts to clean up. Not so with the immersion blender. You pop off the metal part of the wand, wash it, and you are done. It is awesome. Probably my new absolute favourite gadget. I keep thinking of new ways to play with it…

Hardworking and beloved!

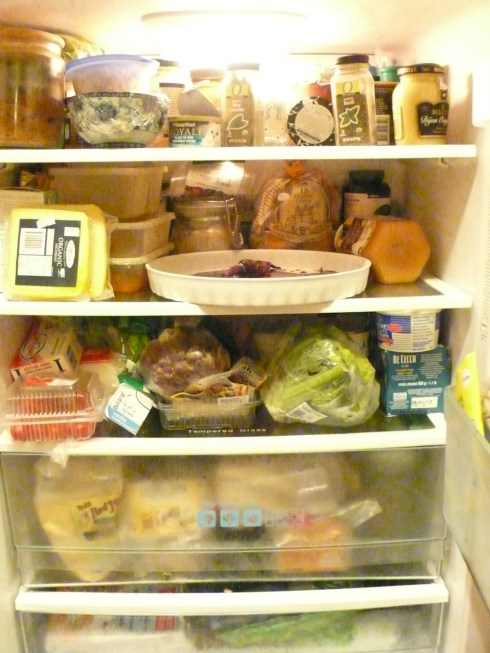
Fridge

When I first moved into my apartment, my landlady provided me with a fridge. Dont get me wrong, it wasnt an awful fridge. But it was definitely from the 1970’s, that particular vomity green colour that all major appliances had back then. It was very retro in not a cool way, and it wasnt very big. I could barely fit my juice and staples in, and I certainly didnt have enough freezer space for more than ice cubes and a carton of Ben & Jerry’s. I thank the good Goddess that this indispensable piece of kitchen equipment is par for the course. But when I renovated, I decided I deserved a larger fridge. I think I might have gotten my measurements wrong, or in my mind’s eye my kitchen was bigger than I thought it was, because this fridge just fit. I had to get things built around it, but I dont care! I love love love it.

Its freezer is on the bottom – a clever bit of design, because you dont use the freezer as much as the fridge part, and so bending to check out whats in the bottom of the fridge lurking in the veggie bin, is a thing of the past. My fridge is full of stuff – my vitamins and staples (flour, sugar, salt – all of which I keep in the fridge because of the high heat and humidity here) – as well as food I have just cooked and am saving for friends to eat and taste – or thats waiting to be frozen for next week – and fresh fruits and vegetables waiting to inspire me. It gives me great satisfaction to look into a full fridge – may be its that Jewish-Muslim feeding people thing, but I love knowing that if someone drops by, I will always, always have something to offer them.

My fridge makes me feel safe (against hunger, because as anyone who knows me knows, I could just fade away! 😉 ) and satisfied. When I look in my fridge, I see all the things I have made (thats one last lone oven roasted fig in the centre, by the way, waiting for AngelKitten and Ezril), and I know that I have expressed my love and passion in a way that is distinctly me. I also am inspired. Sometimes I just look in the fridge and think… Oooh, I will make that today! Or I think, I need something soothing and quiet. And whatever my mood, I can always find inspiration there.

Its funny, but taking photographs of the interior of my fridge was a bit intimidating. Kind of like showing your your undies to complete strangers. Oh well, its me, and this is my blog, so fudge it 😉

Frozen Chocolate Dipped Bananas

17 Jul

Little Chocolate Banana Babies Waiting for the FreezerTonight, a short recipe. I was going to make Welsh Rarebit (inspired by an article on things on toast – burnt cheese is my weakness) but I realised that Worcestershire sauce is not vegetarian (it has anchovies in it – will have to do some research on that one). Also, I had the pleasure of going to see the last night of Junji Delfino’s Here I Am celebration – what a voice!

Anyway… came home a bit tired, and thought I need something simple, comforting, with shades of my childhood.

When I was little, a huge treat for my sister and I were frozen bananas dipped in chocolate. Anyone can make these, and they are DELICIOUS! The bananas seem to freeze and turn into a heavenly natural version of ice cream – the chocolate just adds a rich delicious topping to the whole thing. And bananas seem to love the freezer more than other fruits. They adapt so well to freezing, one would imagine its their natural state! A little chocolate ganache from yesterday, a few pisang mas (the tiny golden sweet bananas here in Malaysia – from my organic delivery!) and a little freezer action. Oh so good.

The chocolate becomes this crunchy shell, and the banana within is creamydreamy.

This is a wonderful recipe to make with young ones – they feel so accomplished afterwards, and its quite healthy too! In my book, chocolate is a health food 😛

Use any good chocolate – white, milk, dark. I prefer it dark because there is such a lovely contrast to the pale frozen banana. They seem to complement each other. And once youve done this once, you will want to do it again. You can experiment. Add a teaspoon of honey to your chocolate mix. Or may be a sprinkle of cinnamon. How about melting down peanut butter chips? Banana and peanut butter, mmmm. Go nuts. Its fun!

You will need:

  • Baking tin, lined with greaseproof paper
  • As many ripe bananas as you want to freeze (I would do at least 6, because once you try these, they are addictive!)
  • A few squares of chocolate for each banana
  • A teaspoon of milk or cream for each banana
  • Some plastic wrap or greaseproof paper to cover
  • A few toothpicks

In a saucepan, over low heat, melt the chocolate into the milk or cream. Dont let it boil over, but as soon as you see the chocolate starting to melt take off heat and stir well. The residual heat will melt the chocolate. Leave to cool a little. If the mixture becomes too stiff, just heat it up a little again.

Meanwhile, peel the bananas. Depending on the skill of your helpers, and the desired level of mess in your kitchen, either lay the bananas on the baking tin and spoon chocolate over (less messy) or dip and roll the bananas in the chocolate and transfer onto the baking tin (rather messy). I often ask my young helpers to peel the bananas and drop them in the saucepan of chocolate, and roll the bananas around with a batter spreader or other blunt cooking instrument to make sure they are covered completely in chocolate. I then go in with two toothpicks, skewer each end of a banana and reverently transfer it onto the baking tin.

You could dip or sprinkle ground nuts, coloured sprinkles, or anything else you like that adheres well to chocolate.

These dont have to be perfect – the beauty is in their imperfection. I get geram looking at all these beautiful and different little chocolate banana babies lined up in a row waiting to be eaten!

You could stick toothpicks on one end of the banana to help in the eating afterwards, but I rarely do. I quite enjoy mess, and feel safer that there is nothing sharp in the banana that could harm little mouths.

Freeze for at least half an hour or so. If youre concerned about mess, wrap half of each banana in greaseproof paper once its frozen and hand out.

Eat greedily and with joy and sharing and mutual accomplishment 😉

Favourite Things

6 Jul

These are some of my favourite things…

Most cooks I know have obsessions –  a particular brand of balsamico or olive oil, certain types of knives, particular tools that they adore, cookbooks. I must admit, I have them all. Cooking enables me to enjoy spoiling myself with things that are “useful” … and buy ingredients which I can share with others and make into delicious dishes.

I love going to grocery stores in new countries I visit – and hardware stores, in the cooking section – and see what gadgets or tools or special ingredients that are local to that place. They are the best things to bring home, because they ensure I have a sensual reminder of the place and space I have visited. Small pleasures, but they are the most important.

I have some things which have never left me, and which go along with me in my travels. I have lugged cookbooks on two week trips to friends, and have packed my favourite knife in my carry on luggage.

I thought that every now and then I would share a few of my favourite things with you because these special items are part of what defines my cooking philosophy.

My favourite cookbook of all time. The Frog Commissary Cookbook by Steven Poses, Anne Clark and Becky Roller, has inspired me for over 20 years. I first got it when I was in university, and its simple, clear writing style, and easy to follow recipes inspired me to cook with passion and creativity. Steven Poses had one of the first modern restaurants in Philadelphia, the Frog Commissary, and is a contemporary of Alice Waters from Chez Panisse on the West Coast. His food is not quite as local/natural as hers is, but it is delicious, divine, delectable.

Though I never got to go to the Frog Commissary, I have had this book since university days. Steven Poses now runs Frog Commissary Catering in Philadelphia, and has cooked for more than 15 million guests. When I first read this cookbook, I fell in love with its unique clever take on food.  Their ideas were so varied, their influences so wide ranging, and their ability to combine different ingredients into a magical special meal made me an instant fan. But it was the absolute specificity of the recipes, and the fact that you could try one and know it would come out perfectly, that had me for life.

I think I have gone through about six or seven copies of this book. I use each copy until it falls apart. For a while there, it was out of print, and I used to buy them wherever I found them (on ebay, 2nd hand bookstores) and hoard them like precious gold. My favourite recipes are either adapted from or inspired by the recipes in this book, and I never ever tire of reading their ideas and inspiration. The food here is very international, vegetarian friendly, and inspired.

I collect cookbooks and always have a couple at my bedside table to page through at night. However, if I had to pick just one cookbook to dream from, be inspired from, and cook from – this would be it.

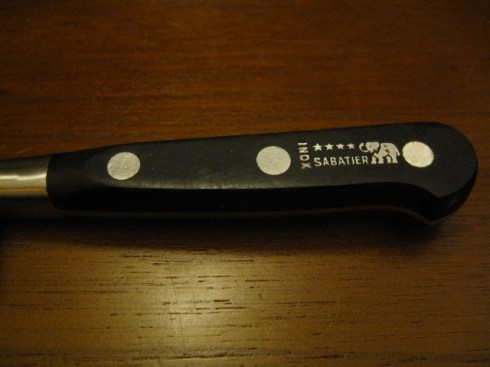
I collect chef’s knives. I love the different types of knives and different brands – I read about the different approaches to shaping and creating a knife with respect to the art form that this truly is. When I finally had the money and the desire to start collecting my own knives, there was only one knife I wanted – a Sabatier. These knives are handmade in Thiers, France from a single piece of high carbon stainless steel. The blade and handle are a single piece of steel, so there is no risk of a blade divorcing a handle mid chop! The knives are hand forged, and have an unbelievable balance in the hand, and a wonderful almost instinctive slice. Their sharpness stays for ages, and they feel both delicate and strong in the hand. I love these knives, and this one, my 4 star elephant Sabatier is my absolute favourite. Its a bit larger than a paring knife, but not as huge as a big chef’s knife. Its large enough to tackle big jobs, sharp and sturdy enough to mince an onion in a few seconds, and comfortable enough in my hand so that I never ever feel tired when using it.

I have a lot of knives in my kitchen, but this is the only one I will not allow anyone else to use. Its “my” knife, and when I hold it in my hand, I feel confident in what I am doing – which of course is half the battle won!

I have two of these 4 star knives, and I use them every single day. I love them so much, there are no words. I found them on ebay, where you can get amazing deals for old Sabatier knives. Do your research first, though. You must know what you are getting, and where its from. There are a lot of fakes out there!

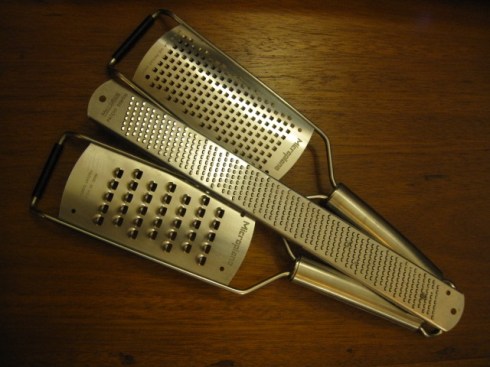
And finally, my favourite graters. I have tried all sorts – box graters, those crappy ones they sell at Ikea, grater attachments for food processors, etc etc etc. But nothing, nothing, nothing compares to Microplane. These graters were developed as plane tools for the woodworking industry. It was a woman, cooking in her own home, who nicked her husband’s new woodworking tool, who gave these tools their place in inspired herstory. Once you have tried a Microplane grater, you will not use anything else again, ever. Everything, from carrots to cheese to peel, grates smoothly, evenly, and easily. There is almost no effort needed to get stunning results. These three graters are the only thing I ever use for cheese, for grating vegetables, for mincing garlic and ginger, and for getting the peel off lemons and limes. I use them all the time, and though you do have to be careful with fingers (they are sooooooooooooo sharp!) these are indispensable.

So these are three tools which make me happy, and help me to be a better cook. Hope they give you ideas about what you are using in your own kitchen. If you have special tools, I would love to hear from you!

My Tomato Sauce

5 Jul

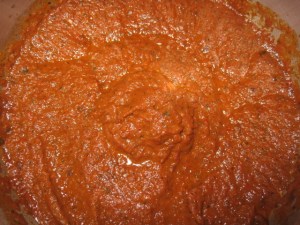
For pasta, for pizza, for salsa… for just about anything. When I need a pasta sauce that is delectable, this is the one I go to. Its been “developed” over more than 20 years of cooking tomato sauce. I have friends who remember me cooking a version of this sauce when I was 14 years old! Im almost 40 now 😉  Its ingredients are malleable but there are some broad rules that I usually stick to:

  • Keep a base of onions and loads of garlic
  • Always use a mix of tomatoes – I use at least 2 types of fresh tomatoes, canned pomodoro, and tomato paste. This ensures a really deep level of tomato flavour. Sun dried tomatoes are also awesome in this sauce.
  • Try and use a mix of fresh and dried herbs. Again, these impart very different flavours, and mixing them really lends depth to the sauce
  • You can use a mix of vegetables (see below for what I put into it) but try and make sure there are some carrots for sweetness

I first started cooking this sauce in high school when I used to have loads of people over for pool parties. It was the most forgiving sauce because you could simmer it for ages, and it just got better and better. As long as the basic rules were followed, and the bones of the sauce were respected, you could add just about any vegetable (bar potatoes or pumpkin) that you wanted.

When I went to university, I started making this sauce for my housemates. There was always something missing, until one day, I hit on a magic combination. And this is the secret to the sauce, without which you will not have the same sublime flavour and glossiness. These are non negotiable. You need at least 1 eggplant for silky smooth, shiny unctuousness, and a big handful of prunes for a dusky sweetness that you just cant place in the final taste. These two ingredients are secret because they both melt into the sauce, encouraging and supporting its flavour without pushing their own agenda into the story. Eggplant and prunes. Who would have guessed?! Please do not try and make this sauce without these two – I promise, it will make you so very happy that you trusted me. 😉

For about 4 – 6 cups of finished sauce, you will need:

  • 2 medium white onions (approx 2 cups), minced
  • 7 cloves of garlic, minced
  • 1/2 cup of extra virgin olive oil
  • 2 tbsp butter (optional)
  • Salt and pepeper
  • Fresh basil, thyme, marjoram, oregano and rosemary, minced fine – about 1/2 cup in total
  • 1 large or about 5 baby eggplant (approx 2 cups) roughly chopped
  • 1 tbsp balsamic vinegar
  • 1 large red pepper (approx 1 cup), deseeded, roughly chopped
  • 4 – 6 baby carrots (approx 1 cup), peeled and roughly chopped
  • 1/2 cup red wine
  • 3 tbsp tomato paste
  • 1 medium zucchini (approx 1 cup), roughly chopped
  • 2 cup mixed tomatoes, roughly chopped (I used cherry and baby roma)
  • 8 medium portobello mushrooms (approx 3 cups) peeled and very roughly chopped
  • 2 x 400 g cans of pomodoro tomatoes in juice – about 4 cups, made up with wine or water if needed
  • 15 pitted prunes
  • 2 tbsp brown sugar
  • 1 – 2 tbsp mixed Italian herbs (dry)

In a heavy 5 qt saucepan, soften onions and garlic in about 2 tbsp olive oil and butter (if you are not using the butter, just use a little more olive oil), over high heat. Keep the olive oil by the side of the stove, and add more when you feel the ingredients are sticking to the bottom of the pan.

Season the onion mixture with salt and pepper, and add about 3 tbsp of the minced mixed fresh herbs, and mix well. Lower heat to medium high, and add the eggplant. Mix well to ensure its covered with oil and onions. Add  balsamic vinegar, and mix to brown a little.

Add red pepper and mix well, and then a few minutes later, add carrots and mix well.

Add all the red wine and the tomato paste, mix well, and turn the heat to low. Add zucchini, mix well, and then add the raw tomatoes and mix well. Add the mushrooms and mix to combine all, keeping check that nothing is sticking and add olive oil if neccessary.

Measure out 2 cans of pomodoro tomatoes in juice into a large measuring cup and make up to 4 cups with wine or water if needed. Smash the tomatoes with a fork so they are roughly chopped, and add all at once to the pan.

Cover the sauce, and allow to begin to simmer and steam. Meanwhile, pit the prunes, and chop roughly. Add the prunes and brown sugar to the sauce and mix well.

Let the sauce simmer, covered, for approx 15 – 20 minutes, mixing every five to ten minutes to ensure it does not burn.

Uncover, mix very well, and let simmer for at least 45 minutes to a couple of hours, over low heat, or until reduced by half. Ensure you check the sauce every 15 minutes or so to ensure it does not burn. You can add more wine if you want a particularly deeply wine-ey sauce.

Taste for flavour and season with salt and pepper if needed, or even some more sugar, and add dried herbs. About five or ten minutes before finished, add the rest of the fresh herbs to let their scent permeate the sauce.

Once the sauce is to your liking, take off heat and decide if you want to keep it chunky (which is nice for some pastas, salsas, etc) or if you want to blend it smooth. I use an immersion blender here. If you do blend it please make sure it has cooled to at least lukewarm – hot splashing tomato sauce is a real pain!

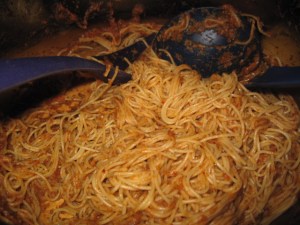
If you are using this as a pizza sauce as I will be, make sure you have at least one cook’s meal with about half a cup of sauce mixed with some angel hair pasta! Soul satisfying.

This freezes extremely well. I often freeze in an ice cube maker and then transfer to a zip loc bag. Alternatively, measure out by cupfuls into a sandwich ziploc bag and freeze flat. Keeps for up to 6 months.

Special thanks to AngelKitten for transcribing all the ingredients and keeping track of me!

Photos copyright Chan KY