Tag Archives: mushrooms

A Meal to Remember @ Nathalie’s Gourmet Studio

13 Dec

Sometimes a meal is a symphony of taste and texture and colour … and sometimes, its even more than that. A divine merging of friends and loved ones, family and comfort, intermingled with sublime food, cooked by an artist, with a sense of love and presence and drama. Last Friday night at Nathalie’s Gourmet Studio was like that – just pure joy. With Adi, Goddess, GoddessSpouse, AngelKitten, GoldenOro and Bubby, and MsTina… laughter flowed around us, wrapped us in warmth and happiness, and the food was a beautiful counterpoint to the joy in the room.

You cannot plan that kind of a night, you cant buy it or make it happen by force of will. It is an alchemical merging of all that is good and joyous. Thank you to Goddess + GoddessSpouse for hosting us. And thank you for Nathalie for welcoming us, yet again, with open arms and brilliant skill. We will be back next month! Meanwhile, feast on our memories 🙂

Joy

A potato galette with sauteed mushrooms, and a porcini foam. Simple, sensuous, lively flavours. Not too much, not too little. Just right to start with. This was the vegetarian choice and it made me happy.

A new take on duck liver with brioche – the brioche made into an apple tart tatin. A clever merging of two very French tastes.

Tuna Tartare with blini and chive cream… and a fresh green salad.

Snail napoleon – earthy, rich, beautifully presented. I tasted the accompanying sauces, and they were beautiful. Balanced, imbued with vegetable essence, gorgeous.

The vegetarian main course. Home made egg tagliatelle with green capsicum and a perfect parmesan porcini foam. Subtle and luxurious, elegant and beautiful. Incredibly satisfying.

The duck main course. According to those who ate it, it tasted truly of duck … gamey and wild and delicious. Served with a stunning hazelnut polenta and a blueberry stuffing. Clever and thoughtful all in one go.

Steak. Apparently, it was perfectly cooked. With a stuffed potato on the side. I like how this looks, the juxtaposition of the meat and the potato… Smart.

An intense caramel custard creme brulee – perfectly burnt crispy sugar crust, with a lime and thyme sorbet. What an interesting combination.

Trio of desserts – a pineapple foam, an incandescently good salted caramel macaroon, and a vanilla spoon biscuit, holding chocolate mousse, and a chocolate truffle. Mine!

Frozen chocolate mousse “gift” with a liquid river of raspberries running through it. So so so good. I could have buried myself in this plate and just whuffled.

A dramatic and architectural Mont Blanc – pureed chestnuts, whipped cream and crisp meringue. So beautiful!

Dried fruit croquant – crisp, caramelised, sticky, delectable.

Savoury Polenta Tart Tatin

3 Nov

Tart TatinOne of the things I love about reading great recipes is that they inspire me to create unique dishes of my own. For a long time now, I have been fascinated by tart tatin, the great French creation where you pour caramel into the bottom of a cake tin, layer over caramelised apples, and then top it all off with puff pastry. The pastry bakes at the top, becoming crispy and light, and the apples caramelise even further. When the tart is done, you flip it out of the cake pan, et voila! A perfectly crisp bottom, and sensuously caramelised apple.

I have always wanted to make a tart tatin that was savoury… but part of the trick is that sweet caramel sauce that you pour in first. How to make something savoury with that? And then… I read Yotam Ottolenghi’s recipe for a caramelised garlic tart – with goats cheese and puff pastry. I read the actual recipe for the caramelised garlic and realised that there is a sweet savoury caramelised sauce that coats those gorgeous garlic pieces. And then… I read a recipe for polenta with sauteed mushrooms. I do love mushrooms, and polenta is another obsession of mine. I fell asleep last night daydreaming of a perfect dish… and this morning, when I woke up, I knew what I needed to make a savoury polenta tart tatin.

I cant tell you how happy this makes me. Its like I have figured out some remarkable puzzle. It may have been made before (after all, in cooking, relatively little is new), but I have never read a recipe like this. I loved it from the moment it popped into my head, and I was determined to make it!

It took me more than 3 hours to make this today. Its a hell of a recipe, but … you could definitely do it in stages. Almost everything (even the polenta) can be made in advance and refrigerated until needed (though I would make the spinach mixture on the day). If you spend a day or two caramelising garlic, sauteeing some mushrooms and burnishing them with old thick balsamic, preparing some polenta, thickened with parmesan and butter … well, then this recipe would probably take you about 40 minutes from assembly to final stages of cooking.

And I am here to tell you… Its damn worth it! It is so good. Outrageously good. Celebration, birthday, vegetarian Thanksgiving, dinner party good. Its gorgeous and dramatic, and the layers of flavour are unbelievable. Fluffy yet creamy and cheesy polenta, with a crisp crust, is topped with creamy spinach, which in turn is topped with balsamic mushrooms and caramelised garlic. Its a beautiful tart, and very dramatic. If you want to add a bit of flair, you could probably decorate it with a few sliced cherry tomatoes stuffed strategically into place, but it really does not need it. This tart is a tour de force of flavours and textures … It is sublime, if I say so myself.

Feeds 6 – 8

Caramelised Garlic (from Yotam Ottolenghi’s Plenty)

  • 3 medium heads of garlic
  • 1 tbsp olive oil
  • 1 tsp balsamic vinegar
  • 220 ml (about 1 1/4 cup) water
  • 3/4 tbsp caster sugar
  • 1 tsp chopped rosemary
  • 1 tsp chopped thyme (I did not have any fresh thyme, so I used about 1/2 tsp dried herbes de Provence)
  • 1/4 tsp salt

Break the heads of garlic up, and peel the cloves. I realised I had many different sizes of garlic cloves, so I chopped the larger pieces in half to make them all approximately the same size.

Place the garlic cloves in a small saucepan and cover with water. Place over medium-high heat and bring to the boil. Lower heat so the water is simmering, and blanch the garlic for 3 minutes. Drain well.

Wipe out the saucepan (make sure you do this well – oil and water sputter badly), and place the olive oil in the saucepan. Over high heat, saute the garlic for 2 – 3 minutes. You want the garlic just to begin to brown around the edges.

Add the balsamic and the water (be careful, it will spit and spew at you as the water hits the hot oil), and bring to the boil. Simmer, stirring occasionally, for 10 minutes. Then add the sugar, rosemary, thyme and salt, and mix well. Simmer on medium heat for a further 10 – 20 minutes, or until most of the liquid has evaporated, and you have a thick  dark caramel sauce and deep dark soft garlic.

Take off heat and set aside. If you are only cooking the tart in the next day or so, transfer to a bowl or container, cover and refrigerate. Bring to room temperature before assembly.

Balsamic Mushrooms

  • 1 tbsp olive oil
  • 1/2 tbsp truffle oil (if you have it – if not, use olive oil or any other flavouring oil that you like)
  • About 8 medium to small portobello mushrooms (about 250 g – 1/2 lb) peeled and sliced thickly
  • About 3 – 4 Swiss brown mushrooms, peeled and sliced thickly
  • Salt and pepper
  • 1 tbsp balsamic vinegar
  • 2 tbsp butter

In a large non stick frying pan, heat the olive oil and truffle oil over medium high heat. Add all the portobello mushrooms, and stir well to combine, and to ensure that most of the mushrooms have been slicked with a little oil. Leave the mushrooms in the pan, not stirring, and allow them to brown and caramelise on their own. The heat and the olive oil will do the trick – you just have to NOT stir! Once you start smelling a wonderful mushroomy smell (about 3 – 5 minutes – possibly longer if your heat isnt that high), flip the mushrooms over. You should see that the bottom side is well browned.

Add the Swiss browns, mix again, and allow to saute, undisturbed for another few minutes. Salt and pepper well, stir, and then add the balsamic all at once. It will immediately begin to bubble and coat the mushrooms completely. Slice the butter directly over the mushrooms, and allow it to melt into the mixture. The butter will flavour the mushrooms as well as adding a bit of needed oil to the balsamic coating.

Taste, adjust seasonings, and once you are happy with the mushrooms (they should be slightly burnt, sticky, gooey, balsamic-y and intensely mushroom flavoured), tip out into a bowl and set aside. Transfer to a bowl or container if you are making the tart in a day or two, and refrigerate. Bring to room temperature before assembly.

Creamed spinach

  • 2 cups baby spinach, tightly packed
  • 2 heaping tbsp cream cheese
  • 1 tbsp cream
  • 1 egg
  • 1/4 tsp salt
  • Lots of black pepper
  • 1/2 cup (or more, depending on your cheesiness) grated cheddar – I used an organic white cheddar which was phenomenal here

Wash the baby spinach very well, and then roughly chop it. Add the spinach to a large non stick pan over medium heat. You still want a bit of the water to be clinging to the leaves – this will help it cook. Saute the spinach briefly – a minute or two will do it – until it turns dark green. Remove the spinach from the heat, and place it in a sieve to drain the liquid from it. Allow to cool a little.

In a small bowl, combine the cream cheese, cream and egg. Add the spinach (squeeze it with your hands before adding to the mix to make sure youve gotten rid of as much moisture as possible). Using an immersion blender (or you could transfer the lot to a blender or food processor), cream the spinach until it has completely integrated into the cream cheese mixture. Add salt and pepper, and mix well.

Add the grated cheddar, and mix well. Taste and adjust for seasoning. Set aside until ready to assemble the tart.

Cheesy Polenta

  • 2 cups water
  • 1/2 cup whole milk (low-fat will do, but its better with whole milk)
  • 1 cup polenta (cornmeal grits)
  • 1/2 cup mixed water and milk if you are making as below (optional)
  • 1/2 tsp salt
  • Loads of black pepper
  • 1/2 cup grated parmesan
  • 2 tbsp butter

Polenta is usually made in a saucepan, but I actually like the quickness and control I get from making it in a large, non stick, frying pan. You need a good spatula or wide flat wooden spoon.

Place a large non stick frying pan over medium heat and pour in the water and milk. Bring just to the boil, and once it boils, reduce the heat to a gentle simmer. Pour in the polenta in a steady stream, mixing constantly as you do so. This will ensure that the polenta is smooth and creamy and without lumps.

Keep stirring, the polenta should begin to thicken almost immediately. I usually use an almost scooping motion – circular, and right at the end, I scoop some polenta, and flip it over itself. Almost like folding egg whites gently into cake batter. Keep stirring and scooping for about 5 – 10 minutes. If the polenta gets too thick, add the water and milk mixture in gentle dribs and drabs.

Taste the polenta – it should be uniformly creamy. Any grittiness, and you need to continue cooking.

Once the polenta has reached a creamy consistency of thick oatmeal, and there is no grittiness, add the salt and tons of black pepper. Stir well and combine. Add the parmesan and butter, and combine well. Taste and adjust seasonings.

Set the polenta aside (in the pan if you like) until it comes to room temperature. The polenta will firm up quite a bit but this is fine. Refrigerate if you are not making the tart immediately, but bring to room temperature when you assemble.

Polenta Tart Tatin – Assembly

  • Caramelised Garlic
  • Balsamic Mushrooms
  • Creamed Spinach
  • Cheesy Polenta
  • 1/2 cup grated parmesan
  • Butter for the cake pan

Preheat the oven to 180C (350F), and prepare a 9 – 10 inch round cake tin. Butter the cake tin, and place a circle of grease proof wax paper in the bottom. Butter this as well.

Pour the syrup from the caramelised garlic, and cover the entire bottom of the cake tin with the sauce. Tilt to make sure you coat the wax paper completely. Arrange about half (or all if youre greedy – I like to keep some back for other uses!) of the garlic on the syrup, and arrange the balsamic mushrooms over the garlic. With the garlic and mushrooms, you will cover the entire bottom of the pan. Dont mix them up though, they should remain quite insular.

Pour over the creamed spinach, and use a spatula or knife to ensure that the spinach completely covers the garlic and mushrooms.

Bake the tart in the oven for about ten minutes, or until the spinach has firmed up and puffed a little – it will bronze a bit. Take out of the oven and allow to cool for about ten minutes or so.

Prepare the polenta. Sccop up a handful of polenta, and flatten it between your hands. It should be less than 1/2 inch thick. You will have a polenta patty – place this gently onto the baked spinach in the tin. Keep doing this until the spinach is completely covered. You can patch up the polenta if there are small holes or bits youve missed.

Grate the parmesan over the polenta, and bake again in the oven for about 20 minutes, or until the parmesan has burnished and become a gorgeous burnt mass on top of the polenta.

YumRemove from oven and allow to cool for about 5 to 10 minutes, in the pan, on a cake rack.

Run a sharp knife around the edges of the pan to make sure that nothing is sticking to the sides. Place a serving plate over the cake pan, and using oven gloves (as the pan may still be hot), flip the tart over in one smooth move. Remove the cake pan, and the wax paper, and adjust any bits of garlic or mushroom that may have fallen off.

Serve warm, at room temperature, or even cold the next day. Any which way, its mind-blowing-ly deeeeeee-licious!

Enjoy!

Kind-of-Ratatouille-a-la-Karo

14 Oct

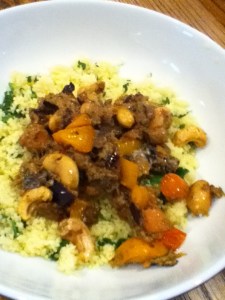
with Spinach Couscous!Tonight’s dinner may not be much to look at but it sure was delicious! And it was an intersection of different food thoughts that have been running through my head in the last few weeks. Inspired by so many things – my friend Karo’s post about the grated courgettes (zucchini), the Medjool dates at Per Se, and Karo’s link to Ottolenghi’s website.

Dinner needed to be fast and yet different tonight. Suddenly, autumn is upon us. I think we had our last 80 degree day a few days back, and now the crisp chill of cold is in the air around us. So dinner needed to be a response to that – warm and hearty, yet with echoes of sunshiney places. I didnt really think I wanted to do a ratatouille (though that often speaks of sunshine and warmth), mainly because I didnt have enough tomatoes. And I wanted to do the zucchini grated, and see what happened.

I started cooking with the thought that I was going to grate everything – but it didnt work out that way. Im pretty glad about that because I think I would have had a dark brown looking sludge by the end of it! Some stuff was grated, some stayed basically intact. You could serve this kind-of-ratatouille with french bread, rice, pasta – or as I did, with spinach couscous for a lush hint of colour and raw spinach flavour.

This is an example of my favourite free-form cooking – starting with a few ideas, and some beautiful ingredients, and seeing what happens. The end result was pretty damn tasty, completely vegan, rich and complex. The spice choices leant a hint of sunshine to the dark cold night, and we all went to bed happy and satisfied. All is right with the world 🙂

Serves 4

  • 1 tbsp plus more as needed olive oil
  • 1 small onion grated (mostly liquid)
  • 2 cloves garlic (or more as is your preference), grated
  • 1 small eggplant (aubergine) – diced
  • 1/2 tsp paprika
  • 1/2 tsp oregano
  • 1/2 tsp red pepper flakes
  • Pinch (or more) cinnamon
  • Salt and pepper to taste
  • 2 portobello mushrooms, peeled and minced
  • 1 zucchini (courgette) grated
  • 1 Medjool date, pitted and chopped very small
  • 1 cup carrots, peeled and chopped into rounds
  • 1/2 orange sweet pepper
  • 1/2 cup roughly chopped tomatoes (I used baby heirloom)
  • 1/2 cup or so water
  • 1/2 cup cashew nuts (toasted)
  • Spinach couscous

First off, toast your cashew nuts if they are raw. Use a non stick frying pan, dont add any oil, and toast over a medium fire until lightly browned. Pour off into a small bowl and set aside.

Add about 1 tablespoon olive oil to the frying pan. You might need to add more oil as you go through the various ingredients, but try to be miserly with the oil – you dont want an overly greasy end dish. Instead, use more or less heat (and eventually water) to control the cooking process.

Grate a small onion directly into the pan. The onion I grated ended up being quite watery – this is fine. If you have lovely little grated shards of onion, this is good too. Saute for a few minutes until the onion is glossy and soft. Grate in the garlic and stir to combine. Lower the heat and let the onion and garlic get acquainted.

While the onion and garlic are bubbling together gently, dice the eggplant into small cubes, keeping the skin intact. Bring the heat up a little (and add a touch of olive oil if you think it needs it), and add all the eggplant, mixing well.

Season the eggplant and onion mixture with the paprika, oregano, pepper, cinnamon and salt and pepper. Taste and adjust if needed.

Cook for about 5 minutes on high-ish heat. You want to burn the eggplant a little bit, and allow the onions to melt into the mix. When you start smelling that wonderful eggplant roasted burnt scent (its unmistakable) add the next part.

Add the mushrooms and mix extremely well. The mushrooms will let go of their liquid – encourage this by mixing thoroughly.

Lower the heat to medium, and let everything simmer together while you grate the zucchini. Squeeze most of the liquid out of the grated zucchini, and add to the pan. Sautee together, and mix very well. The zucchini will act as a paste and start to incorporate everything together. Taste and adjust for seasoning. add the minced date, and mix together. Allow everything to saute on medium heat for a few minutes.

Add carrots, sweet pepper and tomatoes to the pan, bring the heat to high, and stir to combine. As soon as everything starts to pop and sizzle, add the water, and allow the mixture to bubble. Taste for seasoning and adjust.

Add the cashews, and taste everything to make sure its a singular whole. Serve over spinach couscous or a grain of your choice!


Gnocchi with Gorgonzola, Mushrooms and Tomatoes

8 Oct

It was cold and rainy and wet a few days ago. We needed a hot comforting meal so I decided to make a sauce for the potato gnocchi I had bought at Trader Joe’s. Gnocchi are wonderful springy little pillows of potato pasta – easy to make and very filling and delicious. Theyre great for a cold day because they really demand a hearty strong sauce as an accompaniment.

You can make them at home (and they really are quick and easy to make) but if youre in a rush, store bought gnocchi are quite good. Just follow the instructions on the packet – boil in salted olive oiled water until the gnocchi pop up and start floating. Taste, and if theyre still a bit undercooked, continue boiling for a minute or so. Remember that you will put the gnocchi in the sauce and heat them up so its OK if theyre a little undercooked.

Drain and set aside until youre ready with the sauce. It should take about ten minutes to put the sauce together, so make sure the gnocchi are well oiled or prepare them at the same time youre making the sauce – otherwise, if you ask them to sit and wait, they might start sticking together out of rebellion.

I started with a bit of olive oil and truffle oil, five or six white button mushrooms and a portobello mushroom. Sauteed the mushrooms in the oil until they had given off their liquid and started to brown a bit. Seasoned with dried basil, salt and pepper, and then a whooosh of aged balsamic vinegar. There is something about mushrooms and balsamic that is just beyond delicious – its the perfect pairing.

Once the balsamic had been absorbed into the mushrooms, and they looked all glistening and sticky gorgeous, I added about a cup of roughly chopped baby heirloom tomatoes. The tomatoes gave off a lot of liquid, and I squished them into the pan to encourage them. I added a teaspoon of whole grain dijon mustard, and a few tablespoons of sour cream. About half a cup of gorgonzola (mainly the white bits because I didnt want it to start tasting too blue). Let the mixture bubble together, tasted and adjusted for seasoning.

Tipped the cooked gnocchi into the sauce, and let it heat up – the gnocchi plumped up even more and absorbed some of the delicious pan juices.

Served 4 and was comfy as a loving hug. Definitely not haute cuisine, but something fast and infinitely loving.

Spinach Croquettes with Tomato Garlic Mushroom Sauce

18 Sep

With Tomato Garlic Mushroom SauceThe Tiny Queen Z (M’s baby) was having a tough day today. She is teething AND has a cold! Poor thing! But it also meant that my sister was completely exhausted, having been up every hour on the hour with the baby last night, and having to be with her all day today. I wanted to make dinner that would really feel like an indulgence, but be easy to eat, quick and extremely tasty. First I thought of a simple tomato and garlic pasta, but pasta can sometimes be too heavy. We have huge amounts of spinach in the fridge (and its so good for energy and strength) – so I thought spinach croquettes!

These arent the “traditional” croquette, made with mashed potato and rolled in breadcrumbs. To be honest, thats quite an involved recipe, and I wanted to get dinner on the table in under an hour. This actually took about 30 minutes all told, and it was really good. Simple, bold flavours, hot and comforting, the indulgence of fried foods, and yet the healthiness of spinach, mushrooms and tomatoes – simply cooked, without too much fuss.

This is easily convertible to a vegan dish. In the croquettes, substitute almond meal or ground almonds for the parmesan (they give the same wonderfully nutty hit) and a few tablespoons of soy milk to bring it all together instead of the eggs. In the sauce, you could either leave the vegetables clean, or you could substitute wine or soy or coconut milk for the sour cream. Any which way, this is a wonderful meal — it makes people feel comforted and happy. We needed that today!

Serves 4 people. Makes approximately 10 croquettes / patties.

Spinach Croquettes

  • 2 tbsp olive oil (plus a drizzle of truffle oil or roasted sesame oil if you have it for depth of flavour – but not neccessary) plus more for the frying
  • 1 small onion, diced
  • 1/2 tsp salt
  • 1/2 tsp pepper
  • 1 tsp dried basil
  • 1 tbsp balsamic vinegar or red wine or vegetable stock
  • 4 – 6 cups raw baby spinach, rinsed, and then chopped fine
  • 1 1/2 cups bread crumbs (I used Panko crumbs, but you can really use anything – whole wheat would be lovely, as would sour dough)
  • 2 eggs (vegan substitution: 2 – 4 tbsp soy milk or coconut milk)
  • 1/2 cup grated parmesan (vegan substitution: ground almonds)

In a medium saucepan, over medium high heat, saute the onion until it is soft and glossy, about 5 minutes. Season with salt, pepper and dried basil, and mix to combine. Add the balsamic or wine to the onions, and mix well. This will just soften the onions a little bit more, and add even more flavour to the dish.

Add the baby spinach in 2 batches, stirring until the spinach is just wilted, a few minutes. There will be some liquid in the bottom of the pan – this is great! You want it 🙂

Once all the spinach has been added, and lightly cooked, transfer the entire contents of the pan to a heatproof bowl.

Tip in the breadcrumbs and eggs and stir very gently just to combine. The mixture should come together easily. If not, add water, a tablespoon at a time. You want the mixture to bind together, but lightly – you dont want it mushy and wet.

Add the parmesan or ground almonds and mix lightly.

Put in the fridge to firm up while you make the sauce.

Once you are ready to eat (about 10 – 15 minutes before hand), preheat your oven to 100C (200F), and place a pan in the oven. Sprinkle a medium to large non stick frying pan with a touch of olive oil and place on medium heat. Make palm sized patties of the spinach mixture, and saute for about 4 – 5 minutes on the first side. You should be able to get 3 – 4 croquettes in a frying pan.

Flip the croquettes and saute for about 3 – 4 minutes on the second side. As you make the croquettes in batches, transfer the cooked croquettes to the pan in the oven to keep warm. Otherwise, place on serving platter, and cover with a dishtowel or paper napkin.

Tomato Garlic Mushroom Sauce

This is wonderful with the spinach croquettes. It is wonderfully tomato-ey, sweet and slightly gooey. The mushrooms give it depth of flavour too … I use this sauce on everything – on toasted bread for bruschetta, with pasta, as a filling for a decadent omelette. Its a great sauce to have on hand and it gets put together in a matter of minutes.

  • 1 1/2  tbsp olive oil
  • 5 – 7 garlic cloves, sliced
  • 1 cup mushrooms (I used portabello), peeled and sliced thinly
  • Salt and pepper to taste
  • 1 – 2 cups baby tomatoes (I used a mix of baby heirloom tomatoes which were amazing!), chopped
  • 2 tbsp sour cream or soy milk (optional)
  • Pinch of sugar (optional)

In a small frying pan, over medium low heat, saute the sliced garlic cloves in the olive oil. Let the garlic saute for about 5 minutes or so. You want it to get soft and slightly sticky, and lose its bitterness. This extended cooking time really allows the garlic flavours to bloom and soften. Its critical. Be patient. Everything else goes quite quickly.

Bring up the heat, and add the mushrooms in two batches. You want to encourage the mushrooms to lose their liquid, and just start to brown a little on the edges. They will go slightly caramel and sticky in the pan. They wont do this if you put too many in at the same time, which is why you are doing this in two batches. This should be the work of minutes, and watch carefully – you dont want the mushrooms to burn, but rather to brown.

Once the mushrooms have browned, season with salt and pepper to taste. Add the baby tomatoes all at once. They will immediately start to melt in the high heat, and their liquid will bubble and start forming a lovely sauce. Mix everything together well and taste. Add sour cream or soy milk if you want a creamier sauce, and add a tiny pinch of sugar if the tomatoes are not very sweet, to bring out their tomato essence.

Serve the sauce over the spinach croquettes. YUMMY.

Mixed Vegetable Phyllo

27 Aug

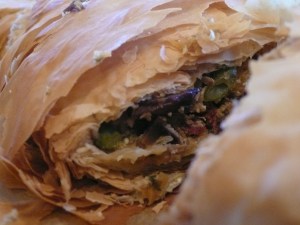
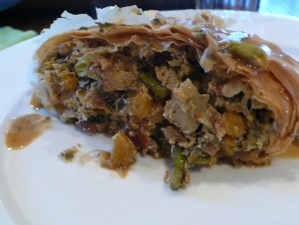
With loads of mixed vegetables!Oh what a day! Blissed out baby mode, and when it came time to make dinner, I realised we had nothing in the fridge but bits and pieces – a handful of spinach, a few artichoke hearts, quarter of a butternut. Some days, you dont have one thing to work with, but many many little odds and ends of things. On days like these, I like to make something that will incorporate all the left over bits – a pie, tart, pasta sauce, even a bread pudding …

Tomorrow we go to Whole Foods once again, but tonight was incorporate all the remaining handfuls and try and make something yummy night. This is one reason why I love phyllo dough. I am not a master Greekie cook (like my beloved Osisters – their spanakopita is phenomenal!) but I do like its ease of use, its pliability and its wonderful presentation. I dont know why, but people feel very manja-ed (Malaysian word – means spoiledbelovedcaredforlookedafter all rolled into one!) when you present them with a baked good – pies, tarts, pastries of all kinds. People love them, and the presence of a crust seems to elevate a rather normal meal into something special. On a night like tonight, phyllo dough enabled me to incorporate lots of things quickly and seamlessly… and delectably!

I would never ever try and make my own phyllo dough. Its waaaaaay too delicate and intricate a process. Rather, I purchase the best phyllo I can find, and am thankful to those who take (almost) all the work out of it for me! There are a few general rules for working with phyllo. Use butter if you want a rich tart, and use olive oil if you want a slightly lighter version. Set up everything you need before you even begin to unwrap the phyllo because as soon as you do, you need to work quickly and efficiently. Phyllo will dry out or start to melt and stick together, so know what you want to do, and do it fast. And always try and work on grease proof or wax paper. This allows you to preheat your pan (I use a jelly roll or large flat cookie pan for this free form recipe) in the oven, and then slide your creation onto it, still on the wax paper. The bottom of the phyllo pie will be crisped because of the immediate contact with hot pan, and you wont get that soggy bottom which generally occurs when you bake the phyllo on a cold pan. And finally, try and drain as much of the moisture out of the filling as you can. You need some moisture to bind the vegetables, but dont put a very wet filling into the pie – it will leak and get soggy and be yucky. If you are making a vegan version, just boil all the juices down into a thickened sauce and use it in place of the ricotta and egg.

This will serve 6 hungry – 8 people

I am going to tell you what I put into this pie, but really, use up what you’ve got in the fridge – from tomatoes and carrots to spinach and pine nuts. You will need about 4 – 6 cups of cooked filling in total.

For the filling

  • 2 tbsp olive oil
  • 1/2 large Vidalia onion, minced
  • 3 – 4 garlic cloves, minced fine
  • Small handful (may be 1/4 cup) sun dried tomatoes
  • Salt and pepper
  • 1/2 – 1 tsp oregano
  • 1/2 tsp paprika
  • 1/4 – 1/2 butternut
  • 1 + 1 cup boiling water
  • 1 cup mixed dried mushrooms – I used chanterelles, porcini and shiitake
  • Pinch of cinnamon (optional)
  • 1/2 cup chopped spinach
  • 1/2 cup chopped french beans
  • 1 cup chopped asparagus
  • 1/2 cup artichoke hearts
  • 3 heaping tbsp ricotta (optional)
  • 2 eggs (optional)
  • 1/4 cup crumbled feta (optional) – use toasted pine nuts instead if you are a vegan!

In a large, non stick frying pan, heat the olive oil and saute the onions, garlic and sun dried tomatoes together until the onions are softened and glossy, and have browned a little.

Add salt, pepper, oregano and paprika, and stir well.

Chop the butternut quite fine – you want little cubes about the size of the nail on your pinkie. You want it to have body, but you want the butternut to cook quickly. Add to the pan, and saute for a few minutes, stirring constantly. Add 1 cup of hot water, and allow to bubble and cook for a while on medium high heat.

In a separate small bowl, immerse the dried mushrooms in another cup of boiling water. Leave for at least 10 minutes, whilst the butternut is bubbling away.

Once the mushrooms have softened, take them out of the water, and chop roughly, and add to the pan. Most of the water from cooking the butternut should have boiled away. Add about half a cup of the mushroom water, and allow to cook for a further five minutes or so. Taste and adjust seasoning. Sometimes I add a little cinnamon for depth of flavour, or more salt, pepper and spices.

Turn off the heat (you should still have a significant amount of liquid in the pan), and transfer the contents of the pan to a sieve set over a small bowl. I usually use the mushroom bowl, cleaned out! Let the liquid drip through, and using your spatula or spoon, press down on the onion-butternut-mushroom mixture so that most of the liquid drains through. Reserve the cooking liquid, either to use as the base of a sauce for the pie, or as the binding liquid if you are baking for vegans.

Transfer the mixture back to the pan, and over medium heat, add the spinach, beans, asparagus and artichoke hearts. Saute briefly until completely combined, but make sure that the greenery does not cook too long – you want it to retain its colour and taste!

Tumble the vegetable mixture into a bowl, and set aside for at least ten minutes to allow it to cool.

If you are cooking vegan, transfer the cooking liquid to the pan, and boil it down until reduced by at least half. It needs to be thick and syrupy. You could add some wine to this if you like, though I didnt have any available. Add a few tablespoons to the vegetable mixture to bind it properly, and give it some body.

Otherwise, beat together the ricotta, eggs and feta, and mix gently through the vegetable mixture. Taste and adjust for seasoning, and set aside.

Phyllo Assembly

  • 7 – 9 large phyllo leaves
  • 1/4 cup olive oil and pastry brush
  • 1/4 cup crumbled feta or toasted pine nuts

Preheat the oven to 200 C and put a jelly roll or cookie pan into the oven to preheat.

Lay out your work surface. On a clean tea towel or a strip of waxed paper, unroll your phyllo dough. Have a small bowl with olive oil and a pastry brush handy. Also have a small bowl containing your feta, and your bowl of prepared vegetables.

Tear a strip of waxed paper long enough to fit your baking pan. Lay a phyllo sheet on the paper (my phyllo dough covered almost the entire paper), and gently brush with a bit of olive oil. Continue to layer leaves of phyllo dough, brushing each layer with olive oil. Its okay if the phyllo tears – just patch it up with olive oil, and keep going. You want to work quickly but surely, and dont worry about covering every inch of the pastry with olive oil – you really just want to give it a gentle brushing. I used 7 layers, but you can use as many as you want.

Sprinkle your crumbled feta onto the dough, going straight down lengthways the middle of the dough. Leave a 2 inch space on either side.

Spoon your vegetable filling over the feta, mounding it, and leaving space on either side. You will now have what looks like a log of vegetables centred on your phyllo dough.

To complete the pie, fold over both short sides, like an envelope, and then fold the longer ends over each other. Using the waxed paper, flip the phyllo log over on itself, so that the seam is bottom side down. Centre the phyllo log on the waxed paper. Brush the top with olive oil.

Using oven mits, take the hot baking pan out of the oven. Using the waxed paper, transfer the paper and the phyllo log onto the hot pan, and put back into the oven.

Bake for about 25 – 30 minutes, or until the phyllo is browned and crispy.

Let sit for a few minutes once out of the oven before slicing and serving.

With Sauce!Sauce

If you are not baking a vegan version of this, use the reserved cooking liquid as the basis for a lovely sauce to serve with the phyllo pie. I boiled the cooking liquid until slightly reduced, and then lowered the heat and added a few tablespoons of creme fraiche, a tablespoon of pesto sauce, some salt and pepper, and a few drops of balsamic. I whisked everything together, and served in a little jug to pour over. It was delicious!

Veggie Burger

15 Jul

Veggie Burger HeavenI was having tea today with Goddessmoments and her Spouse. As we were chatting about food, he said something that made me think about what I miss most about being a carnivore. I think its a great juicy burger, with melted cheddar on top, in a beautiful bun and may be some slices of avo or tomato. Pure heaven. All those different tastes and textures, the satisfaction of a handheld meal, juices dripping everywhere. But I dont eat meat, and so I wont ever have that kind of burger again. But, this veggie burger more than makes up for any sense of loss I might have!

This is scrummy yummy. It can be vegan if you leave out the cheese (or use soy cheese) and its so full of wonderful, healthy vegetables and grains. I use quinoa in this recipe – the wonder grain! It has the most complete proteins of any grain, and it is full of vitamins and minerals – from iron to vitamin e to amino acids. And it tastes wonderful too! Nutty and creamy at the same time.Its a really useful tool for a vegan diet because it adds protein from a surprising source, and its extremely well tolerated, even by those who cannot eat wheat. I love it. I even use it in place of couscous and rice on occasion.

While your quinoa is cooking, you roast a few aubergines, garlic and some nuts. Fry up some mushrooms. I usually throw everything in one large bowl, and mince with my immersion blender (oh how I love thee, let me count the ways!). It comes out tasting really “meaty” in a good way, and its incredibly satisfying. Because everything is cooked or prepped before being formed into patties, the final fry up is really to create a lovely burnt sticky caramelised crust. You could probably do this in the oven as well, though I have never tried. These freeze really well, by the way. Layer in greaseproof paper, and pack away in a plastic container, and use within 6 months.

For about 8 – 10 burger patties, you will need:

  • 1 cup quinoa
  • 1 1/2 cup water plus extra to soak
  • salt
  • 5 baby aubergines (or 1 medium – 1/2 large), sliced in half
  • 1 head garlic
  • Olive oil
  • 1/2 cup raw cashew nuts
  • 1/3 cup raw sunflower seeds
  • 1/3 cup sesame seeds
  • 1/2 cup grated carrot
  • Small packet shiitake mushrooms, de-stemmed, and sliced
  • 6 – 7 medium portobello mushrooms (250 g packet), peeled and thinly sliced
  • 1 tsp Italian mixed herbs (or herbes de Provence or any other herb that you like – basil, rosemary, thyme)
  • truffle oil (optional)
  • balsamic vinegar
  • 1 – 2 tbsp tomato paste
  • 1 tbsp Dijon mustard
  • 1/4 – 1/2 cup parmesan or pecorino cheese, grated
  • Handful of fresh herbs, minced fine (optional – use what you like – basil, rosemary, marjoram, thyme, parsley, mint even)
  • Soy (optional to taste)
  • pepper

To serve, you will need hamburger buns, cheese (optional), lettuce, tomato, avocado, onion (your choice of any or all or none!), some mayo, ketchup, mustard, pickle… you get the drift!

Preheat your oven to about 220C.

First start off by soaking the quinoa. In a medium saucepan, cover the quinoa with water, and let stand for 15 minutes or so. This softens the grain, and also encourages the hard outer casing to split. A good thing!

Meanwhile, split your baby aubergines (or slice your medium/large one), and arrange, skin side down, on a baking tin that has been lined with baking paper. Slice the top of a head of garlic, and place on tin. Lightly oil and salt the aubergines and garlic and pop in the oven for 15 minutes. About 3 – 4 minutes before they are done, flip them over, and sprinkle the cashew nuts onto the baking tin. You want the cashew nuts to toast lightly, but not really to burn.

When your quinoa has stood for 15 minutes, drain, put back into saucepan, and add 1 1/2 cups of water, and a bit of salt. Cover the pan, and bring to the boil over high heat, and then lower heat and simmer the quinoa, covered, for about 15 minutes. You will know when its done when most of the water has boiled off, and the quinoa has fluffed up and doubled in size. Take off heat, and leave covered for at least five minutes.

Once your aubergines, garlic and cashews have been taken out of the oven, leave to cool for a few minutes. Meanwhile, add sunflower and sesame seeds to a large mixing bowl, and grate in the carrot. Add the cooled aubergines, the garlic cloves (pop them out of their papery casing), and the cashew nuts.

Go back to your quinoa, fluff it up a bit, and measure out 1 1/2 – 2 cups. If there is any left over, it freezes well and is a wonderful addition to any soup. Add the measured quinoa to the large mixing bowl.

Prepare your mushrooms. Pour a little olive oil into a medium – large frying pan, and add the shiitake mushrooms. I was taught that shiitake mushrooms need quite a while to cook. You need to slice them thinly (I also de-stem them) and leave them over low heat to brown around the edges. They will melt, and get soft, and reduce in size. Dont mix them in the pan too much, just let the heat and the oil and the mushrooms do what they know how to do. It should take about 10 minutes or so.

Once the shiitakes have been well browned, add the portobello mushrooms (still on low heat), and stir to combine. If you want, sprinkle a little truffle oil over, and let cook for about 5 minutes or so, stirring every now and then. Add some balsamic vinegar, the tomato paste and Dijon mustard, and stir to combine. The portobellos should have browned a little and reduced in size. Add the mushrooms to the mixing bowl.

Grate the cheese into the bowl if you are using.

With your immersion blender, process everything in the mixing bowl. Do it in short sharp bursts because you want to make sure you combine and chop most everything very fine without pureeing it into complete oblivion. You can use a food processor if you like. Again, short sharp bursts.

Once everything has been combined to your liking, taste. Season with salt and pepper if needed. Add the minced herbs, if you like. I often add some soy sauce for deeper darker flavour.

Refrigerate for at least 30 minutes up to 2 hours.

About fifteen to twenty minutes before you are ready to eat, heat a little olive oil in a shallow non stick frying pan over low heat. Take the burger mix out of the fridge, and form thin (about half an inch to an inch maximum) patties with your hands. Fry up to three patties at a time, flipping only once or twice. It should take you about 10 – 15 minutes to get a glistening dark brown exterior. You wont need much oil. A few minutes before you are serving, flip a final time and slice some old mature cheddar (or not) over the burger, and let it melt a bit.

Toast your hamburger buns, add the fixins – mayo, ketchup, mustard, fresh veg. Eat with your hands, and mop up any fallen bits and juices with your bread. Its that good.

Vegetarian Chili + Tacos

11 Jul

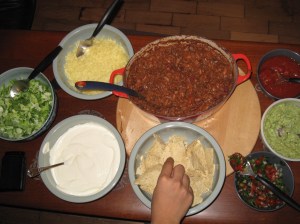
Taco DinnerThis is a meal for a celebration. A birthday, a party, a World Cup final. Or even just because. Its so delicious – and its good for you too! No cream or butter, and lots of fresh vegetables. You can make it vegan by cutting out the sour cream and cheese sides (or finding wonderful alternatives – soy cheese is surprisingly tasty). It looks lush and bountiful, and making it is really the work of one afternoon. There are lots of fiddly bits, and I admit, I dont make my own tacos, and I supplement my salsa by purchasing a good branded one (I used Paul Newman’s peach salsa this evening). The heat is also up to you. I give measurements for a medium spicy chili, but really do what feels natural to you.

I also use dried pinto beans. Why? Well, in part because I am stubborn, and Ive always made it that way. But also because even with an overnight soaking, they need at least 3 – 4 hours to cook. This forces you to cook the chili for long enough so that it really becomes thick and luscious, and for all the flavours to meld.

Feel free to halve this recipe, but really, its a meal for a big group of people!

Serves 8 – 12

Vegetarian Chili

  • 500 g pinto beans
  • 3 – 4 tbsp olive oil
  • 1 medium onion minced
  • 7 cloves of garlic, sliced
  • 2 stalks of celery, chopped
  • 2 carrots, chopped
  • 4 large portobello mushrooms, peeled and chopped
  • 1 red pepper, deseeded and chopped
  • 1 – 2 red chilis, deseeded and chopped
  • 1 bay leaf
  • 1 tsp dry basil
  • 1/8 tsp cinnamon
  • 1/2 tsp mixed herbs
  • 1 tsp crushed chili pepper flakes
  • 1 tsp cayenne
  • 1/2 tsp coriander
  • 1 tsp cumin
  • 1 tsp oregano
  • 1/4 tsp smoked hot paprika
  • Salt and pepper
  • 250 g can white beans
  • 250 g lentils
  • 250 g can kidney beans
  • 500 g can pomodoro tomatoes in their own sauce
  • 1 – 2 c fresh tomatoes
  • 1 tbsp mustard
  • 1 tbsp cocoa powder
  • 1 tsp sugar
  • 1/2 cup red wine
  • handful of dried chanterelle and portobello mushrooms reconstituted in hot water for 15 minutes
  • juice of 3 small limes
  • Handful of Italian parsley (or fresh coriander if you really must)

In a saucepan or heatproof bowl, rinse and sort the pinto beans. Make sure there are no grit or stones in the beans – a nasty bite of food if there ever was. Cover with water and leave overnight.

The next day, about 4 – 6 hours before you want to eat, in a large, heavy pan (I use a dutch oven or heavy bottomed 5 quart stock pan), over medium low heat, heat oil and soften onions and garlic. Saute until glossy, and then add the celery, carrots, mushrooms, pepper and chilis, mixing well after each addition. Cook for about 3 – 5 minutes until the mixture has softened and let go of some of its liquid.

Add the bay leaf, basil, cinnamon, herbs, pepper flakes, cayenne, coriander, cumin, oregano, and smoked hot paprika, and mix very very well. Season with salt and pepper.

Add about 3/4 of the pinto beans (you can freeze the rest and use in a soup or stock), the white beans, lentils, and kidney beans, mixing well after each addition. Add the pomodoro tomatoes and their liquid and stir to combine. Cover and let simmer over low heat for about 15 minutes, stirring every five minutes or so.

After about 15 minutes, uncover the pan. It will be very liquid. Add the fresh tomatoes, the mustard, cocoa powder, sugar, and red wine. Chop the dried mushrooms fine, and add to the stew, along with the juice of 3 small limes. Cook, over very low heat, for at least 3 hours and up to 6 if you want, stirring every 10 – 15 minutes so it doesnt burn on the bottom. The chili will go from liquid to a very thick savoury stew. Taste for spice and salt and pepper, and adjust to your liking.

Just before serving, sprinkle over some chopped fresh parsley. If you like fresh coriander (I hate it), please feel free to substitute!

Tomato Salsa

I dont add any spice to this salsa because I think it would interfere with the chili and the bought salsas I am serving. However, if this is the only salsa youre serving, feel free to add 1 – 2 chilis, chopped fine.

  • 1 – 2 cups baby roma tomatoes (or 2 – 3 large juicy tomatoes)
  • 1/4 – 1/2 yellow onion, minced
  • Salt and pepper
  • 1/4 – 1/4 cup mixed fresh basil and Italian parsley, chopped
  • Juice of 4 – 5 small limes

Chop the tomatoes in a small dice. Add the minced onions, and salt and pepper, and mix well. Chop the basil and Italian parsley, and add and mix well. Juice 4 – 5 small limes, and add this liquid to the salsa. Mix, cover and store in the fridge until serving time.

Guacamole

I am a purist. I like guacamole simple – as many avocados as I can afford, mashed with a bit of salt and pepper and lime. Unbelievably delicious.

  • 4 ripe avocados (dark skinned)
  • Salt and pepper
  • Juice of 5 small limes
  • 1 avocado pit

Cut your avocados in half lengthwise, using the pit as a guide for your knife. Using a spoon, carve out chunks of avocado into a pretty serving dish. Make sure you scrape out all the beautiful dark green flesh that is right next to the peel.

Mash the avocado with a fork until it is a smooth paste. Add salt and pepper to taste, and the juice of 5 small limes. You wont taste the limes in the finished guacamole, just a really intense avocado flavour.

Pop the avocado pit into the serving bowl to ensure that the avocado does not brown, and store, covered, in the fridge until time to serve.

To serve

To serve this feast, you will need:

  • White and yellow corn tacos, heated briefly in the oven (figure 3 taco shells per person, or 2 if you add the wraps)
  • Soft burrito wraps, warmed briefly in the oven
  • Vegetarian chili
  • Tomato Salsa
  • Store bought salsa as an addition, refrigerated
  • Guacamole
  • Shredded lettuce (I use a combo of lettuce, baby spinach and parsley)
  • Sour cream
  • Shredded cheddar or jack cheese

Arrange on pretty serving platters, and let your guests make their own! So much fun!

All photos copyright Chan KY

Hand: Ezril

Chicago Deep Dish Pizza

10 Jul

Mushroom PizzaOh my goodness, this is superb. It elevates pizza (which I think is pretty high on the totem pole anyway) to sublime heights. Its got a golden, nutty crust, oozing cheese, and superb toppings. I make two lots of the crust, and set out two different pizzas – a divine mushroom and onion, and a blue cheese, spinach and onion. Aiyoh. Heaven. Just about my favourite dinner, and I dont know why I make it so rarely. Its pretty easy with a bit of forward planning. You need to have certain ingredients at the ready: the tomato sauce (I use my own tomato sauce recipe but you could just reduce some onions, garlic and tomatoes with oregano); a couple of toppings – I used sauteed spinach (with just salt and pepper), caramelised onions, and sauteed mushrooms; cheese – a mix of mozzarella and parmesan is good; and your dough. Once you have everything set, making and baking the pizzas is a matter of half an hour.

The dough is adapted from the Frog Commissary Cookbook… my favourite cookbook ever. Its very difficult to get durum wheat here in Malaysia, so I used very high protein bread flour. Also, its difficult to get semolina here (which is the rough version of durum wheat) so I decided I wanted a corn textured dough – I used polenta and fine ground cornmeal. Adjusting is the key – but you have to know what to replace and where. This gives you a nutty chewy delicious crust that holds its own against whatever you throw at it. Make sure to prep the dough at least 2 hours before you want to begin cooking.

Dough

For each pizza you will need:

  • 1 1/4 oz packet instant yeast (here in Malaysia, they sell 11g packets – you will need about 2/3rds of this)
  • 1 1/3 cups warm water
  • 3/4 cup polenta
  • 1/2 cup farina
  • 2 1/2 cups high protein bread flour
  • 1 tsp sugar
  • 1 tsp salt
  • 1/3 cup olive oil

Dissolve the instant yeast in the warm water, and set aside for five minutes or so.

Mix all flours with sugar and salt. Make a well in the centre, and pour the warm yeast and water, and the olive oil into the flours and mix well with your hands. You will have a soft dough. Knead a few times in your bowl. Make a ball, cover with a clean cloth and leave for at least half an hour to an hour to rise. Punch down, and use immediately, or refrigerate for up to 24 hours, and punch down and knead before use.

Assembly

For each pie you will need:

  • 14 inch long rectangle baking pan
  • A little oil
  • A little polenta
  • Dough
  • Cheese – a mix of mozzarella and parmesan – about 1 – 1 1/2 cups per pie
  • Tomato sauce – about 1/2 – 3/4 cup per pie
  • Fillings

Preheat oven to 200 C. Oil pan with a little olive oil and sprinkle polenta over.

Roll put the dough – thinner in the centre, and thicker on the sides, and transfer to the baking pan. Use your fingers to push and pull and prod the dough so that it covers the entire pan, going up the sides. Make sure that it is thicker at the edges, and thinner at the bottom of the pan.

Sprinkle about 2/3rds of the cheese along the bottom of the pie. Cover completely with tomato sauce. Spread the toppings over the pie.

I made two pies. The first was with caramelised onions (about 1/2 cup) and sauteed mushrooms (about 2 cups). You need to saute or cook all the vegetables before adding to the pie because you do not want the vegetables to lose their water during baking. You will need to saute the mushrooms until they let go of their liquid before you add them to the pie. The second pizza was with sauteed spinach and caramelised onions, with a little blue cheese added to the cheese topping mix at the end.

Spinach PizzaPut the pie in the oven for approximately 20 minutes, or until you see the edges begin to become golden brown. Take the pizza out of the oven, and sprinkle with the rest of the cheese. Let brown in the oven for a further 5 – 10 minutes. Allow to rest for at least 5 minutes once out of the oven. This is also wonderful cold, and makes a fantastic picnic!

All photographs copyright Chan KY

My Tomato Sauce

5 Jul

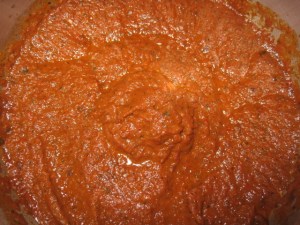
For pasta, for pizza, for salsa… for just about anything. When I need a pasta sauce that is delectable, this is the one I go to. Its been “developed” over more than 20 years of cooking tomato sauce. I have friends who remember me cooking a version of this sauce when I was 14 years old! Im almost 40 now 😉  Its ingredients are malleable but there are some broad rules that I usually stick to:

  • Keep a base of onions and loads of garlic
  • Always use a mix of tomatoes – I use at least 2 types of fresh tomatoes, canned pomodoro, and tomato paste. This ensures a really deep level of tomato flavour. Sun dried tomatoes are also awesome in this sauce.
  • Try and use a mix of fresh and dried herbs. Again, these impart very different flavours, and mixing them really lends depth to the sauce
  • You can use a mix of vegetables (see below for what I put into it) but try and make sure there are some carrots for sweetness

I first started cooking this sauce in high school when I used to have loads of people over for pool parties. It was the most forgiving sauce because you could simmer it for ages, and it just got better and better. As long as the basic rules were followed, and the bones of the sauce were respected, you could add just about any vegetable (bar potatoes or pumpkin) that you wanted.

When I went to university, I started making this sauce for my housemates. There was always something missing, until one day, I hit on a magic combination. And this is the secret to the sauce, without which you will not have the same sublime flavour and glossiness. These are non negotiable. You need at least 1 eggplant for silky smooth, shiny unctuousness, and a big handful of prunes for a dusky sweetness that you just cant place in the final taste. These two ingredients are secret because they both melt into the sauce, encouraging and supporting its flavour without pushing their own agenda into the story. Eggplant and prunes. Who would have guessed?! Please do not try and make this sauce without these two – I promise, it will make you so very happy that you trusted me. 😉

For about 4 – 6 cups of finished sauce, you will need:

  • 2 medium white onions (approx 2 cups), minced
  • 7 cloves of garlic, minced
  • 1/2 cup of extra virgin olive oil
  • 2 tbsp butter (optional)
  • Salt and pepeper
  • Fresh basil, thyme, marjoram, oregano and rosemary, minced fine – about 1/2 cup in total
  • 1 large or about 5 baby eggplant (approx 2 cups) roughly chopped
  • 1 tbsp balsamic vinegar
  • 1 large red pepper (approx 1 cup), deseeded, roughly chopped
  • 4 – 6 baby carrots (approx 1 cup), peeled and roughly chopped
  • 1/2 cup red wine
  • 3 tbsp tomato paste
  • 1 medium zucchini (approx 1 cup), roughly chopped
  • 2 cup mixed tomatoes, roughly chopped (I used cherry and baby roma)
  • 8 medium portobello mushrooms (approx 3 cups) peeled and very roughly chopped
  • 2 x 400 g cans of pomodoro tomatoes in juice – about 4 cups, made up with wine or water if needed
  • 15 pitted prunes
  • 2 tbsp brown sugar
  • 1 – 2 tbsp mixed Italian herbs (dry)

In a heavy 5 qt saucepan, soften onions and garlic in about 2 tbsp olive oil and butter (if you are not using the butter, just use a little more olive oil), over high heat. Keep the olive oil by the side of the stove, and add more when you feel the ingredients are sticking to the bottom of the pan.

Season the onion mixture with salt and pepper, and add about 3 tbsp of the minced mixed fresh herbs, and mix well. Lower heat to medium high, and add the eggplant. Mix well to ensure its covered with oil and onions. Add  balsamic vinegar, and mix to brown a little.

Add red pepper and mix well, and then a few minutes later, add carrots and mix well.

Add all the red wine and the tomato paste, mix well, and turn the heat to low. Add zucchini, mix well, and then add the raw tomatoes and mix well. Add the mushrooms and mix to combine all, keeping check that nothing is sticking and add olive oil if neccessary.

Measure out 2 cans of pomodoro tomatoes in juice into a large measuring cup and make up to 4 cups with wine or water if needed. Smash the tomatoes with a fork so they are roughly chopped, and add all at once to the pan.

Cover the sauce, and allow to begin to simmer and steam. Meanwhile, pit the prunes, and chop roughly. Add the prunes and brown sugar to the sauce and mix well.

Let the sauce simmer, covered, for approx 15 – 20 minutes, mixing every five to ten minutes to ensure it does not burn.

Uncover, mix very well, and let simmer for at least 45 minutes to a couple of hours, over low heat, or until reduced by half. Ensure you check the sauce every 15 minutes or so to ensure it does not burn. You can add more wine if you want a particularly deeply wine-ey sauce.

Taste for flavour and season with salt and pepper if needed, or even some more sugar, and add dried herbs. About five or ten minutes before finished, add the rest of the fresh herbs to let their scent permeate the sauce.

Once the sauce is to your liking, take off heat and decide if you want to keep it chunky (which is nice for some pastas, salsas, etc) or if you want to blend it smooth. I use an immersion blender here. If you do blend it please make sure it has cooled to at least lukewarm – hot splashing tomato sauce is a real pain!

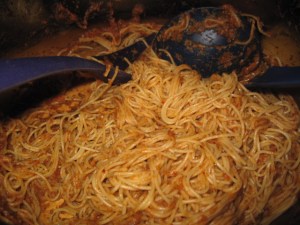
If you are using this as a pizza sauce as I will be, make sure you have at least one cook’s meal with about half a cup of sauce mixed with some angel hair pasta! Soul satisfying.

This freezes extremely well. I often freeze in an ice cube maker and then transfer to a zip loc bag. Alternatively, measure out by cupfuls into a sandwich ziploc bag and freeze flat. Keeps for up to 6 months.

Special thanks to AngelKitten for transcribing all the ingredients and keeping track of me!

Photos copyright Chan KY