Tag Archives: cookie

Pretty Gingersnap Cookies

14 Nov

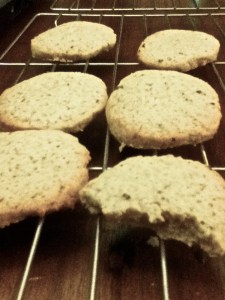
Gingersnaps!Today was a day of birthdays! My beloved nephew turned 21 (yeah, I cant quite believe it myself!) and dear friends celebrated their, and their children’s, birthdays with a huge bash this afternoon. I wanted to contribute something, and so I made cookies! About 200 Starry Starry Night Cookies (4 batches) and about 200 of these gorgeous decorated gingersnap cookies. I was going to make sugar cookies, as I did for my sayang niece’s 1st birthday, but I thought I would try something different – and I do love a good, crisp ginger cookie. These make fantastic gingerbread people, and they last for ages (no eggs, so they dont go soft quickly) – you could poke hole in them (with a straw or chopstick) and use them as stunningly pretty decorations on a tree for Christmas.

I used Royal Icing for the cookies, and it set hard, and gorgeous. And because it was a children’s party, I used IndiaTree natural food colours – they were the loveliest shades of pastel – pink, robin’s egg blue, violet and spring green. Before the icing set, I decorated them with tiny silver and gold dragees, hearts, sparkle sugar, and colourful hard sugar confetti. They looked luscious, and they tasted pretty great too!

The other thing I loved about these cookies were they were a snap (hehe) to make – but you need to be really organised and focused. I made 2 batches of dough, each divided into 4. Rolled out, and frozen overnight, and then cut with small and large shapes. I stuck with hearts and circles, but you could make animals, letters, stars… anything actually that you can find as a cookie cutter. They take about 10 – 15 minutes to bake. Decorating can take a bit longer!

If you prefer chewy cookies, roll out a bit thicker, and cut and bake until the centres are just firm. Either way, involve the young people in your life in the decoration. You will be overjoyed by their creativity, and your cookies will be uniquely beautiful.

Makes about 20 – 25 gingerbread people or 80 – 100 gingersnap cookies (depending on the size of your cookie cutter). Any leftover can be frozen, rolled out, for later use.

  • 3 cups all purpose flour
  • 3/4 cup dark brown sugar (use dark brown, not light brown – you will taste the difference here. The dark brown sugar really deepens the flavour of the cookie)
  • 1 tbsp cinnamon
  • 1 tbsp ginger
  • 1/2 tsp all spice or mixed spice
  • 1/2 tsp nutmeg
  • 1/2 tsp cloves
  • 1/2 tsp salt
  • 3/4 tsp baking soda
  • 1 1/2 sticks (3/4 cup – 12 tbsp) butter
  • 3/4 cup molasses
  • 2 tbsp milk

In a large stand mixer, or large bowl if youre using a handheld mixer, combine the flour, sugar, cinnamon, ginger, all spice, nutmeg, cloves, salt and baking soda. Mix briefly so all are combined well.

Add the butter, cut into large chunks, and mix again. The butter will “cut” into the flour mixture, and will become coated with it – and the bowl will look like it contains a sandy mixture of small dark pellets.

Add the molasses and mix again. The dough will start coming together with the addition of the molasses.

I usually add the milk to the measuring cup which held the molasses, and stir it around a bit to capture any molasses that was left behind. Add the milk, and mix just briefly.

You will have a very very soft dough. Turn out onto a sheet of wax paper, and divide into four even pieces. Working quickly, form a disc with each piece, wrap tightly in individual pieces of wax paper, and transfer to the fridge to firm up for about 30 minutes or so.

Once the dough has firmed (it will still be pliable, but will just be a little easier to work with), place a piece of wax paper on your working surface, then a disc of dough, and cover with a second piece of wax paper. Roll out quite thinly and evenly. You now need to freeze the dough for about half an hour (and even overnight if you wish) – you could also refrigerate it, but I find it works quite well coming out of the freezer. Given that this is the tropics, frozen dough is much easier to work with.

Once you have frozen or refrigerated the dough, and are ready to bake, prepare your oven. Preheat to 160C (325F).

Remove one sheet of dough from the freezer. Peel the top layer of wax paper off the dough, and then replace it onto the dough sheet (this helps in making the dough easy to remove once its been cut). Flip the sheet over, and remove the (now) top layer of wax paper. I used this wax paper to line my baking sheets.

Cut out shapes and patterns to your heart’s content, and place on a baking sheet lined with wax paper.

Bake in the hot oven for about 10 – 15 minutes, or until the cookies have puffed (from the baking soda), and deflated, have darkened just a bit, and are firm in the centre to your touch.

Remove and allow cookies to cool for about 5 minutes on the baking sheet, and then transfer to a rack (or even a plate – they should be pretty cool and hardy by now). Repeat with the remaining dough.

Decorate as you like, or have them perfectly naked – a spicy wonderful happy making gingersnap.

Any scraps can be gathered together, formed into a disc, refrigerated, rolled out, frozen and re-cut.

Royal Icing

14 Nov

cookieOh Royal Icing, how do I love thee? This stuff is absolutely fantastic for cookies – it sets hard, and any colour you add to it becomes almost jewel like. When its still wet, you can decorate it with sparkles or sugar or dragees or any other edible lovely you can think of. Its also good as a glaze for a pound cake or a bundt cake – it goes on slick and if its quite liquid, it adds just a thin glaze, that will thicken and harden and protect your cake from drying out. You can flavour it (my preference is vanilla, but go crazy – chocolate, almond, lemon, whatever your passion), and its quick and easy to make… IF you have the correct tools.

I only make royal icing with meringue powder. Its traditionally made with egg whites, but even when using organic eggs, I am never quite happy serving raw egg to children, people with compromised immune systems or pregnant women. The risk of salmonella is just too high. Meringue powder is basically egg whites that have been pasturised and freeze dried, mixed with small amounts of sugar, edible gums, alum, salt, vanillin and calcium lactate. It can be used in just about any recipe that calls for egg white, but to be honest, in most recipes fresh egg white tastes better! But in royal icing, I believe it is essential, and I love love love it! You can find it in speciality baking shops, or online, and I always try and have a jar of it around. Baking is just that much easier with it.

That said, you need to be super organised, otherwise the icing will definitely get the best of you. It hardens pretty quickly, so make sure that you work with only what you need at any given time, and cover the rest (or store in an airtight container). This recipe will give you about 3 cups of royal icing – more than enough to ice about 100 – 150 small cookies. I would highly recommend the use of IndiaTree natural food colouring to tint the icing, and a palette knife to spread the icing on the cookie. If you have them, pastry bags, fitted with small-ish tips are incredibly useful for applying the icing to the cookie surface (and if you want to get really fancy, try using tiny tips and decorating the icing with a contrasting colour!).

Gingersnaps!Have a large work surface, arrange all your cookies on a flat sheet, and work about 10 cookies at a time – icing, and then decorating if you wish with hearts, sparkles, etc. Let the cookies air dry for at least 2 hours before packing away. I divided my icing up into 4 equal portions, placed it in plastic take away containers with lids, and dyed it blue, purple, green and pink. I then covered what I didnt need, and placed what I would use in a pastry bag. I clipped the bags top and bottom, to ensure the icing stayed a good creamy consistency as I worked. When I moved on to the next colour, I whisked the icing before I used it to make sure it was creamy and smooth.

Its all a bit complex, but you will soon find your own rhythm and natural feel for it. Practice – even on strips of wax paper, and see how it spreads, how it comes out of the pastry bag, how it moves about when smoothed with a palette knife. Once you play with royal icing, you will look for reasons to play once more!

Makes about 3 cups

  • 1/4 cup meringue powder
  • 1/2 cup warm water and flavouring (I usually put about a tablespoon or two of vanilla in a measuring cup, and then make it up to 1/2 cup with warm water)
  • 4 cups icing sugar
  • 3 tbsp corn syrup (for smoothness and liquidity – not the monetary kind!)

In a stand mixing bowl (or large bowl if you are using handheld mixers), combine the meringue powder with the warm water and flavouring. If you dont want to use vanilla, use whatever flavour strikes your fancy.

Whisk on medium speed until the meringue powder has dissolved into the water, and begins to whip up – it will look just like whipped egg whites, and will have the same glossy, creamy consistency. This should take about 1 – 2 minutes.

Add the icing sugar and corn syrup, and beat for about 5 minutes on medium speed. Add additional warm water, a teaspoon at a time, if the consistency is too thick for your liking.

Colour with natural food colouring, and use immediately.

White Chocolate Shortbread

11 Nov

I am in full on cookie baking mode. I just put about 200 Starry Starry Night cookies into the freezer, waiting to be baked tomorrow, and I decided to sit and think about what other kind of cookie I could make. I love shortbread – full, rich, simple and classic, but I wanted to give it a twist. As I looked in my store cupboard, I realised I had about a kilogram of Valrhona white chocolate waiting to be made into something fabulous.

I wanted to make white chocolate chip cookies, and I still may do that, but I wondered if there was a way to get white chocolate into a shortbread without making a shortbread with white chocolate chips. I wanted the white chocolate to be in every bite, to permeate the shortbread – to live in its essence 🙂 So I thought about it some more, and looked at the ingredients list – pretty simple, really. Butter, sugar, flour. Vanilla for additional flavour if needed, and a touch of salt. Thats it.

Well, I thought, if I were to add white chocolate, I could bring the sugar content down. But how to add the chocolate without melting it? Melting the chocolate and adding it to shortbread would, I thought, mess with the essential crumby-ness of this classic biscuit. It would make a nice cookie, but it wasnt what I wanted. I was still thinking about the sugar though, and then it came to me… Could I somehow crumb the white chocolate so that it was mixed in with the flour? I could blitz with my immersion blender – and lo! It worked!

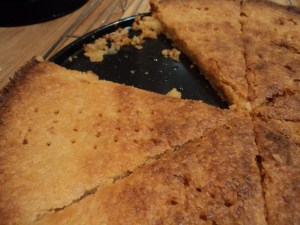
This cookie is astoundingly good. Its surprising too – white chocolate just oozes out of its very heartbeat – but you dont see it when you bite into the cookie, so it taste is unexpected and wonderful. Crispy, rich, scented with vanilla and white chocolate, this cookie is so much more wicked than it looks. Enjoy it very soon, with someone you love very much 😉

Makes 8 triangles from a 9 or 10 inch pan

  • Approx 1 cup (5 oz/150 g) good quality white chocolate (I used Valrhona disks – otherwise, use a good chocolate bar and roughly chop), cold from the fridge
  • 1 1/4 cup all purpose flour
  • 1/4 tsp salt
  • 1/2 cup (8 tbsp) butter, softened
  • 1/4 cup light brown sugar
  • 1 tbsp vanilla

Place white chocolate, flour and salt in a large bowl. Using your hands, mix together until all the white chocolate is completely covered in flour. This is important for the next step, so please dont skip it!

If you are using a food processor or blender, place the flour chocolate mixture into the machine, and pulse lightly until the white chocolate has crumbed and completely integrated into the flour. If you are using an immersion blender, as I did, place the blender into the flour chocolate mixture, and pulse quickly. Move the bowl around, until all the chocolate has been incorporated into the flour. Set aside in the refrigerator while you prepare the butter mixture.

In a stand mixture, or using a hand held mixer, cream the butter until it is light and fluffy. This usually takes about a minute or two. Add the light brown sugar and cream until it is incorporated into the butter. Add vanilla and mix again.

Remove the flour mixture from the fridge, and add to the butter mixture, adding it in a few batches. The dough will come together quickly.

Butter a spring form pan or a tart pan (about 9 – 10 inches across), and place the dough in the centre. Using your hands, quickly push the dough so that it covers the entire bottom of the pan. Score wedges with a sharp knife (I cut it into 8 pizza wedges – you could do it however you wish), and poke holes in it with the tines of a fork.

Refrigerate the prepared dough for at least an hour, or overnight.

Once youre ready to bake the shortbread, preheat the oven to 175C (350F). Bake the shortbread for about 25 – 35 minutes. Check after about 15 minutes, and if its browning too fast, cover with a little aluminum foil to prevent it from burning. After about 25 minutes check again – it should be crumbly and firm to the touch.

Cool, in the pan, on a rack for about ten minutes. Re-score and re-hole if you feel the shortbread needs it! After about ten minutes, cut the shortbread through with an offset spatula or sharp knife, and allow to cool for a further ten to fifteen minutes. Serve immediately and enjoy!

If you have any leftover, cover and refrigerate for up to 2 weeks.


Adi’s Cookies

26 Oct

Inspirational!Today was a lovely chilled day, reconnecting with the KL I love so much … seeing friends, being inspired and challenged by strong women. My beloved friend, Adi, gave me a beautiful gift – an astonishingly lovely vanilla bean paste that she brought back from holidays in Bali … and this paste was truly magical. It was a mix of vanilla bean, cacao nibs and chili! What a taste combination … and what a scent. When I opened the jar this deep spicy dark chocolatey vanilla musk wafted out and assailed me with its deliciousness.

I couldnt wait to cook with it … and it set me to thinking. Pastes are such a lovely conglomeration of tastes – this one in particular has a balance of dark deep flavours, invigorated by a faint sting of chili. Beautiful! I decided I was going to make refrigerator cookies with the paste, and I also dreamed up a whole variety of other pastes I could make inspired by this one.

If you cant put your hands on a vanilla, cacao nib, chili paste (and unless youre in Bali, and visiting the Puri Ganesha Villas where it was concocted, I doubt you can!), you can make your own paste from any number of wonderful combinations.

Just pound together a few ingredients that inspire you – a mortar and pestle would do well by you here – and bake some cookies or make a cake with the paste as your flavouring inspiration.

Here are a few that come to mind:

  • Crystallised ginger, cranberries and cinnamon
  • Grated lemon and orange peel, hazelnuts and raisins
  • Mint, cacao nibs, and pineapple
  • Dried blueberries, saffron, and almonds
  • Macadamias, a touch of honey, and nutmeg

Once you have a paste that you love, you can add it to so many things – to cakes and glazes. You could stir some into a pudding or ice cream. Use it to perfume a cupcake or frosting. Rub it onto an apple before baking, or stir it into a fruit crumble… you will have a haunting, unique flavour that will intrigue and delight.

Or you could make these cookies. I love refrigerator cookies. Basically, you make a simple cookie dough, lushly rich with creamed butter and sugar, and flavoured with the paste of your choice, and refrigerate the dough, rolled into logs, for at least a few hours. This allows the butter to firm up, and then you just slice the cookies and bake for a few minutes. Any left overs, you can freeze for up to six months, so you always have fresh cookies to hand. What a pleasure and a luxury! And once you have a paste that you love, the entire process takes literally 20 minutes to put together!

Enjoy this recipe, and be comforted. And thank you to Adi for inspiring me in so many ways!

Makes about 48 cookies / 2 logs

  • 2 sticks (16 tbsp) butter, at room temperature
  • 1 cup light brown sugar
  • 1 egg
  • 1 tbsp sour cream (or you could use cream cheese – or even leave this out – I just love the slight tang this provides)
  • 2 – 4 tsp vanilla, cacao nib and chili paste (or one that you make up!)
  • 2 1/2 cups unbleached organic cake flour
  • 1 tsp baking powder
  • 1/4 – 1/2 tsp sea salt (I used 1/2 tsp because I wanted to bring out the spice note of the chili – use less if your flavour combinations are softer)
  • 1 tbsp milk or buttermilk

In a stand mixer, fitted with a flat paddle, or a electric hand beater, cream the butter and sugar until light and fluffy. This takes a few minutes, so be patient. Its not just mixed together, but actually starts to fluff up…

Add the egg and sour cream and mix well. Add 2 teaspoons of the vanilla paste and taste – adjust if needed.

In a separate bowl, mix together the flour, baking powder and sea salt. Add to the butter mixture in three batches, adding a touch of milk in between each batch to keep the dough soft and pliable. Mix in the flour very briefly, just until the dough comes together, then add a bit of milk, mix again, etc.

Once all the flour has been incorporated, turn the dough out onto a long strip of waxed paper. Divide the dough into half, and roll out into a thick log. Wrap tightly in separate pieces of waxed paper, and refrigerate for at least 2 hours, or freeze until you are ready to use.

When you are ready to bake some cookies (and I have to ask myself, when am I not?!), preheat the oven to 200C (400F)

Line a cookie tin with greaseproof paper, and take out a log of cookie dough. Cut slices about 1/8th inch thick from the log, and arrange on baking sheet. They wont spread very far, so they dont need to be very far apart.

Bake for 6 – 10 minutes, until the edges are just starting to brown, and the cookies are firm to the touch. Cool on racks for a few minutes before devouring.

Enjoy and be inspired!

PS – forgive the blurry photograph, am still sorting through my luggage looking for my camera!

Pink Heart Cookies

24 Sep

cookieSo I was sitting in the kitchen this morning, minding my own business when this very pink fairy flew in through the window. She had glitter dust all over her wings, sparkles in her hair, and she had the most annoying whiny buzzy sound … So I smushed her. And she exploded. And the entire kitchen was filled with pink glazed sugar cookies, bedecked with hearts and sparkle and glitter. This is what happens, apparently, when a pink fairy explodes.

Actually, I spent most of the morning baking these cookies (I tripled the recipe so I ended up with about 100 biscuits) and most of the afternoon glazing them. These are not quick work if you want to roll out the dough and then cut patterns out with a cookie cutter. They are however quite simple if you want them for easy log slices – if you want to roll the dough into logs about 2 – 3 inches thick and then just slice rounds and bake. Either way, they are very very delicious – crumbly and yet sturdy, very buttery and not too sweet. I based the cookie on Cook’s Illustrated Sugar Cookie – but I used my hands rather than a stand mixer. It worked out fine.

I used royal icing to glaze the cookies – a basic confectioner’s sugar and water mixture with the addition of meringue powder (basically freeze dried egg whites). The addition of the egg whites makes the glaze harden extremely well. If you have access to meringue powder, use it – there is a huge difference. You can also make royal icing with egg whites, but since they are raw, and I am making the cookies for a children’s birthday party, I decided to go with the powder.

I used the India Tree dye – and as you can see from the image – it was gorgeous! Very easy to work with, very strong colour, and an almost imperceptible taste. I love this stuff, and I love that I can bake wildly colourful cakes and cookies for young people, and not worry about poisoning them with too much food dye. Decorating these cookies by hand took a lot of time and work – but they are so pretty, it was worth it!

Sugar Cookie

This cookie is basically much like the basis for a sweet tart shell – butter (so much butter!), superfine sugar (which gives a more tender cookie and a finer crumb), a touch of salt, flour, vanilla and cream cheese. Thats it. You have to be quite gentle with the dough, and once it comes together, you shouldnt really handle it a lot. Its very very tender. I made the dough the night before, refrigerated it well wrapped, and baked the next morning.

This should yield you about 30 – 40 cookies

  • 2 1/2 cups unbleached flour
  • 3/4 cup light brown sugar
  • 1/4 teaspoon salt
  • 16 tbsp butter (2 sticks) – at room temperature. It should be soft, but not totally giving, if you know what I mean. You want it to still hold its shape – so take it out of the fridge about half an hour before you mean to use it, and dont leave it in the heat.
  • 1 tbsp vanilla
  • 2 heaping tbsp cream cheese

If you are baking immediately, preheat your oven to 170C (375F).

Whizz the light brown sugar in a food processor or with your immersion blender so that the sugar becomes superfine. Its not 100% neccessary but it does make a difference in the finished product.

In a large bowl, whisk together the flour, sugar and salt.

Using your fingers, work the butter into the flour mixture. You want flakes of butter to be completely incorporated into the flour – it should look like oatmeal. Do this as quickly as possible, but also as completely as possible. When you are happy with the mixture, use your whisk to just combine everything together again.

Pour over the vanilla and cream cheese, and again using your hands, quickly and evenly work these two ingredients into the mixture. You will see that they bind the flakes together and you will have an extremely soft dough.

Take the dough out of the bowl, and on a clean surface, knead a couple of times, using the palm of your hand to smear the dough away from you. This will lengthen the butter flakes within the dough.

Roll the dough into a ball, and divide into two.

If you are making slice cookies, fashion each half into a log, and wrap well with parchment paper or plastic wrap and refrigerate for at least 20 minutes before slicing and baking. These also freeze bloody well, so you can always have a fresh baked cookie to hand!

If you are making cookie cutter cookies, wrap each half in parchment paper or plastic wrap and refrigerate at least 20 minutes.

Take dough out of fridge, and centre each half between two sheets of parchment paper, about the length of a jelly roll pan. Using a rolling pin and light movements, roll out the dough between the sheets, to about 1/4 – 1/8th inch thick, and refrigerate again. If you are working in an extremely hot climate, you can freeze the rolled out dough for a few minutes so it is quite stiff.

Place the parchment on a flat surface, and gently peel the top layer of parchment off the dough. Use cookie cutters to cut shapes out of the dough, and gently transfer the cookies to a baking sheet lined with parchment paper. Any scraps, you can re roll and recut into cookies, but make sure you rest the re rolled dough in the fridge or freezer before cutting cookies out of it!

Bake in the oven for 15 minutes, or until the edges just begin to brown (I burnt one lot, by the way, and they were DELICIOUS!).

Cool on a rack before glazing.

Royal Icing

  • 2 cups confectioner’s (icing) sugar
  • 2 tbsp meringue powder
  • 3 – 5 tbsp warm water
  • 3 – 7 drops of food colouring (I chose red – because PINK is our theme – of course!)

Sift the confectioner’s sugar into a medium bowl. You dont have to do this, and it usually turns out fine, but this just makes sure there are no lumps!

Add the meringue powder, and stir to combine. Add 3 tbsp of water, and whisk well. You can whisk with a balloon whisk or with an electric whisk, but you really want to combine the mixture until the icing is thick, and forms gentle peaks. Add more water if you need it – I like quite a liquidy glaze – dont worry, with the addition of the meringue powder, it hardens!

Add food colouring, a drop at a time, and whisk well to combine, until the royal icing is tinted to your desire.

Do note that I added a drop of vanilla to the icing – it made it taste quite good, but it did change the colour from light pink to darker pink.

cookieAssembly

  • Sugar Cookies
  • Royal Icing
  • Decorations – I used sanding sugar, pink and silver glitter, sparkling sugar, and sugar hearts – optional – you might want the beautiful elegance of a glazed cookie – but I was looking for exploding fairy pink!

You need to work systematically when icing these cookies.

Arrange the un-iced cookies in a tray lined with parchment paper. Have next to you the royal icing in a bowl, covered with a tea cloth (to keep it liquid), a mug, half filled with warm water, a tea spoon, and whatever decorations you want to use.

Ice 4 – 6 cookies at a time by taking a teaspoon of icing, and pouring it over a cookie, using the back of the spoon to smooth the icing over.

Once up to 6 cookies have been iced, decorate them with your sparkly sugary delights. Then go on to the next 6. The reason you do this is so that the icing does not harden before you can decorate it.

Add more water to the royal icing if it becomes too stiff – but do this literally half a teaspoon at a time – you will be amazed how it reacts to just a few drops of water.

Let the icing harden for at least 2 hours before packing the cookies into an air tight container. They can be refrigerated for up to 3 days before serving.

Sticky Fingers Bakery + Fried Rice

5 Sep

Today was a totally vegan day. We planned it that way, but to be honest, no one ever even vaguely missed the dairy! For brunch, we went to Sticky Fingers Bakery – a Washington DC vegan institution. M and I had been talking about it for ages … when she got married, I thought of getting her a cake from Sticky Fingers, but I couldnt get my act together! Finally, we went and ate there. It was a bit of a mission to get to, but thank Goddess for GPS, she found it fine!

Sticky Fingers is a really cool, relaxed place. There were families, teenagers, a young woman studying for her LSATS, guys drinking coffee and Skyping, and a man who came in and bought himself a huge sundae, and sat all by himself and ate it with great relish. As you walk in, there is a cold case with pre-made food: everything from TLT’s (tomato, lettuce and tofu bacon sandwiches) to pasta to gyros. Straight in front of you is the bakery section with cookies, cakes, brownies, cupcakes. Everything is home made, fresh and looks incredibly tempting. There is a menu on a chalkboard above the payment counter, and drinks from a cooler or you can order coffee and tea. You can choose between take out and eat in, and because we were with the baby, we sat and ate. There are a few tables (one big communal and 6 smaller tables) inside, and a few outside.

I had the iced vanilla latte, and it was absolutely superb. The coffee itself was brilliant, and I couldnt tell the difference between the soy they used and regular milk. I think they used Silk, which we have tried, and its great. M suggested we have the breakfast sandwich. It came from the pre-made cooler, and it was sublime. Sooooo bloody good! Two english muffins sandwiched a tofu egg omelette (coloured with tumeric and creamy and delicious), with soy protein sausage, and a yeast vegannaise. It was one of the most delicious things I have had in a long time.

M and B had seconds, and I decided to be adventurous by ordering the biscuits and gravy, with scrambled tofu and roasted potatoes. To be honest, I should have stuck with the breakfast sandwich. The biscuits were bland, the gravy was this floury white sauce that was completely tasteless, the scrambled tofu was just ok, and the roasted potatoes had no flavour to them at all. We were all quite disappointed after the delights of the sandwich.

To make up for it, I ordered a sweet and salty cookie which was really good! A chocolate chip and raisin cookie, baked with a sprinkle of salt over it. Really lovely, wonderful juxtaposition of tastes. I would have those again and again! M had a peanut butter fudge cupcake for dessert and B had an oreo cupcake. They were delicious (I think B had seconds on that too!)…. Not too sweet, velvety, moist, and very chocolaty. Even Baby Z got into the fudge cupcake. But when everything is vegan, cholesterol free, lower in saturated fats and sweetened with evaporated cane juice … its actually kind of okay 😉

I also ordered, and took home, a sticky cinnamon bun. How can you not when they are the bakery’s name inspiration? They were good, if a bit doughy…I should have gotten another sweet and salty cookie instead. Though this bakery is not cheap, it is very much worth the trek to find it, and the expense. I wish I could say everything was delicious, but what was good, was phenomenal! We were so busy eating, I didnt even have time to take photos 😉

Sticky Fingers Bakery
1370 Park Road, NW Washington DC, 20010
1 block north from Columbia Heights Metro
Tel: 202.299.9700

——————————————————

vegan!We had a busy afternoon, walking around downtown, shopping, playing… When it was time for dinner, we wanted something really light and yet satisfying. Fried rice was the perfect solution. I made it really quickly and very simply, with a few ingredients.

Because we had rice, curry and rendang potatoes for dinner last night, I had left over rice – this, as any Malaysian will tell you, is the key to good fried rice – cold rice! Once rice has been cooked and refrigerated, the starches solidify over each grain. When you apply heat again, the grains of rice remain intact, firm and rice-y. If you try and fry hot just cooked rice, it will turn to mush!

I used what was in the fridge for this dish, and heated up the remains of the rendang potatoes (mmmmmmm) to serve as a side dish. It was a delectable vegan dinner! You could use any manner of vegetable in this dish – peas are wonderful, as is spinach. Toasted cashew nuts would be great too.

Serves 4

  • 2 – 3 tablespoons oil (I used 1 tablespoon each of olive, truffle and toasted sesame oil – use what you have – peanut oil is good too – it gives a nutty smoky flavour) plus additional if needed
  • 1 cup sliced and chopped red onion
  • 3 cloves garlic, sliced
  • 1 inch ginger, sliced and chopped
  • Salt and pepper
  • 1 tablespoon plus extra soy sauce
  • 1 tablespoon balsamic vinegar
  • 1 – 2 cups button mushrooms, peeled and sliced
  • 3 – 4 cups cold rice (at least overnight in the fridge)
  • 1/2 cup baby roma tomatoes, sliced
  • 1/2 cup baked seasoned tofu, cubed
  • 2 tbsp chili sauce (I used Lingam’s)

In a large, non stick frying pan, over medium high heat, saute the onions, garlic and ginger in the oil. This is the longest part of the dish – you need to get the onions past the soft stage to the slightly burnt and sticky stage. Adjust your heat accordingly so they dont over burn, but keep stirring and let them really cook down so they are soft and brown at the edges. Salt and pepper well.

Pour over the soy and balsamic vinegar, and let the onion mixture cook for several minutes more. Peel and slice the mushrooms, and add them to the onions. Encourage them to burn a bit too – you want them to lose all their moisture, and cook well. Once the mushrooms have coloured, add the rice all at once, and mix the rice into the pan ingredients. Fold over and over again, using a spatula or wooden spoon. Incorporate everything, and then taste. Pour over a bit more soy so that the rice colours a little. Taste again.

Add the tomatoes and tofu, and stir to incorporate. Taste. Adjust. Add the chili sauce and taste again. Adjust to your liking, and serve hot. M and I love scraping the pan from fried rice – its where the best bits hide!

Cinnamon Sugar Cookies

11 Aug

perfect happy memoryI wrote in an earlier post about my late father’s love of white buttered toaste with a sprinkle of sugar. He ate it as a treat, even though he could have most any gourmet food he wished. This taught me that food is about memory as much as it is about taste… And one of my earliest memories is staying over at an Aunt’s house, one sharp sparkling autumn day, with my sister. We woke up in the morning, and she offered us cinnamon toast. We had never had it before (I think I was probably 6 to my sisters 4 years), and eagerly accepted.

What a taste. What an amazing combination. White toast, crispy and warm, melting butter, crackling sugar … and cinnamon. Its a dark scent, almost woody and powdery. Hits of spiciness, sweetness, flowers. Its not a description that comes easily, but when you taste cinnamon, especially for the first time, its as if your taste buds wake up. I have always loved the scent and taste of cinnamon, and its warming fragrance brings memory of autumn, cider, Christmas. When I sat down to write about the actual taste of cinnamon, I realised this is another taste which is intricately wrapped in memory for me.

So today, on the first day of the Ramadan, after an exceedingly hot, busy day, I wanted comfort. Food that is a combination of memory and laughter, and wonderful easy taste. I turned to this recipe for cinnamon sugar cookies which I think I have been making as long as I can remember cooking. These cookies are really delicious, quick to put together, and delightful to give away. The recipe makes a very soft dough. Dont over beat it or you will get tough cookies. Just let it sit, in its creamy buttery sugary-ness, and handle with care when you dip in cinnamon sugar.

Enjoy with much love, and the memory of warmth during the cold…

Makes about 32 cookies, depending on how big or small you want them!

  • 3 tbsp fine granulated white sugar
  • 1 – 2 tbsp cinnamon (depending on how deeply cinnamon you like your cookies – I always use 2 tbsp!)
  • 1 1/2 cups sugar – a mix of dark brown, light brown, and white (I use 1/2 cup of each)
  • 1 cup / 2 sticks butter, slightly softened
  • 2 eggs
  • 1 1/2 tbsp vanilla extract
  • 2 1/2 cups pastry flour
  • 1 scant tsp baking soda
  • 1/2 tsp salt

Preheat your oven to 160C.

Mix the 3 tbsp sugar and cinnamon in a little bowl, and set aside. Make sure you combine thoroughly – the sugar will be a dark brown when done. You will roll the cookie dough in this just before baking.

In a stand mixer bowl, combine your three sugars. I usually beat the sugars together to ensure they are combined well. If you dont have a stand mixture, use electric beaters.

Once the sugars are combined, add the butter, cut into chunks. Let your mixer beat the sugar and butter together until very well combined. This could take a few minutes. Just have some patience.

Add the eggs and vanilla, and beat until completely combined. The mixture will be a little soft and fluid. Let it sit for a few minutes minutes. This gives the butter and sugars time to melt into each other.

Combine flour, baking soda and salt in a separate bowl, and little by little, mix into the butter sugar mixture. I use a spoon or spatula at this point as I dont want to over mix the cookies! A tender cookie is one which is allowed to come together of its own accord! Again, let sit for a few minutes before moving on to the next step.

Line baking trays with greaseproof paper.

Using a tablespoon, measure out spoon sized pieces of dough (you can make bigger or smaller, according to your preference – this is just how I like to do it!). I usually get about 8 cookies to a sheet.

Using your thumb, drop the dough straight into the sugar/cinnamon mixture, and gently roll it around to coat it completely. Place on baking tray, and pat down gently, so it is not a ball shape, but a little flatter.

Bake for about 15 – 18 minutes. The cookies will rise, and then fall. They are done when they have turned a slightly darker shade of brown.

Let cool in trays for at least 5 minutes before cooling completely on racks.

You will have a wonderfully soft cookie with a crispy crunchy crust. Perfect balance.

Share! These are too good not to – and you can make sure other people will make wonderful cinnamon memories too 🙂

The Best Chocolate Chip Cookies (EVER)

24 Jun

I wanted to bake some cookies at M’s house, but I was worried that if I used the heavy equipment needed for a good cookie dough (electric mixer for example to cream the butter), I would wake the baby! So I looked online and found this recipe by Cook’s Illustrated magazine, which runs the brilliant tv show America’s Best Kitchens. They are truly amazing cooks, and combine artistry with a certain technical chemical mastery.

Anyway. I adapted these cookies a little bit (as all cooks will) but kept with their basic formula. This is a no mixer cookie, and makes the softest, most pliable, “lemak” dough I have ever used. And it takes like 15 minutes to put together.

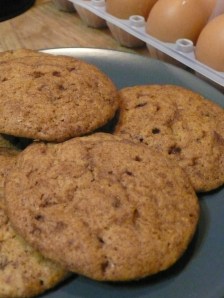
And seriously? Amongst the best chocolate chip cookies I have ever tasted. I have made them probably about 4 – 5 times with AngelKitten and Sawa during this World Cup, and people are obsessed by them. They get cravings, and beg us for just a few from our secret stash. We have shared them with friends and family, and just keep getting asked for more. I was thinking of making other things – a berry crumble or the most phenomenal carrot cake in the whole wide world – but for ease of making and for pleasure given, these just cannot be beaten. Hot from the oven they are … well, orgasmic is a word I would use. Enjoy!

Just a few notes:

1. Depending on the “rise” please adjust your baking soda. First batch I used about a teaspoon, and they were a tad thicker than second batch where I used about 1/2 teaspoon. Depends on your preference really.

2. Use best quality chocolate (NOT cooking chocolate, and not chips if you can avoid it)… Get good chocolate, and chop it up. ALWAYS makes a cookie taste better.

The Perfect Chocolate Chip Cookie via Cooks Illustrated

  • 1 3/4 all purpose unbleached flour
  • 1/2 – 1 tsp baking soda
  • 14 tablespoons butter, divided into 10 tablespoons + 4 tablespoons (I used salted)
  • 1/2 cup light brown sugar
  • 3/4 cup dark brown sugar, well packed
  • 1 tsp table salt
  • 2 – 4 tsp vanilla extract
  • 1 large egg
  • 1 large egg yolk
  • 2 cups chocolate chunks – when I first made these I used Callebut white + milk cut off a block – now I use Valhrona buttons smashed up, a mix of dark (70%), milk (65%) and white.

Measure the flour in a measuring jug, add the baking soda (1/2 tsp for preference) and set aside.

Over high heat, in a large non stick skillet, melt 10 tablespoons of butter. Once melted, keep on heat, swirling constantly, until the butter has browned well, and is toasty and nutty. You want it browned and caramel-y and dark and gleaming, but not burnt. You will know from the smell, but be careful because it goes brown very quickly. The darker it gets (without burning) the more caramel notes you will have in your cookie – so be brave, but dont let it go over to the burnt and bitter side! Transfer the butter to a heatproof bowl (or even a large saucepan or pot!). Add the remaining 4 tsp butter (it will foam up) and using a wooden spoon, mix in until melted.

Add sugar, salt and vanilla and whisk until incorporated. Add egg and egg yolk, and whisk again.

This is VERY IMPORTANT

Let mixture stand for about 3 – 5 minutes, and then whisk again for about 30 seconds.

Continue to do this (letting mixture stand, and then briefly whisking) 3 times in total. You will see a remarkable difference in the mixture from when you started, to the final whisking. It will have set up, thickened, become almost stiff liquid caramel in consistency. Amazing.

The resting is key, so please do not think you can skip the above.

Using a spatula or wooden spoon, mix in the flour until just combined. Let rest for a minute or so, and then mix in the chocolate chunks. You will find you have the softest, silkiest cookie dough you have ever handled. Let rest for a few minutes while you heat up the oven to 375 degrees and line a cookie tin with parchment or baking paper.

You should be able to get 8 cookies (of 1 tablespoon balls each) onto the cookie tin. If you prefer larger cookies, go right ahead but reduce the number of cookies on the tin! They spread! This should make approx 32 smaller cookies or 16 larger.

Bake for 7 – 9 minutes, or until just browned on the edges. Take out of the oven and allow to cool for a few minutes (they will set up) before transferring to baking sheet.

Try and break at least one so you have some cook’s rights before theyre all devoured!