Tag Archives: cinnamon

Ms Tina’s Gluten-Free Granola

4 Apr

Since I decided to take a pause in my life – and yes, thank you, I managed to turn 40 very successfully with the help and love of some dear friends – I havent been cooking a lot. Other life issues demanded precedent. I needed something to get me moving again, and of course, I do love a challenge. My dear friend, Ms Tina gave me a challenge that was intriguing and exciting. She asked me to create a truly tasty and delicious gluten-free granola for her.

Gluten-free is basically a diet that is completely free of any gluten containing cereals, specifically wheat, spelt, barley, and rye – and ensuring that no ingredients used have any gluten based cereals as an additive or filler, and even that non gluten flours / ingredients have not been processed on machines which also are used for wheat. This is a moment which calls for vigilance in shopping! I am lucky in that I have O’Gourmet Food Hall as a wonderful resource for hard to find ingredients that are also natural, not overly processed, and organic.

While the recipe is very open to interpretation, you must make sure that all ingredients are gluten-free – and the best way to do that is by reading the small print. I found some rice flour for this recipe, but I did not read the small print. When I got home, I found that the rice flour had been processed on machines that were also used for wheat flour – so I ended up using gluten-free buckwheat flour instead. I had to search quite hard to find gluten-free ingredients, but the effort was worth it!

This makes about 10 cups of granola. Its not labour intensive, but it does take quite a bit of time in the oven, with checking and turning every 20 minutes or so. Bake it in the still of the night, or on a lazy Sunday. Please also do feel free to chop and change ingredients. You may not like nuts in your granola as much as I do – add raisins, cranberries, apricots, etc. I could not find gluten-free oats (and remember, not every oat is gluten free!) so I used gluten-free muesli instead – it already had raisins and apricots, so I decided not to add any more. You need about 11 cups of mixed granola ingredients. I also tried to add as little oil as possible to the granola – but the result was a granola which did not clump together as much as I would have wished it to. Add up to 1/2 cup more oil to really bind the mixture together.

With a bit of care and creativity, you will find that this granola is well worth the effort – delicious, gluten-free and vegan to boot!

Makes 10 cups

  • 4 cups gluten-free oats (or gluten-free muesli if you cannot find pure oats)
  • 2 cups quinoa flakes
  • 1 cup sunflower / sesame seeds
  • 1 cup raw whole macadamias, roughly smashed
  • 1 cup raw hazelnuts, roughly smashed
  • 1 cup raw pistachios
  • 1 cup raw cashews
  • 3 tbsp rice flour
  • 3/4 cup best quality honey (I used a mix of leatherwood and manuka)
  • 3/4 – 1 1/2 cups canola or sunflower oil
  • 1/2 cup organic juice (I used an organic raspberry and pear juice)
  • 1 tbsp vanilla extract
  • 2 – 3 tsp cinnamon
  • 1 tsp ginger
  • Large pinch of sea salt

Preheat the oven to 115 C (250F). Line your largest baking tin with parchment paper and set aside.

Mix the oats/muesli, quinoa flakes, sunflower/sesame seeds, macadamia, hazelnuts, pistachios, and cashews together in a very large bowl. Use your hands, and really ensure everything is mixed well. Sprinkle over the rice flour, and combine again.

In a small bowl, whisk together the honey, oil, juice, vanilla extract, cinnamon and ginger. Pour this mixture over the dry ingredients, and using your hands, mix well to combine. The granola should be quite soggy. Sprinkle sea salt over, and combine again with your hands. Taste and adjust seasonings.

Turn the granola out onto your prepared baking sheet, and pat it into a very large, well packed rectangle. Place in the oven and bake for up to three hours, removing it every 20 minutes or so, and turning the granola over  in sections to make sure it crisps every where.

After about 3 hours, remove the granola from the oven, and pat and pack the granola down quite well, and switch the oven off, but return the granola back to the cooling oven. Leave, undisturbed for at least another 2 hours, or even overnight.

Break the granola into large chunks, and store in air tight containers, for up to 2 weeks.

Enjoy!

Zucchini Chocolate Spice Bread

12 Feb

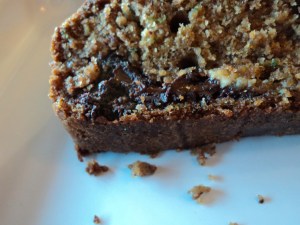
I love zucchini bread – bold in its simplicity and perfectly comforting. Its a good bread, one that is easily frozen and surprisingly easy and quick to make. I thought of this bread when I saw some luscious zucchini at O’Gourmet last week, and thought that it might be a nice idea to try a new twist. I found Bentong ginger powder at PastryPro – organic, sun-dried and so deep and complex in scent its almost overwhelming. I wanted to use it in a bread, and with my beautiful zucchini to hand, I set about inventing a new, enticing version of my beloved old standard.

I have to admit, this new zucchini bread is pretty spectacular. It is damp, lush, complex and dark. I really decided to go all out in this bread … I used dark and light brown sugar, freshly grated nutmeg, cinnamon and the amazing Bentong ginger, a touch of ground hazelnuts, beautiful Tasmanian Leatherwood honey, and both white and bittersweet chocolate. I realise, its full on! I thought to myself, when I put the loaves in the oven … either this is going to be delicious, or its going to taste like a muddled mess!

Luckily, its a wonderful, complicated, intriguing bread. Its very moist and it will get better over a few days – the flavours compounding and playing off one another. It freezes well, and its wonderful lightly toasted, as a snack, breakfast or tea time treat. Plus, what a wonderful way to get people to eat their zucchini and love it too!

I know that this seems a load of ingredients to bring together. If you cant find ground hazelnuts, or dont want to make them, substitute ground almonds, or even just plain flour. Chop and change as you wish, its a very forgiving recipe. Try though to include the honey and the spices … they really deepen and improve the bread immensely. And who doesnt like chocolate? Hehe … though if you want to be more healthy, try a few seeds or dried fruit instead. And do try and wait at least 10 minutes after you remove the bread from the hot oven – its very delicate at first, and needs a moment to firm up! Says she, who never waits 😉

Makes 2 loaves

  • 2 medium-large zucchini (approximately 2 – 3 cups grated)
  • 2 eggs
  • 1 cup canola or other vegetable oil
  • 1 scant cup sugar – half dark brown, half light brown
  • 1 heaping tbsp honey
  • 1 tbsp vanilla extract or 1 vanilla pod, beans scraped
  • 2 cups flour
  • 1/2 cup ground hazelnuts
  • 1 tsp salt
  • 3/4 tsp baking soda
  • 3/4 tsp baking powder
  • 2 1/2 tsp cinnamon
  • 1/2 tsp dried ginger (I used Bentong ginger, which is very flavourful – you may want to up the amount of ginger – may be 1 – 2 tsp –  depending on the quality of your source)
  • 1/2 whole nutmeg, grated
  • 2 cups chocolate chips, drops or chopped (I used half bittersweet, half white, best quality chocolate)

Preheat the oven to 175 C (350 F). Line two loaf pans with baking paper. I usually cut out a large piece of baking paper, centre the loaf pan, and cut in at a 90 degree angle on all four corners. I can then fold in the paper, and have a bit of nice overhang. Set aside the pans.

Set a sieve over a small bowl, and grate the zucchini into the sieve. I use the very fine grater, but depending on the texture youre going for, you might want to grate it slightly more coarsely. Press the zucchini into the sieve to encourage as much water out as possible (you will probably get about 1 cup worth). Set aside while you prepare the rest of the ingredients (and reserve both the zucchini and its liquid!).

In a large bowl, place the eggs, vegetable oil, sugars, honey and vanilla. Whisk together well until everything is well combined and integrated. Set aside.

In a small bowl (or large measuring jug, which is what I use) combine the flour, ground hazelnuts, salt, baking soda, baking powder, cinnamon, ginger, and nutmeg. Stir to combine completely. Set aside for a moment.

Measure out about 1/2 cup of zucchini water.

Stir the flour and zucchini water into the sugar/oil mixture, in thirds, mixing gently but thoroughly. You might not use all of the zucchini water – just add a splash each time to really help the flour to integrate into the sugar/oil.

Add all the zucchini and mix well, and finally add the chocolate and mix well.

Divide the batter evenly between the two loaf tins.

of Zucchini Bread!Bake, switching the tins in the oven half way through if youre concerned about hot spots, for about 45 minutes – 1 hour. A cake tester inserted into the loaf will either come up covered in chocolate (in which case, wipe down and try again!) or with scant crumbs attached.

Allow the bread to cool for 10 minutes or so before devouring. This freezes exceedingly well, and will stay good in the fridge for a week or more (though its always finished up by the first day or so in my house!).

Enjoy!


Hot Fudge + Port Pear Chili Jam

30 Dec

So yes, I am in a saucy mood. I have been cooking a lot recently, but not new recipes. And its been one of those weeks (months?) – first my phone died, and then my hardrive on my laptop got fried. I am lucky in that I have the means to deal with these issues (new phone on the one hand, and my old laptop on the other). But its been a frustrating time, and I havent felt a whole lot of inspiration.

But a stroll through O’Gourmet certainly helped! Mr. Kumar (the manager) was so excited to show me some chili powder from Kashmir – hand carried back to KL. It was like nothing I had ever seen before – rich, deep burnt orange red, and almost wet … with a scent that had so many layers to it I cannot even begin to describe, but I will try. Soft, mellow, with a sharp tinge… hauntingly musky with a long profound beat of heat and sun and spice. Gorgeous. Stunningly sensual. I had to cook with it – and suddenly, inspiration arrived!

I decided to make a chili ice cream (the recipe for which I will post tomorrow). But this was to be not just a singular ice cream, but an ice cream sundae. Hot fudge sauce (with dark bittersweet chocolate and melted Scottish fudge) and a chili jam – with a base of port and pears – at once sweet, hot and boozily beautiful. I felt that these sauces would elevate and intrigue – and would provide the perfect foil for the cold creamy ice cream. AngelKitten suggested we get some caramelised pistachios to top the sundae. What a combination of flavours and tastes! I couldnt wait to get started.

These two sauces would of course be just as magical on their own (the hot fudge sauce is particularly simple to put together) or combined over chocolate or vanilla ice cream. If you can, though, try the whole package. Its quite a few pieces of cooking work – but if you break it all down, and prepare in advance, its actually a doddle!

Hot Fudge Sauce

Makes about 2 cups of hot fudge. This can be served warm, or made in advance and reheated just before serving. Use the best quality chocolate and fudge you can find.

  • 450 – 500 g (1 lb) vanilla fudge
  • 1/2 cup cream
  • 250 – 300 g bittersweet (at least 70%) chocolate, chopped
  • 1/2 teaspoon Maldon or other sea salt

Grate the fudge into a large saucepan. Add the cream and stir a little.

Add the chopped chocolate, stir, and add the Maldon salt.

Place the saucepan over a low heat, and melt the chocolate into the fudge, stirring all the while. Make sure that the fudge too has been completely melted into the sauce.

Serve warm, or store, covered, in the refrigerator for up to 2 weeks. Reheat before serving.

Port Pear Chili Jam

Makes about 2 cups of jam.

This jam is quite loose. It pours like a sauce, but it also depends on how long you cook it – the less liquid left, the more “jammy” and thick it becomes.  If you do not want to use port or another alcohol, substitute with grape juice.

  • 9 pears (I used 3 each of D’Anjou, Bosc and Conference), peeled, pared and roughly chopped
  • 1 + 1 tbsp pear balsamic vinegar (if you cannot find this, try using pear or apple juice or even some apple cider vinegar)
  • 1 cup port wine (or grape juice)
  • 1 tsp best quality (Kashmir if you can find it) chili
  • 1 tsp chili flakes
  • 1 tsp mustard seeds
  • 3 – 6 tbsp dark brown sugar
  • 1 tbsp cinnamon
  • 1/2 tsp salt
  • 1 tbsp best quality (25 year old) balsamic vinegar
  • 2 tbsp honey (I used leatherwood honey)
  • 1 tbsp vanilla bean paste or vanilla essence

Peel, core and chop the pears. As you work, place the pears in a large saucepan, and toss them with 1 tbsp of the pear vinegar.

Measure out the pour wine and add to it the remaining 1 tbsp pear vinegar, chili, chili flakes, mustard seed, 3 tbsp of brown sugar, cinnamon, salt and balsamic vinegar. Stir well to combine, and pour over the pears.

Place the saucepan over high heat, and bring the mixture to the boil, stirring well.

Once the mixture comes to the boil, lower the heat to medium, and add the honey and the vanilla. Allow the mixture to simmer, uncovered for at least an hour. The jam will thicken and become much darker in colour. Taste and add a little more brown sugar if you feel you need to up the sweetness of the jam.

Give it a stir every so often. Allow to simmer until it is a thickness that you prefer. I like it a little liquid because I am using it as an ice cream topping … but! If you want to make it into a proper jam, just cook it for a little longer.

This can be served warm or at room temperature, and will keep, uncovered in the fridge for up to 2 – 3 weeks.

Apologies for lack of photos – still dealing with loss of hardrive!

Mini Candy Apples

22 Dec

I think I might have candy on my mind! Actually, I kind of do … I am devising a Yee Sang Cake for O’Gourmet Food Hall, and I have been looking at innocuous and innocent fruits with an evil candy-ing glint in my eye. Heheh. I love the candied caramelised oranges I made yesterday, and today, I decided to try another route – candied apples. But not just any apples, mind you, sweet, succulent, fragile miniature apples from Japan. These little babies are just so beautiful – perfect in miniature – that I could not bear to cut them up and cook them.

I remembered growing up in the US, one of the greatest fall and winter pleasures were  candied apples we would get from farm stalls. These candies are the stuff of memory – and the taste of them conjures up cold, crisp weather, puffs of breath, that clean smoky scent in the air, sky blue (or white with coming snow) and immeasurably beautiful. I adore candy apples – for the memory and the joy they represent.

These candy apples – large or small – would make lovely home-made Christmas presents. They are quick and relatively easy, they transport grownups back to the innocent pleasures of childhood, and they can be decorated in all sorts of ways – double dip these candy apples in ground nuts, bits of chocolate, crushed candy cane … let your imagination go wild! Or, serve them as part of a Christmas buffet or dinner. Such pretty pleasures.

Candy apples are not that difficult to make, but you really need a sugar thermometer to evaluate exactly where your candy is going. And you need to be brave (hot sugar is very dangerous), and have a sure hand. Work quickly, surely and have everything at the ready. I love how the hot candy clings to the apple skin – and lightly softens the apple flesh. When you bite into one of these gorgeous beauties, you get crackling shards of cinnamon candy, and then soft yielding apple. Lovely!

Makes 8 – 10 large or 12 – 16 small candy apples

  • 12 – 16 small apples (or 8 – 10 large) – try and get the small ones if you can, but if not, a strong red skinned apple is fine
  • 2 cups sugar
  • 1/2 cup light corn syrup
  • 1/2 cup water
  • 1 tsp cinnamon
  • 1 tsp vanilla (optional)
  • A few drops red food colouring (optional – I used India Tree natural food colour)

Line a baking pan or jelly roll tin with parchment or wax paper.

Wash the apples extremely well. I placed all the apples in a large bowl, squirted in some fruit and vegetable cleaner, and covered with water. I let the apples sit for about five minutes before draining and drying the apples very well.

Place the completely dried apples onto the prepared tin, and piece each apple with a skewer. For the tiny apples, I used double toothpicks.

Set the apples aside.

In a medium saucepan, combine the sugar, corn syrup and water. Stir well to ensure that everything is combined.

Place the saucepan over medium high heat, and bring the sugar/water mixture to a boil, swirling the pan a few times to make sure everything is mixed well. Dont stir – sugar crystals will form, and this is not a great final candy look. Use your candy thermometer, and allow the sugar syrup to come to 149C (300F).

Take off the heat, and have everything at the ready. Sprinkle on the cinnamon, and mix well (a silicone spatula is fine). Add the vanilla and red food colouring (stand back as it will bubble up), and stir well again.

Using an oven mit, pick up the saucepan, and tilt it so that the candy forms a deep well in one side. Pick up an apple by the toothpick, or skewer, and submerge the apple as completely as possible in the candy. As you remove the apple from the candy, twirl it, and place it back onto the parchment paper.

If you are adding another topping, dip immediately before placing back on the parchment paper.

Repeat with the rest of the apples, and allow to air dry for at least a few hours.

Remove the skewers or toothpicks, and serve as is or wrap in parchment paper to give as lovely gifts.

Kind-of-Ratatouille-a-la-Karo

14 Oct

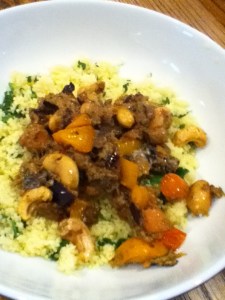
with Spinach Couscous!Tonight’s dinner may not be much to look at but it sure was delicious! And it was an intersection of different food thoughts that have been running through my head in the last few weeks. Inspired by so many things – my friend Karo’s post about the grated courgettes (zucchini), the Medjool dates at Per Se, and Karo’s link to Ottolenghi’s website.

Dinner needed to be fast and yet different tonight. Suddenly, autumn is upon us. I think we had our last 80 degree day a few days back, and now the crisp chill of cold is in the air around us. So dinner needed to be a response to that – warm and hearty, yet with echoes of sunshiney places. I didnt really think I wanted to do a ratatouille (though that often speaks of sunshine and warmth), mainly because I didnt have enough tomatoes. And I wanted to do the zucchini grated, and see what happened.

I started cooking with the thought that I was going to grate everything – but it didnt work out that way. Im pretty glad about that because I think I would have had a dark brown looking sludge by the end of it! Some stuff was grated, some stayed basically intact. You could serve this kind-of-ratatouille with french bread, rice, pasta – or as I did, with spinach couscous for a lush hint of colour and raw spinach flavour.

This is an example of my favourite free-form cooking – starting with a few ideas, and some beautiful ingredients, and seeing what happens. The end result was pretty damn tasty, completely vegan, rich and complex. The spice choices leant a hint of sunshine to the dark cold night, and we all went to bed happy and satisfied. All is right with the world 🙂

Serves 4

  • 1 tbsp plus more as needed olive oil
  • 1 small onion grated (mostly liquid)
  • 2 cloves garlic (or more as is your preference), grated
  • 1 small eggplant (aubergine) – diced
  • 1/2 tsp paprika
  • 1/2 tsp oregano
  • 1/2 tsp red pepper flakes
  • Pinch (or more) cinnamon
  • Salt and pepper to taste
  • 2 portobello mushrooms, peeled and minced
  • 1 zucchini (courgette) grated
  • 1 Medjool date, pitted and chopped very small
  • 1 cup carrots, peeled and chopped into rounds
  • 1/2 orange sweet pepper
  • 1/2 cup roughly chopped tomatoes (I used baby heirloom)
  • 1/2 cup or so water
  • 1/2 cup cashew nuts (toasted)
  • Spinach couscous

First off, toast your cashew nuts if they are raw. Use a non stick frying pan, dont add any oil, and toast over a medium fire until lightly browned. Pour off into a small bowl and set aside.

Add about 1 tablespoon olive oil to the frying pan. You might need to add more oil as you go through the various ingredients, but try to be miserly with the oil – you dont want an overly greasy end dish. Instead, use more or less heat (and eventually water) to control the cooking process.

Grate a small onion directly into the pan. The onion I grated ended up being quite watery – this is fine. If you have lovely little grated shards of onion, this is good too. Saute for a few minutes until the onion is glossy and soft. Grate in the garlic and stir to combine. Lower the heat and let the onion and garlic get acquainted.

While the onion and garlic are bubbling together gently, dice the eggplant into small cubes, keeping the skin intact. Bring the heat up a little (and add a touch of olive oil if you think it needs it), and add all the eggplant, mixing well.

Season the eggplant and onion mixture with the paprika, oregano, pepper, cinnamon and salt and pepper. Taste and adjust if needed.

Cook for about 5 minutes on high-ish heat. You want to burn the eggplant a little bit, and allow the onions to melt into the mix. When you start smelling that wonderful eggplant roasted burnt scent (its unmistakable) add the next part.

Add the mushrooms and mix extremely well. The mushrooms will let go of their liquid – encourage this by mixing thoroughly.

Lower the heat to medium, and let everything simmer together while you grate the zucchini. Squeeze most of the liquid out of the grated zucchini, and add to the pan. Sautee together, and mix very well. The zucchini will act as a paste and start to incorporate everything together. Taste and adjust for seasoning. add the minced date, and mix together. Allow everything to saute on medium heat for a few minutes.

Add carrots, sweet pepper and tomatoes to the pan, bring the heat to high, and stir to combine. As soon as everything starts to pop and sizzle, add the water, and allow the mixture to bubble. Taste for seasoning and adjust.

Add the cashews, and taste everything to make sure its a singular whole. Serve over spinach couscous or a grain of your choice!


Plum Crisp + Frittata

13 Oct

CrispOn Sunday, BSA invited some lovely friends of his over for lunch. M and I chatted about what we should serve, and decided on a typical brunch-y meal that our family loves. Lots of bits and bites to eat (toasted breads, croissants, smoked white fish, james, cheeses, bagels, cream cheese) and two main dishes: frittata and plum crisp.

The frittata was a variant of the frittatas I have made earlier, but with added inspiration from my friend Karo’s post. I sauteed rounds of leek in butter until they were soft, and then I grated a couple of zucchini (courgettes), squeezed the liquid out of them, and added them to the leeks with a little more butter. Sauteed them until they were soft, and then made the frittata with some beautiful goat’s milk cheese for added flavour. This was a delicate and beautiful frittata, finished in the oven to make it puffy and brown!

For the plum crisp, I decided to be a little brave. I sliced the plums into quarters, and then chopped them up. I added cinnamon, vanilla, grated nutmeg, and a little basil – it gave the fruit a slightly savoury deep hit of flavour that was totally gorgeous. The crisp was embellished with oats and almonds. Beautiful, served with yogurt mixed with brown sugar and vanilla.

Serves 6 – 8 people

  • 12 ripe dark purple plums, quartered and chopped, skin still on
  • 1 tbsp + 1/4 cup flour
  • 1 + 2 tbsp brown sugar
  • 1 + 1 tsp cinnamon
  • 1/2 tsp grated nutmeg
  • 1/2 tsp basil
  • 1 tbsp + 1 tsp vanilla
  • 1/2 cup oats
  • 4 tbsp butter, cubed
  • 1/2 cup sliced almonds, crushed
  • 1/2 tsp salt

Preheat oven to 400C (200F).

In chosen baking dish (I used a rectangular Pyrex dish), tumble in the chopped plums. I kept the skins on – but obviously took the pits out!

Sprinkle 1 tbsp flour, 1 tbsp brown sugar, 1 tsp cinnamon, nutmeg, basil and 1 tbsp vanilla over the plums and using hands (or a spoon if you want to be neat!), mix thoroughly.

Crush the sliced almonds – I put them in a little zip log bag and bashed them with the bottom of a wine bottle! A rolling pin works just as well 😉

In a small bowl, mix together 1/4 cup flour, 2 tbsp brown sugar, 1 tsp cinnamon, 1 tsp vanilla, oats, butter, crushed almonds, and salt. Use your fingers to really work the butter into the rest of the ingredients, and taste. Adjust spices if need be.

Sprinkle the crisp over the plums, and bake in the oven for 25 – 30 minutes, or until the plums are soft and bubbling. The plums will have let go of deep dark purple juices and the whole thing will be gorgeously lush. Serve warm or at room temperature with vanilla ice cream or plain yogurt, scented with a bit of brown sugar and vanilla.

Zucchini Bread

8 Sep

DeliciousToday was a day of memories… I dont know why, may be because I chatted with old friends, and video conferenced for a while with family back home, but today was a day for remembering. It was also a Whole Foods day (which makes it a fabulous day) and once again I was inspired and amazed by the produce, the freshness, the colour, the beauty of all the gorgeous fruits and vegetables.

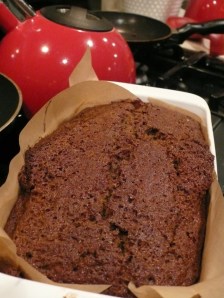
Because of that certain melancholy memory feeling to today, I decided to make zucchini bread. This is a wonderful bread, spicy, warm, gorgeous crust, hearty and yet very good for you. I love zucchini bread because its a wonderful way to get non vegetable eaters to eat their greens! How can that simple squash be transformed into a bread that tastes as if it was sent from the Goddesses? I dont know, but I do love it so. Our mother used to make zucchini bread, and though that recipe has been lost, I think I came pretty close to making something that has the same comforting, loving feeling to it.

This bread freezes exceptionally well. Its wonderful slathered with butter (or margarine if youre a vegan!) and it is fantastic sliced and toasted. I remember thick slices, slightly burnt at the edges, salted butter seeping onto the surface of the bread. Pure comfort. Pure happiness. Its also a great bread to give to little ones who are just starting to eat, because of the vegetables and because it teaches them about spice and taste and texture.

This recipe will make a large loaf. If you only have small loaf pans, divide into two. Baking time is still roughly the same. Make some, its easy, I promise. And make memories of your own 🙂

I used eggs in this recipe, but if you are vegan, they are easily replaced by 1 cup of applesauce. You will get the same texture and deliciousness as if you used eggs.

You can add raisins and nuts to this recipe if you like (about half a cup each) but I like my zucchini bread pure. If you do add, walnuts are particularly good with this bread.

For one large loaf, you will need:

  • 2 eggs (or if vegan, use 1 cup apple sauce plus 1 tsp lemon juice)
  • 1 cup canola or other light vegetable oil
  • 1 cup dark brown sugar
  • 1/2 cup light brown sugar
  • 2 tbsp vanilla essence
  • 2 1/2 cups flour (I used whole wheat flour, but use any kind you have – all purpose is fine)
  • 1 tsp salt
  • 1 tsp baking soda
  • 1/2 tsp baking powder
  • 1 1/2 tbsp cinnamon
  • 1 tsp ginger
  • 1/2 tsp nutmeg
  • 2 – 2 1/2 cups grated zucchini, skin on – about 2 medium sized zucchini

Preheat the oven to 175C (350 F). Line a large loaf tin with baking paper. I cut a piece of baking paper that was about three times larger than the base of my loaf pan, and then cut into each of the four corners of the paper at a 45 degree angle. This made it easier to line the baking pan and fold over the edges.

In a large mixing bowl, beat the eggs lightly. Add the oil, sugars, and vanilla essence, and whisk until thick and glossy.

In a separate bowl, mix together the flour, salt, baking soda, baking powder, cinnamon, ginger and nutmeg. Use a spatula to make sure all the spices are well integrated into the flour.

In three batches, mix the flour into the oil mixture, taking care not to over mix.

Wash the zucchini well, and then top and tail it, and grate finely. Measure out the zucchini into the batter. 2 regular sized zucchini usually gives me about 2 1/2 cups of grated zucchini. If you have a bit more or a bit less, its fine. Just dont go above 3 cups.

Mix the zucchini gently into the batter, ensuring that its well incorporated.

Pour the batter into the loaf pan, and bake in the preheated oven for an hour to an hour and a half, or until a tester comes out with only crumbs attached. If you bake beyond an hour, check every ten minutes or so to ensure it does not over bake.

Enjoy the scent that permeates your house, and allow the zucchini bread to cool for at least 20 minutes before slicing and devouring, and making some comforting memories of your own!

Apple Berry Crumble

18 Aug

Its been a wonderful day of baby bliss and cooking – it was rainy outside today, so we had soup for lunch – a gorgeous mixed vegetable soup – butternut, asparagus, carrot, tomato, and green bean, simmered lightly, and then blitzed in the blender. And with it, four cheese grilled cheese sandwiches, on gorgeous brown bread, with a smear of mayo and mustard. Four cheese might sound overwhelming, but it really isnt if you use only little bits. I used all four because I was trying to use up ends of cheese – so we had brie, with the rinds cut off, which made the sandwiches silky and melty smooth, parmesan for its nuttiness, cheddar for its cheesy-ness, and Laughing Cow, because it was there! A little salt and pepper, and grilled them over a slow fire. Delicious.

For dinner, an angel hair pasta with spinach, zucchini, tomato, mushrooms, sliced garlic, white wine and sour cream. And for dessert, an apple berry crumble made with literally a handful of berries left over from a berry fest, and some gorgeous Braeburn apples. The berries tinged the apples red, and added a sweet berry tartness to the crumble. Perfection.

This crumble will serve six. Adjust as needed. Wonderful warm with cream, and leftovers make a great breakfast, with a bit of milk or yogurt poured over 🙂

  • 4 apples, peeled, cored and chopped
  • 1 tsp lemon juice
  • 1/2 – 1 cup mixed berries (we had blackberries, raspberries and blueberries)
  • 2 tsp + 1 tbsp granulated light brown sugar
  • 1 + 2 tsp cinnamon
  • 1 tbsp flour
  • 1/2 – 1 cup steel cut oats
  • 1/2 stick (approx 4 tbsp) cold butter, grated
  • 1/4 tsp salt

Preheat the oven to 170 C

Peel, core and chop the apples, and place them in a glass or metal baking pan. You can use a pie pan but I like those smallish rectangular pans. Sprinkle lemon juice over.

Mix in the berries, with your hand or a spoon, making sure that the berries are completely mixed up with the apples. Sprinkle over 2 tsp light brown sugar (or more if your apples arent that sweet), 1 tsp cinnamon, and 1 tbsp flour. Again using your hands or a spoon, mix well. The flour will thicken the juices of the apples and berries as they cook so you have a thick luscious crumble, instead of a juicy wet one! Ensure that the berry apple mixture is arranged in an even layer in the baking pan.

In a small bowl, mix together 1 tbsp sugar, 2 tsp cinnamon, the oats, grated butter, and salt. Using your fingers, work the butter into the oats. The mixture will resemble sandy gravel. This is what you want. Taste – if it needs more cinnamon, more sugar, more butter, add.

Sprinkle the crumble mixture over the apple berry mixture, and bake in the oven for 45 minutes – 1 hour. Serve warm or cold.

Cinnamon Sugar Cookies

11 Aug

perfect happy memoryI wrote in an earlier post about my late father’s love of white buttered toaste with a sprinkle of sugar. He ate it as a treat, even though he could have most any gourmet food he wished. This taught me that food is about memory as much as it is about taste… And one of my earliest memories is staying over at an Aunt’s house, one sharp sparkling autumn day, with my sister. We woke up in the morning, and she offered us cinnamon toast. We had never had it before (I think I was probably 6 to my sisters 4 years), and eagerly accepted.

What a taste. What an amazing combination. White toast, crispy and warm, melting butter, crackling sugar … and cinnamon. Its a dark scent, almost woody and powdery. Hits of spiciness, sweetness, flowers. Its not a description that comes easily, but when you taste cinnamon, especially for the first time, its as if your taste buds wake up. I have always loved the scent and taste of cinnamon, and its warming fragrance brings memory of autumn, cider, Christmas. When I sat down to write about the actual taste of cinnamon, I realised this is another taste which is intricately wrapped in memory for me.

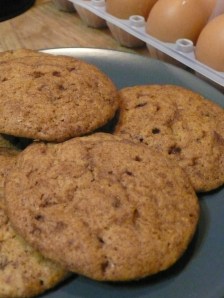
So today, on the first day of the Ramadan, after an exceedingly hot, busy day, I wanted comfort. Food that is a combination of memory and laughter, and wonderful easy taste. I turned to this recipe for cinnamon sugar cookies which I think I have been making as long as I can remember cooking. These cookies are really delicious, quick to put together, and delightful to give away. The recipe makes a very soft dough. Dont over beat it or you will get tough cookies. Just let it sit, in its creamy buttery sugary-ness, and handle with care when you dip in cinnamon sugar.

Enjoy with much love, and the memory of warmth during the cold…

Makes about 32 cookies, depending on how big or small you want them!

  • 3 tbsp fine granulated white sugar
  • 1 – 2 tbsp cinnamon (depending on how deeply cinnamon you like your cookies – I always use 2 tbsp!)
  • 1 1/2 cups sugar – a mix of dark brown, light brown, and white (I use 1/2 cup of each)
  • 1 cup / 2 sticks butter, slightly softened
  • 2 eggs
  • 1 1/2 tbsp vanilla extract
  • 2 1/2 cups pastry flour
  • 1 scant tsp baking soda
  • 1/2 tsp salt

Preheat your oven to 160C.

Mix the 3 tbsp sugar and cinnamon in a little bowl, and set aside. Make sure you combine thoroughly – the sugar will be a dark brown when done. You will roll the cookie dough in this just before baking.

In a stand mixer bowl, combine your three sugars. I usually beat the sugars together to ensure they are combined well. If you dont have a stand mixture, use electric beaters.

Once the sugars are combined, add the butter, cut into chunks. Let your mixer beat the sugar and butter together until very well combined. This could take a few minutes. Just have some patience.

Add the eggs and vanilla, and beat until completely combined. The mixture will be a little soft and fluid. Let it sit for a few minutes minutes. This gives the butter and sugars time to melt into each other.

Combine flour, baking soda and salt in a separate bowl, and little by little, mix into the butter sugar mixture. I use a spoon or spatula at this point as I dont want to over mix the cookies! A tender cookie is one which is allowed to come together of its own accord! Again, let sit for a few minutes before moving on to the next step.

Line baking trays with greaseproof paper.

Using a tablespoon, measure out spoon sized pieces of dough (you can make bigger or smaller, according to your preference – this is just how I like to do it!). I usually get about 8 cookies to a sheet.

Using your thumb, drop the dough straight into the sugar/cinnamon mixture, and gently roll it around to coat it completely. Place on baking tray, and pat down gently, so it is not a ball shape, but a little flatter.

Bake for about 15 – 18 minutes. The cookies will rise, and then fall. They are done when they have turned a slightly darker shade of brown.

Let cool in trays for at least 5 minutes before cooling completely on racks.

You will have a wonderfully soft cookie with a crispy crunchy crust. Perfect balance.

Share! These are too good not to – and you can make sure other people will make wonderful cinnamon memories too 🙂

Sour Cream Almond Coffee Cake

31 Jul

Sour Cream Coffee CakeThis weekend is rainy and damp – the perfect time for baking. Cakes and cookies, the scent of warm cinnamon and chocolate – all these are, to me, the ultimate comfort. A slice of cake, be it carrot, coffee or chocolate, is a welcoming gift to present a visitor, and they pack wonderfully for on-the-go presents. I love cake – the beautiful crumb, the creamy icings, the melding of flavor and texture. Baking a cake is immensely satisfying – the finished product is an act of magic, bringing together simple ingredients and creating a stunning finished product. I dont trust people who dont like cake 😉

And oh, this cake. A humble coffee cake, something you could whip together in half an hour or so, even though it has a filling, topping and batter. Its a simple cake, and it bakes up beautifully – fluffy, cinnamon specked, cream-cheesy interior, with little specs of baked apple, streusel topping. Its surprisingly balanced, and not over-the-top sweet. A wonderful snack, and a delightful breakfast with a cup of hot coffee. My idea of the perfect thing to have in the fridge at all times 🙂

This cake is adapted from Tamasin Day-Lewis from her Kitchen Classics book. She got the recipe from her assistant, who got it from her Auntie Fei. So this recipe has been handed down and redrafted at least four times – which is one of the things I love about cooking. You can tell someone how you made a dish, you can even write out a recipe for them. As soon as they get it home, look in the fridge and realise they have raisins rather than an apple, or creme fraiche rather than sour cream, they substitute and change around and add. Its human nature, but its also what makes cooking so personal. As soon as you have any confidence in the kitchen, you know what you like, and you adapt things to that sense of taste and artistry. Its why I love eating other people’s cooking so much. They expose their sense of taste, colour, texture, flavour and fun through what they cook, and how they cook it.

And I must admit something here. This cake actually has nuts in it! I usually dont go for cake with nuts. Ever. I took the nuts out of the sublime carrot cake from yesterday. I would never make anything chocolate with nuts. I love nuts, but not with sweet, except in this cake (well, may be I would use almond meal in a cake in place of flour in a pinch, but thats another story). Here, the nuts act as the texture component, and elevate the coffee cake with their smoky crunchy bite. They also cut the creaminess of the cake well – its made with sour cream, and layered with cream cheese, so its very rich. The nuts help that richness stay balanced. I use almonds because I find them the least offensive of nuts in sweet things, but you could use hazelnuts, walnuts, pecans, or even macadamias if you like.

Making this cake is not hard, but I would certainly make the filling and topping first, before making the batter. That way, the final assembly is quick and easy. Also, you can make it in a bundt pan, but I didnt want to, so I made it in a cake tin. Cooking time is about 10 – 15 minutes less in a bundt pan so watch for that.

Eat this at breakfast or during a coffee break, for a tea time snack or as dessert. Its delicious any which way, but I particularly like it warm from the oven.

Filling

  • 3/4 cup cream cheese
  • 1 egg
  • 1 tbsp light brown sugar
  • 1/4 tsp salt

Please make sure you get a good cream cheese. That Philadelphia stuff is full of stabilisers, gums and other chemicals. If you can find a natural, organic or locally made cream cheese, get that. The difference is huge.

Beat all ingredients together till light and creamy, and set aside.

Topping

  • 1/2 cup flour
  • 1/2 cup light brown sugar
  • 1 tsp salt
  • 2 tsp cinnamon
  • 1 cup toasted sliced almonds, divided (note: you can use any nut you like)
  • 4 tbsp melted butter
  • 1 tsp vanilla extract

In a medium to large frying pan, toast the almonds (or other nuts) until they become light golden. Divide into 3/4 cup and 1/4 cup. Set the smaller amount aside to use with the filling, and place the 3/4 cup of almonds in a bowl along with the flour, sugar, salt and cinnamon. Melt the butter, add the vanilla extract to the melted butter, and mix into the almond-flour mixture. It will be crumbly. Set aside.

Cake

  • 1/4 cup butter
  • 1 1/3 cup light brown sugar
  • 4 eggs
  • 2 cups flour
  • 1/2 tsp baking soda
  • 1 1/2 tsp baking powder
  • 1 tsp cinnamon
  • 1/2 tsp salt
  • 200 ml (about 1 cup) sour cream (you can substitute creme fraiche if you like)
  • 2 tsp vanilla extract

In a mixing bowl, cream the butter and sugar until light and fluffy. Beat in the eggs, one at a time.

Meanwhile, sift together the flour, baking soda, baking powder, cinnamon and salt. In a separate bowl, mix together the sour cream and vanilla.

Beat the dry ingredients and sour cream into the butter-sugar-egg mixture bit by bit – I usually mix in a couple tablespoons flour, then a couple tablespoons sour cream, etc, until you have a smooth batter.

Assembly

  • Cake batter
  • 1 large apple (I used a Fuji apple) peeled, cored, and diced (you could use dried cranberries, raisins, or any other fruit you like)
  • 1/4 cup reserved almonds
  • Filling
  • Topping

Preheat oven to 180C.

Butter a cake pan, or  a bundt pan with removable sides, well. I usually put some baking paper on the bottom of my cake tin, and butter that as well, just to make removal a bit easier.

Pour about half of the cake mixture into the prepared cake tin, and smooth. Sprinkle on the diced apple, and then the reserved almonds. Spoon over the cream cheese filling, making sure you get it smeared up against the sides, and dropped throughout the interior of the pan. Top with the remaining cake batter. Smooth the top, and sprinkle over the filling. Using a fork or spoon, fold over a little batter so that you have spots of batter peaking through the filling.

Bake for 55 – 65 minutes depending on your pan, or until a cake tester comes out with crumbs.

Allow to cool on a rack for at least 20 – 30 minutes before unmolding, cutting and devouring.

Enjoy with friends.