Tag Archives: onion

Quick French Onion Soup

18 Nov

Quick French OnionI am sick today. There seems to be a bug going around, and somehow, I caught it. I coughed all of yesterday – miserable, tight-chested, and painful. I slept for ages this morning, woke up and decided I needed some soup. But when I went to the kitchen, all I had was 3 onions …  A very sad state of affairs, but I was planning on shopping today! And instead, I am sick!

So I decided to make a French Onion soup. This is not a fancy one, with toasted bread rubbed with garlic, and gruyere cheese. Its basic, simple, warming and deeply comforting. If you have cheese, grate some over your toast, but if you want to keep it vegan, dont add any cheese (or butter in the beginning) at all. It will still taste delicious, and reach all those cold miserable places.

This makes about 4 servings of soup. You could easily double it for a dinner party, and toast a baguette, and pile over some stringy gruyere. Broiled in the oven, its a decadent feast – but when youre sick, as I am today, its just too much effort. I toasted a really lovely dark brown slice of bread, placed it in the bottom of the bowl, and grated some parmesan and cheddar over – its what I had. I then ladled the soup over, and allowed the bread and cheese and hot oniony soup to meld and interact. Beautiful. Comforting.

Definitely feeling a little bit better 🙂

Serves 4. Doubles easily.

  • 3 large onions (about 1/2 kg) sliced very fine
  • 1 tbsp olive oil
  • 1 tbsp butter (or an additional tbsp olive oil if youre keeping it vegan)
  • 1 heaping tbsp flour
  • 4 cups of hot vegetable stock – I used 1 organic vegetable stock cube dissolved in 4 cups of boiling water
  • Salt and pepper
  • 1 slice dark brown bread, well toasted, per serving
  • A bit of parmesan, cheddar or gruyere, grated

Peel the onions of their brown skin, and slice really fine. I used a mandolin for this job, and it was fast, easy and really exact. If you dont have one, use a sharp knife and try and get the onion slices as fine as possible.

Place a medium saucepan over medium heat, and warm the olive oil and butter (or just olive oil) until the butter has melted. Add all the onions, and stir to coat the onions with the oil/butter mixture. Turn heat down to medium low and saute the onions until well browned for at least 20 minutes or so. This is the ultimate trick to this soup – you need to be really patient with the onions. They need to cook and cook and cook until they are deeply brown because this is the basis of the flavour and strength of the soup.

They will let go of some liquid, this is fine, and then they will get glossy and soft. Keep at it. They will start to turn golden, stir a little and let cook further. You want a deep dark brown – teak or coffee with a touch of milk colour. If you prefer a lighter soup, obviously, you can let the onions go only to light golden, but you will miss the deep layered flavours that you would get if you keep your nerve and just keep cooking them. Without letting them burn!

And you dont have to stir all the time. The occasional stir is fine, whilst you make yourself a cup of tea, play with the cat or take some vitamins. Let the onions do their own job. Just keep the heat low and steady, and stir sometimes to make sure nothing is burning.

Once the onions are cooked to your liking, sprinkle over the flour and stir well. Cook for a few minutes to allow the flour to amalgamate with the onions and fat. This will ensure a creamy thick soup without a raw flour flavour.

Pour over hot vegetable stock, stir well, semi cover the pot and allow to simmer for about half an hour. Taste, add some pepper and a touch of salt.

YumMeanwhile, toast your bread till quite dark. Place in a soup bowl (you might have to shove it in there, this is fine), and grate some cheese over. Not too much as it can be overwhelming, but enough to add flavour and interest to the soup.

Ladle hot soup over the toast and cheese just to cover, and allow to sit for a minute so that the soup and toast and cheese get firmly acquainted.

Serve to those needing comfort.

Grilled Cheese with Jammy Onions

15 Oct

with Jammy OnionsIts suddenly cold! Last night when I went out to get the hound in, I saw my breath, puffs of white, against the darkness of the night. And today, its gray and rainy. In about a week, I will be home in the warmth of the tropics, but here, its cold, and only going to get colder.

Lunch today was about comfort – grilled cheese with the addition of jammy, dark caramelised onions. If you need to start from the beginning it can take a little less than an hour to make this meal. But if you make the jammy onions in advance and have them in the fridge… well, then, you can do this quick as a blink! Jammy onions are wonderful to have on hand, by the way. They elevate anything and everything – from pasta sauce, to curry, to soup.

This is very rich – so make sure that when youre actually grilling the sandwiches in the pan, that you use only a little bit of butter – and low heat. This will enable the cheese inside to really melt and meld with the onions, and the bread to toast without getting too greasy and buttery.

Wonderful served with tomato soup – or something green like a sharp mustardy arugula (rocket) salad with sliced tomatoes and a sharp dressing on the side. This is lunch to warm the innards and bring a smile to the faces of those you love. And its just grilled cheese – but with such a lovely twist.


Serves 4

  • 2 medium onions
  • 2 tbsp olive oil
  • Salt and pepper
  • 1/2 tsp basil
  • 1/2 tsp oregano
  • 1/4 cup red wine
  • 1 tsp brown sugar
  • 2 – 3 tbsp balsamic vinegar
  • 1 – 2 tbsp soy sauce
  • Water
  • 8 slices bread – I used sourdough, though a yeasty brown bread would be wonderful here too
  • A few tablespoons mayonnaise (or Marie’s Italian dressing – my family’s favourite!)
  • 2 2/3 cups grated cheese (approximate) – you can use cheddar, brie, blue, goat, parmesan – what ever you like. I used cheddar and jack – and figured about 2/3rd cup cheese per person, but its sometimes less. You could also use 8 slices of cheese but please dont use plastic cheese – its gross!
  • A few tablespoons of butter, softened to room temperature

First, prepare the onions. Slice the onions in half, peel, and slice the top off. Slice half rings, thinly all the way to the root.

Put a medium non stick pan over medium high heat, add olive oil and onions, and saute for 3 – 5 minutes, until the onions have softened. Add salt, pepper, basil, and oregano, and mix well to combine.

Put heat up to high, and add red wine. Allow the red wine to bubble, and mix the onions well to coat them in the wine. The wine will soften the onions, and will be absorbed almost completely by them. Once the onions are a dusky red, and the wine has been absorbed, sprinkle over brown sugar, balsamic and soy sauce. Stir to combine, and allow to bubble for a few minutes.

Add about 1/4 cup water, and bring the heat down to medium. Simmer the onions for at least 10 minutes, or until all the water has been absorbed. Taste, adjust seasonings, and consider if the onions are soft and melting enough for you. If not, add some more water (and a little touch more sugar if you like), and bubble away again. Each time you add more water, and it gets absorbed, the onions will go darker, slicker and jammier. Sometimes I do this, in increments 3 or 4 times.

Once the onions are a good jammy consistency, transfer to a heat proof bowl and set aside.

Rinse out the non stick pan, and have another one ready. If you dont think you can fit two sandwiches in one pan (and will thus have to cook them in two rounds), preheat the oven to the lowest temperature, and have a baking sheet ready to receive grilled sandwiches while you make the rest.

Lay out 8 slices of bread in 4 groups of 2 each. Spread mayonnaise (or other sandwich spread – we use Marie’s Italian dressing – mustard would be good here – as would aioli) sparingly on bread. Spread about 1/3 cup (or less if you like) grated cheese – or 1 slice of cheese – on 4 slices of bread. Divide jammy onions between these four slices, and cover again with another 1/3 cup grated cheese (or 1 slice of cheese) each. Cover with remaining slices of bread to make 4 sandwiches.

Butter the outside of each sandwich, sparingly. Place sandwiches on non stick pans, two to a pan, and place on low heat.  Grill sandwiches undisturbed for about 5 – 7 minutes (I always check at 5) on low heat. If you think the sandwiches are not toasting enough, bring heat up, but just a little.

Flip sandwiches, and grill for about 3 – 5 minutes on second side. Once sandwiches are grilled to your preference, remove from pan, slice horizontally, and serve. The cheese should have melted through those glorious onions, and it should be a sticky wonderous mess.

Kind-of-Ratatouille-a-la-Karo

14 Oct

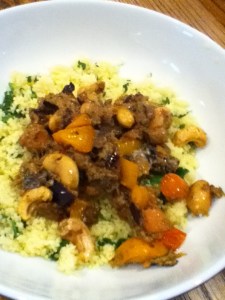
with Spinach Couscous!Tonight’s dinner may not be much to look at but it sure was delicious! And it was an intersection of different food thoughts that have been running through my head in the last few weeks. Inspired by so many things – my friend Karo’s post about the grated courgettes (zucchini), the Medjool dates at Per Se, and Karo’s link to Ottolenghi’s website.

Dinner needed to be fast and yet different tonight. Suddenly, autumn is upon us. I think we had our last 80 degree day a few days back, and now the crisp chill of cold is in the air around us. So dinner needed to be a response to that – warm and hearty, yet with echoes of sunshiney places. I didnt really think I wanted to do a ratatouille (though that often speaks of sunshine and warmth), mainly because I didnt have enough tomatoes. And I wanted to do the zucchini grated, and see what happened.

I started cooking with the thought that I was going to grate everything – but it didnt work out that way. Im pretty glad about that because I think I would have had a dark brown looking sludge by the end of it! Some stuff was grated, some stayed basically intact. You could serve this kind-of-ratatouille with french bread, rice, pasta – or as I did, with spinach couscous for a lush hint of colour and raw spinach flavour.

This is an example of my favourite free-form cooking – starting with a few ideas, and some beautiful ingredients, and seeing what happens. The end result was pretty damn tasty, completely vegan, rich and complex. The spice choices leant a hint of sunshine to the dark cold night, and we all went to bed happy and satisfied. All is right with the world 🙂

Serves 4

  • 1 tbsp plus more as needed olive oil
  • 1 small onion grated (mostly liquid)
  • 2 cloves garlic (or more as is your preference), grated
  • 1 small eggplant (aubergine) – diced
  • 1/2 tsp paprika
  • 1/2 tsp oregano
  • 1/2 tsp red pepper flakes
  • Pinch (or more) cinnamon
  • Salt and pepper to taste
  • 2 portobello mushrooms, peeled and minced
  • 1 zucchini (courgette) grated
  • 1 Medjool date, pitted and chopped very small
  • 1 cup carrots, peeled and chopped into rounds
  • 1/2 orange sweet pepper
  • 1/2 cup roughly chopped tomatoes (I used baby heirloom)
  • 1/2 cup or so water
  • 1/2 cup cashew nuts (toasted)
  • Spinach couscous

First off, toast your cashew nuts if they are raw. Use a non stick frying pan, dont add any oil, and toast over a medium fire until lightly browned. Pour off into a small bowl and set aside.

Add about 1 tablespoon olive oil to the frying pan. You might need to add more oil as you go through the various ingredients, but try to be miserly with the oil – you dont want an overly greasy end dish. Instead, use more or less heat (and eventually water) to control the cooking process.

Grate a small onion directly into the pan. The onion I grated ended up being quite watery – this is fine. If you have lovely little grated shards of onion, this is good too. Saute for a few minutes until the onion is glossy and soft. Grate in the garlic and stir to combine. Lower the heat and let the onion and garlic get acquainted.

While the onion and garlic are bubbling together gently, dice the eggplant into small cubes, keeping the skin intact. Bring the heat up a little (and add a touch of olive oil if you think it needs it), and add all the eggplant, mixing well.

Season the eggplant and onion mixture with the paprika, oregano, pepper, cinnamon and salt and pepper. Taste and adjust if needed.

Cook for about 5 minutes on high-ish heat. You want to burn the eggplant a little bit, and allow the onions to melt into the mix. When you start smelling that wonderful eggplant roasted burnt scent (its unmistakable) add the next part.

Add the mushrooms and mix extremely well. The mushrooms will let go of their liquid – encourage this by mixing thoroughly.

Lower the heat to medium, and let everything simmer together while you grate the zucchini. Squeeze most of the liquid out of the grated zucchini, and add to the pan. Sautee together, and mix very well. The zucchini will act as a paste and start to incorporate everything together. Taste and adjust for seasoning. add the minced date, and mix together. Allow everything to saute on medium heat for a few minutes.

Add carrots, sweet pepper and tomatoes to the pan, bring the heat to high, and stir to combine. As soon as everything starts to pop and sizzle, add the water, and allow the mixture to bubble. Taste for seasoning and adjust.

Add the cashews, and taste everything to make sure its a singular whole. Serve over spinach couscous or a grain of your choice!


Vegetable Soup with Matzoh Balls

19 Sep

With Matzoh Balls!My sister and I caught the Baby Queen Z’s cold, so we are all a tad miserable. Even though its a gorgeous day outside, colds and flus almost demand a good, homemade vegetable soup. When we were little, it used to be a chicken soup with matzoh balls, so I decided to make them and add them to the vegetable soup. Matzoh balls are a supremely comforting Jewish tradition – matzoh cracker meal, combined with salt, egg and a bit of soup stock to make dumplings. Eating them feels like being enveloped in a pure cashmere blanket. And when youre ill, they are very nourishing.

I went vegetarian with the matzoh balls, though I did find good vegan recipes here and here. To be honest, I just wasnt up to trying the vegan version … not feeling focused or well enough to pay attention to multiple ingredients. But the soup is vegan – and I made it creamy and thick by whizzing it up with my immersion blender. Literally less than a minute and all those amazing veggies were pureed in a silken mass. I made the matzoh balls and boiled them in the soup pot (with the soup safely stored in a heatproof bowl) and then when they were done, introduced them to the soup.

Good, healthy, nourishing and full of vegetable love. Sure to make us all better in a jiffy!

Vegetable Soup

This makes 1 big potful. Adjust the vegetables to what you have in the fridge, but note that I almost always use onion or leek or both, carrot, and a can of plum tomatoes. Everything else comes and goes, but those are the constants 😉

  • 1 tbsp olive oil
  • 1 medium onion, chopped
  • 1 leek, chopped
  • 3 small carrots, topped and tailed, and roughly chopped (leave the skin on)
  • 1 zucchini, roughly chopped (skin on)
  • 1 can plum tomatoes in their juice
  • 1 cup potatoes, chopped (skin on)
  • 1/2 head of rapini or broccoli, chopped
  • 1 cup chopped spinach
  • Salt and pepper to taste

In a large soup pot, over medium heat, heat the olive oil and saute the onion and leek until they go soft and slightly melty, and a little browned along the edges. This is quite important as they form the basis of the soup, so you want to cook them long enough to caramelise a bit. This can take up to ten minutes depending on heat source.

Add the carrots, stir to combine, and let them soften, about three to four minutes.

Add the zucchini, stir to combine and let it soften, about two to three minutes.

Open a can of plum tomatoes in their juice, and pour over the soup base. I usually use one hand to hold and pour the tomatoes, and the other hand to catch the tomatoes as they fall into the soup and lightly crush them.

Fill the can with water twice, and add to the soup pot. Stir everything to combine.

Taste and lightly salt and pepper.

Add the potatoes, rapini and spinach, and lower the heat to a soft simmer. Allow the soup to simmer for about 20 minutes, checking every ten minutes or so to make sure there is enough liquid in the pot. If there isnt, top it up.

Adjust salt and pepper.

You can eat the soup just as it is – broth and wonderful chunks of vegetables. But when I am ill, I like a smooth soup, so I take it off the heat, and use my immersion blender to make a really thick silky soup. The choice is up to you.

Matzoh balls

To be honest, you could use just about any cracker in this soup – saltines or oyster or water biscuits would all do. But if you have matzoh, use it – there is something very particular about this delicious taste that owes itself to the matzoh meal. Also, if you use salted crackers, adjust salt accordingly.

This will make for quite a salty unboiled mixture. Dont worry. A lot of the salt will boil out in the pot.

  • 1 cup matzoh meal
  • 3/4 tsp salt
  • 2 eggs
  • 2 tbsp oil
  • 2 tbsp soup stock

To make the matzoh meal, take a matzoh cracker or two, break it up into smallish pieces, and place in a sturdy ziploc plastic bag. Using a wine bottle, rolling pin or other hard, heavy implement, smash the matzoh cracker until it is dust! Very therapeutic 😉

In a small bowl, combine the matzoh meal and the salt. In a separate small cup or bowl, beat together the eggs, oil and soup stock until combined well. Pour the egg mixture over the matzoh meal, and stir lightly to combine. It will be quite sticky and soft.

Refrigerate for at least 30 minutes.

To boil the matzoh balls, transfer the soup into a large heatproof bowl. Its okay if a bit of soup remains – this will enrich the boiling liquid for the matzoh balls.

Fill the pot with water, and bring to the boil.

Take the matzoh mixture out of the fridge, and using your hands, make small balls (about 1 inch in diametre) and drop them in the boiling water. Remember that matzoh balls expand to more than twice their size, so dont make huge balls!

Boil for 20 – 30 minutes, or until cooked through. You will know when they are completely cooked when you cut through one and it is light and fluffy all the way through, having absorbed enough water to cook the insides.

Transfer the cooked matzoh balls to the soup, drain and rinse the pot, and transfer soup and matzoh balls back. Reheat gently. Eat and feel better!

Sticky Fingers Bakery + Fried Rice

5 Sep

Today was a totally vegan day. We planned it that way, but to be honest, no one ever even vaguely missed the dairy! For brunch, we went to Sticky Fingers Bakery – a Washington DC vegan institution. M and I had been talking about it for ages … when she got married, I thought of getting her a cake from Sticky Fingers, but I couldnt get my act together! Finally, we went and ate there. It was a bit of a mission to get to, but thank Goddess for GPS, she found it fine!

Sticky Fingers is a really cool, relaxed place. There were families, teenagers, a young woman studying for her LSATS, guys drinking coffee and Skyping, and a man who came in and bought himself a huge sundae, and sat all by himself and ate it with great relish. As you walk in, there is a cold case with pre-made food: everything from TLT’s (tomato, lettuce and tofu bacon sandwiches) to pasta to gyros. Straight in front of you is the bakery section with cookies, cakes, brownies, cupcakes. Everything is home made, fresh and looks incredibly tempting. There is a menu on a chalkboard above the payment counter, and drinks from a cooler or you can order coffee and tea. You can choose between take out and eat in, and because we were with the baby, we sat and ate. There are a few tables (one big communal and 6 smaller tables) inside, and a few outside.

I had the iced vanilla latte, and it was absolutely superb. The coffee itself was brilliant, and I couldnt tell the difference between the soy they used and regular milk. I think they used Silk, which we have tried, and its great. M suggested we have the breakfast sandwich. It came from the pre-made cooler, and it was sublime. Sooooo bloody good! Two english muffins sandwiched a tofu egg omelette (coloured with tumeric and creamy and delicious), with soy protein sausage, and a yeast vegannaise. It was one of the most delicious things I have had in a long time.

M and B had seconds, and I decided to be adventurous by ordering the biscuits and gravy, with scrambled tofu and roasted potatoes. To be honest, I should have stuck with the breakfast sandwich. The biscuits were bland, the gravy was this floury white sauce that was completely tasteless, the scrambled tofu was just ok, and the roasted potatoes had no flavour to them at all. We were all quite disappointed after the delights of the sandwich.

To make up for it, I ordered a sweet and salty cookie which was really good! A chocolate chip and raisin cookie, baked with a sprinkle of salt over it. Really lovely, wonderful juxtaposition of tastes. I would have those again and again! M had a peanut butter fudge cupcake for dessert and B had an oreo cupcake. They were delicious (I think B had seconds on that too!)…. Not too sweet, velvety, moist, and very chocolaty. Even Baby Z got into the fudge cupcake. But when everything is vegan, cholesterol free, lower in saturated fats and sweetened with evaporated cane juice … its actually kind of okay 😉

I also ordered, and took home, a sticky cinnamon bun. How can you not when they are the bakery’s name inspiration? They were good, if a bit doughy…I should have gotten another sweet and salty cookie instead. Though this bakery is not cheap, it is very much worth the trek to find it, and the expense. I wish I could say everything was delicious, but what was good, was phenomenal! We were so busy eating, I didnt even have time to take photos 😉

Sticky Fingers Bakery
1370 Park Road, NW Washington DC, 20010
1 block north from Columbia Heights Metro
Tel: 202.299.9700

——————————————————

vegan!We had a busy afternoon, walking around downtown, shopping, playing… When it was time for dinner, we wanted something really light and yet satisfying. Fried rice was the perfect solution. I made it really quickly and very simply, with a few ingredients.

Because we had rice, curry and rendang potatoes for dinner last night, I had left over rice – this, as any Malaysian will tell you, is the key to good fried rice – cold rice! Once rice has been cooked and refrigerated, the starches solidify over each grain. When you apply heat again, the grains of rice remain intact, firm and rice-y. If you try and fry hot just cooked rice, it will turn to mush!

I used what was in the fridge for this dish, and heated up the remains of the rendang potatoes (mmmmmmm) to serve as a side dish. It was a delectable vegan dinner! You could use any manner of vegetable in this dish – peas are wonderful, as is spinach. Toasted cashew nuts would be great too.

Serves 4

  • 2 – 3 tablespoons oil (I used 1 tablespoon each of olive, truffle and toasted sesame oil – use what you have – peanut oil is good too – it gives a nutty smoky flavour) plus additional if needed
  • 1 cup sliced and chopped red onion
  • 3 cloves garlic, sliced
  • 1 inch ginger, sliced and chopped
  • Salt and pepper
  • 1 tablespoon plus extra soy sauce
  • 1 tablespoon balsamic vinegar
  • 1 – 2 cups button mushrooms, peeled and sliced
  • 3 – 4 cups cold rice (at least overnight in the fridge)
  • 1/2 cup baby roma tomatoes, sliced
  • 1/2 cup baked seasoned tofu, cubed
  • 2 tbsp chili sauce (I used Lingam’s)

In a large, non stick frying pan, over medium high heat, saute the onions, garlic and ginger in the oil. This is the longest part of the dish – you need to get the onions past the soft stage to the slightly burnt and sticky stage. Adjust your heat accordingly so they dont over burn, but keep stirring and let them really cook down so they are soft and brown at the edges. Salt and pepper well.

Pour over the soy and balsamic vinegar, and let the onion mixture cook for several minutes more. Peel and slice the mushrooms, and add them to the onions. Encourage them to burn a bit too – you want them to lose all their moisture, and cook well. Once the mushrooms have coloured, add the rice all at once, and mix the rice into the pan ingredients. Fold over and over again, using a spatula or wooden spoon. Incorporate everything, and then taste. Pour over a bit more soy so that the rice colours a little. Taste again.

Add the tomatoes and tofu, and stir to incorporate. Taste. Adjust. Add the chili sauce and taste again. Adjust to your liking, and serve hot. M and I love scraping the pan from fried rice – its where the best bits hide!

Mixed Vegetable Phyllo

27 Aug

With loads of mixed vegetables!Oh what a day! Blissed out baby mode, and when it came time to make dinner, I realised we had nothing in the fridge but bits and pieces – a handful of spinach, a few artichoke hearts, quarter of a butternut. Some days, you dont have one thing to work with, but many many little odds and ends of things. On days like these, I like to make something that will incorporate all the left over bits – a pie, tart, pasta sauce, even a bread pudding …

Tomorrow we go to Whole Foods once again, but tonight was incorporate all the remaining handfuls and try and make something yummy night. This is one reason why I love phyllo dough. I am not a master Greekie cook (like my beloved Osisters – their spanakopita is phenomenal!) but I do like its ease of use, its pliability and its wonderful presentation. I dont know why, but people feel very manja-ed (Malaysian word – means spoiledbelovedcaredforlookedafter all rolled into one!) when you present them with a baked good – pies, tarts, pastries of all kinds. People love them, and the presence of a crust seems to elevate a rather normal meal into something special. On a night like tonight, phyllo dough enabled me to incorporate lots of things quickly and seamlessly… and delectably!

I would never ever try and make my own phyllo dough. Its waaaaaay too delicate and intricate a process. Rather, I purchase the best phyllo I can find, and am thankful to those who take (almost) all the work out of it for me! There are a few general rules for working with phyllo. Use butter if you want a rich tart, and use olive oil if you want a slightly lighter version. Set up everything you need before you even begin to unwrap the phyllo because as soon as you do, you need to work quickly and efficiently. Phyllo will dry out or start to melt and stick together, so know what you want to do, and do it fast. And always try and work on grease proof or wax paper. This allows you to preheat your pan (I use a jelly roll or large flat cookie pan for this free form recipe) in the oven, and then slide your creation onto it, still on the wax paper. The bottom of the phyllo pie will be crisped because of the immediate contact with hot pan, and you wont get that soggy bottom which generally occurs when you bake the phyllo on a cold pan. And finally, try and drain as much of the moisture out of the filling as you can. You need some moisture to bind the vegetables, but dont put a very wet filling into the pie – it will leak and get soggy and be yucky. If you are making a vegan version, just boil all the juices down into a thickened sauce and use it in place of the ricotta and egg.

This will serve 6 hungry – 8 people

I am going to tell you what I put into this pie, but really, use up what you’ve got in the fridge – from tomatoes and carrots to spinach and pine nuts. You will need about 4 – 6 cups of cooked filling in total.

For the filling

  • 2 tbsp olive oil
  • 1/2 large Vidalia onion, minced
  • 3 – 4 garlic cloves, minced fine
  • Small handful (may be 1/4 cup) sun dried tomatoes
  • Salt and pepper
  • 1/2 – 1 tsp oregano
  • 1/2 tsp paprika
  • 1/4 – 1/2 butternut
  • 1 + 1 cup boiling water
  • 1 cup mixed dried mushrooms – I used chanterelles, porcini and shiitake
  • Pinch of cinnamon (optional)
  • 1/2 cup chopped spinach
  • 1/2 cup chopped french beans
  • 1 cup chopped asparagus
  • 1/2 cup artichoke hearts
  • 3 heaping tbsp ricotta (optional)
  • 2 eggs (optional)
  • 1/4 cup crumbled feta (optional) – use toasted pine nuts instead if you are a vegan!

In a large, non stick frying pan, heat the olive oil and saute the onions, garlic and sun dried tomatoes together until the onions are softened and glossy, and have browned a little.

Add salt, pepper, oregano and paprika, and stir well.

Chop the butternut quite fine – you want little cubes about the size of the nail on your pinkie. You want it to have body, but you want the butternut to cook quickly. Add to the pan, and saute for a few minutes, stirring constantly. Add 1 cup of hot water, and allow to bubble and cook for a while on medium high heat.

In a separate small bowl, immerse the dried mushrooms in another cup of boiling water. Leave for at least 10 minutes, whilst the butternut is bubbling away.

Once the mushrooms have softened, take them out of the water, and chop roughly, and add to the pan. Most of the water from cooking the butternut should have boiled away. Add about half a cup of the mushroom water, and allow to cook for a further five minutes or so. Taste and adjust seasoning. Sometimes I add a little cinnamon for depth of flavour, or more salt, pepper and spices.

Turn off the heat (you should still have a significant amount of liquid in the pan), and transfer the contents of the pan to a sieve set over a small bowl. I usually use the mushroom bowl, cleaned out! Let the liquid drip through, and using your spatula or spoon, press down on the onion-butternut-mushroom mixture so that most of the liquid drains through. Reserve the cooking liquid, either to use as the base of a sauce for the pie, or as the binding liquid if you are baking for vegans.

Transfer the mixture back to the pan, and over medium heat, add the spinach, beans, asparagus and artichoke hearts. Saute briefly until completely combined, but make sure that the greenery does not cook too long – you want it to retain its colour and taste!

Tumble the vegetable mixture into a bowl, and set aside for at least ten minutes to allow it to cool.

If you are cooking vegan, transfer the cooking liquid to the pan, and boil it down until reduced by at least half. It needs to be thick and syrupy. You could add some wine to this if you like, though I didnt have any available. Add a few tablespoons to the vegetable mixture to bind it properly, and give it some body.

Otherwise, beat together the ricotta, eggs and feta, and mix gently through the vegetable mixture. Taste and adjust for seasoning, and set aside.

Phyllo Assembly

  • 7 – 9 large phyllo leaves
  • 1/4 cup olive oil and pastry brush
  • 1/4 cup crumbled feta or toasted pine nuts

Preheat the oven to 200 C and put a jelly roll or cookie pan into the oven to preheat.

Lay out your work surface. On a clean tea towel or a strip of waxed paper, unroll your phyllo dough. Have a small bowl with olive oil and a pastry brush handy. Also have a small bowl containing your feta, and your bowl of prepared vegetables.

Tear a strip of waxed paper long enough to fit your baking pan. Lay a phyllo sheet on the paper (my phyllo dough covered almost the entire paper), and gently brush with a bit of olive oil. Continue to layer leaves of phyllo dough, brushing each layer with olive oil. Its okay if the phyllo tears – just patch it up with olive oil, and keep going. You want to work quickly but surely, and dont worry about covering every inch of the pastry with olive oil – you really just want to give it a gentle brushing. I used 7 layers, but you can use as many as you want.

Sprinkle your crumbled feta onto the dough, going straight down lengthways the middle of the dough. Leave a 2 inch space on either side.

Spoon your vegetable filling over the feta, mounding it, and leaving space on either side. You will now have what looks like a log of vegetables centred on your phyllo dough.

To complete the pie, fold over both short sides, like an envelope, and then fold the longer ends over each other. Using the waxed paper, flip the phyllo log over on itself, so that the seam is bottom side down. Centre the phyllo log on the waxed paper. Brush the top with olive oil.

Using oven mits, take the hot baking pan out of the oven. Using the waxed paper, transfer the paper and the phyllo log onto the hot pan, and put back into the oven.

Bake for about 25 – 30 minutes, or until the phyllo is browned and crispy.

Let sit for a few minutes once out of the oven before slicing and serving.
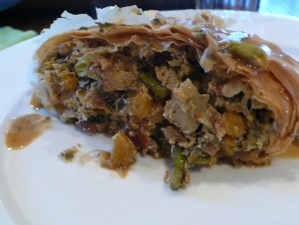
With Sauce!Sauce

If you are not baking a vegan version of this, use the reserved cooking liquid as the basis for a lovely sauce to serve with the phyllo pie. I boiled the cooking liquid until slightly reduced, and then lowered the heat and added a few tablespoons of creme fraiche, a tablespoon of pesto sauce, some salt and pepper, and a few drops of balsamic. I whisked everything together, and served in a little jug to pour over. It was delicious!

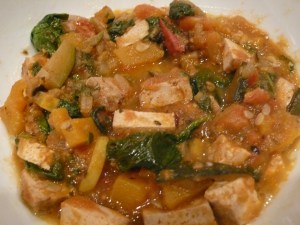
Summer Stew

22 Aug

Perfect Bright Summer FlavoursWow, today was such a lovely day! Lunch at Le Pain Quotidien – perfect tart lemonade with loads of mint, and a gorgeous open face sandwich of fresh ricotta, mission figs, cracked black pepper, honey and chopped tomatoes. I know, it doesnt sound like it would all go, but oh boy, did it! Superb. And then home, and loads and loads of cooking. Dinner was a cold potato salad – roasted garlic and baby tomatoes, mixed as soon as they came out the oven with a few tablespoons of mayo. SO good. And summer stew – the best, brightest and tastiest of the summer veg, stewed briefly together, served with some rice. Vegan, and delicious. And for dessert, a strawberry fool – those gorgeous strawberries I bought yesterday, macerated with a bit of balsamico, and then folded into lightly whipped cream which had been sweetened just a bit, and flavoured with a bit of vanilla. Actually, it turned out to be an Eton Mess, because we also had some store bought meringue which we crumbled over the top. So bloody good!

And then of course, I had to do some prep cooking for M’s birthday tomorrow. I have decided that since it is summertime, I am not going to bother with huge numbers of hot dishes. Most everything can be served cold or at room temperature. Tonight I made broccolini with toasted almonds and a bright lemon olive oil dressing. Roasted butternut which will go into an arugula salad with a few shavings of parmesan. The stuffing for the mushroom pastry. The pudding for the chocolate cake. My feet hurt! And its late. But at least tomorrow, I can bake the cake in the morning, and do the mushroom pastry in the afternoon, and assemble all the salads in between, without having to worry I dont have enough time. Plus, we are planning on going to the farmer’s market! I cant wait! That should be wonderful fun.

So now, back to this summer stew. These are a few of the beautiful vegetables I found at Whole Foods. I didnt want to over cook them, as their bright clean flavours were just too delicate. Also, to be honest, I only put a tiny bit of flavouring into this stew – I wanted the veggies to perfume the gravy with their own fragrance, and I felt it really didnt need any additional enhancement. Please go to the market and see what is bright and fresh and tasty. Use that. If you dont see a squash, but there is a wonderful array of carrots, substitute! This stew is about using whats best in the summertime, and celebrating it. Enjoy!

Serves about 6 – 8

  • 3 – 4 tbsp olive oil
  • 1/2 Vidalia onion, finely chopped
  • 1/2 large (or 2 small) aubergines (eggplant), washed, sliced and chopped fine
  • 1/2 tsp paprika
  • 1/2 tsp oregano
  • Salt and pepper
  • 1 yellow zucchini squash, halved and chopped
  • 1 zucchini, halved and chopped
  • 1/2 butternut, peeled, seeded, and roughly chopped
  • 2 ripe large heirloom tomatoes, roughly chopped
  • 1/2 – 1 cup water
  • 1 package firm seasoned tofu, chopped roughly
  • Large handful baby spinach, washed well

In a large pan, over high heat, in about 2 tbsp olive oil, saute the onion until glossy and softened. Add the aubergine, and sautee until the aubergine starts to brown and burn a bit. Season with paprika, oregano, salt and pepper.

Add the yellow zucchini squash and zucchini to the pan, and sautee until slightly softened. You may need to add more olive oil.

Add the butternut, and combine well. You may want to put a lid on the pan to soften the butternut a bit, but I usually just let all the ingredients bubble and saute for a few minutes. Add the tomatoes, and encourage the sauce that will start to form with the addition of some hot water. I usually add about 1/2 cup, and let the stew cook for about 5 minutes, and then check the butternut. If it needs more time, I add more water. Let cook and meld together for about 10 – 15 minutes, and taste and adjust seasonings.

Dont overcook. This is a delicate stew, and you want to really allow the clean fresh flavours of the vegetables to remain intact.

Add the tofu and baby spinach, and cook just until the spinach is wilted.

Serve warm over jasmine rice.

My Tomato Sauce

5 Jul

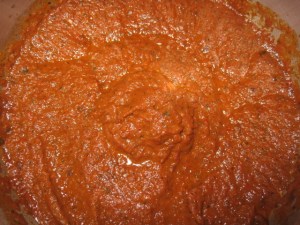
For pasta, for pizza, for salsa… for just about anything. When I need a pasta sauce that is delectable, this is the one I go to. Its been “developed” over more than 20 years of cooking tomato sauce. I have friends who remember me cooking a version of this sauce when I was 14 years old! Im almost 40 now 😉  Its ingredients are malleable but there are some broad rules that I usually stick to:

  • Keep a base of onions and loads of garlic
  • Always use a mix of tomatoes – I use at least 2 types of fresh tomatoes, canned pomodoro, and tomato paste. This ensures a really deep level of tomato flavour. Sun dried tomatoes are also awesome in this sauce.
  • Try and use a mix of fresh and dried herbs. Again, these impart very different flavours, and mixing them really lends depth to the sauce
  • You can use a mix of vegetables (see below for what I put into it) but try and make sure there are some carrots for sweetness

I first started cooking this sauce in high school when I used to have loads of people over for pool parties. It was the most forgiving sauce because you could simmer it for ages, and it just got better and better. As long as the basic rules were followed, and the bones of the sauce were respected, you could add just about any vegetable (bar potatoes or pumpkin) that you wanted.

When I went to university, I started making this sauce for my housemates. There was always something missing, until one day, I hit on a magic combination. And this is the secret to the sauce, without which you will not have the same sublime flavour and glossiness. These are non negotiable. You need at least 1 eggplant for silky smooth, shiny unctuousness, and a big handful of prunes for a dusky sweetness that you just cant place in the final taste. These two ingredients are secret because they both melt into the sauce, encouraging and supporting its flavour without pushing their own agenda into the story. Eggplant and prunes. Who would have guessed?! Please do not try and make this sauce without these two – I promise, it will make you so very happy that you trusted me. 😉

For about 4 – 6 cups of finished sauce, you will need:

  • 2 medium white onions (approx 2 cups), minced
  • 7 cloves of garlic, minced
  • 1/2 cup of extra virgin olive oil
  • 2 tbsp butter (optional)
  • Salt and pepeper
  • Fresh basil, thyme, marjoram, oregano and rosemary, minced fine – about 1/2 cup in total
  • 1 large or about 5 baby eggplant (approx 2 cups) roughly chopped
  • 1 tbsp balsamic vinegar
  • 1 large red pepper (approx 1 cup), deseeded, roughly chopped
  • 4 – 6 baby carrots (approx 1 cup), peeled and roughly chopped
  • 1/2 cup red wine
  • 3 tbsp tomato paste
  • 1 medium zucchini (approx 1 cup), roughly chopped
  • 2 cup mixed tomatoes, roughly chopped (I used cherry and baby roma)
  • 8 medium portobello mushrooms (approx 3 cups) peeled and very roughly chopped
  • 2 x 400 g cans of pomodoro tomatoes in juice – about 4 cups, made up with wine or water if needed
  • 15 pitted prunes
  • 2 tbsp brown sugar
  • 1 – 2 tbsp mixed Italian herbs (dry)

In a heavy 5 qt saucepan, soften onions and garlic in about 2 tbsp olive oil and butter (if you are not using the butter, just use a little more olive oil), over high heat. Keep the olive oil by the side of the stove, and add more when you feel the ingredients are sticking to the bottom of the pan.

Season the onion mixture with salt and pepper, and add about 3 tbsp of the minced mixed fresh herbs, and mix well. Lower heat to medium high, and add the eggplant. Mix well to ensure its covered with oil and onions. Add  balsamic vinegar, and mix to brown a little.

Add red pepper and mix well, and then a few minutes later, add carrots and mix well.

Add all the red wine and the tomato paste, mix well, and turn the heat to low. Add zucchini, mix well, and then add the raw tomatoes and mix well. Add the mushrooms and mix to combine all, keeping check that nothing is sticking and add olive oil if neccessary.

Measure out 2 cans of pomodoro tomatoes in juice into a large measuring cup and make up to 4 cups with wine or water if needed. Smash the tomatoes with a fork so they are roughly chopped, and add all at once to the pan.

Cover the sauce, and allow to begin to simmer and steam. Meanwhile, pit the prunes, and chop roughly. Add the prunes and brown sugar to the sauce and mix well.

Let the sauce simmer, covered, for approx 15 – 20 minutes, mixing every five to ten minutes to ensure it does not burn.

Uncover, mix very well, and let simmer for at least 45 minutes to a couple of hours, over low heat, or until reduced by half. Ensure you check the sauce every 15 minutes or so to ensure it does not burn. You can add more wine if you want a particularly deeply wine-ey sauce.

Taste for flavour and season with salt and pepper if needed, or even some more sugar, and add dried herbs. About five or ten minutes before finished, add the rest of the fresh herbs to let their scent permeate the sauce.

Once the sauce is to your liking, take off heat and decide if you want to keep it chunky (which is nice for some pastas, salsas, etc) or if you want to blend it smooth. I use an immersion blender here. If you do blend it please make sure it has cooled to at least lukewarm – hot splashing tomato sauce is a real pain!

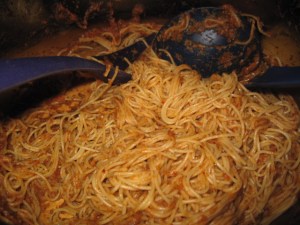
If you are using this as a pizza sauce as I will be, make sure you have at least one cook’s meal with about half a cup of sauce mixed with some angel hair pasta! Soul satisfying.

This freezes extremely well. I often freeze in an ice cube maker and then transfer to a zip loc bag. Alternatively, measure out by cupfuls into a sandwich ziploc bag and freeze flat. Keeps for up to 6 months.

Special thanks to AngelKitten for transcribing all the ingredients and keeping track of me!

Photos copyright Chan KY

A Simple Vegetable Soup for a Tired Mummy

29 Jun

I loved the fresh fruit and vegetables we got at Whole Foods – what a feast for the senses! When MZ was exhausted and didnt really even have the energy to eat (thats what happens when you are at full time work and have a gorgeous babygirl), I would try and make her things that would taste good, but go down easy. This vegetable soup is really as simple as it reads – inspired by what was in the store, and flavoured by nothing more than a little rind of parmesan and salt and pepper. The vegetables were all organic, and their flavour and colour were vivid and vibrant. You dont really need spices or herbs when the veg are this good. Wonderful served with a simple grilled cheese sandwich, or even some bread and tomatoes.

Serves 4

  • 2 – 3 tbsp olive oil
  • 1/2 medium onion, diced
  • 2 – 3 cloves of garlic, minced
  • 1 – 2 large portobello mushrooms, peeled and chopped roughly
  • 3 – 4 carrots, washed and chopped
  • 1 zucchini, washed and chopped
  • 1 small head of broccoli, washed and chopped
  • 1 small butternut, peeled, deseeded and chopped
  • Handful of baby spinach
  • 1/2 cup water
  • Rind of parmesan if you have it (omit for vegan)
  • Salt and pepper to taste

In a saucepan, heat oil over medium heat and soften onion and garlic. Once they have softened, and are glistening happily, add the mushrooms, and stir to combine. As soon as the mushrooms release some of their liquid, add the carrots. Stir to combine.

Add the zucchini, and allow it to release its own liquid into the pan. Stir all together, and add the broccoli, butternut, spinach and water, and stir all well. Pop in the rind of parmesan (this will add a bit of salt, and a haunting dusky note that is just lovely), if you have it, and cover with a lid for about five minutes, lowering the heat.

Once you take the lid off, take out the parmesan, and think about your choices. You could mash and mush the vegetables by hand with a potato masher, or you could transfer cup by cup to a blender or food processor. Dont completely liquidise the soup – you want it chunky and thick. After you pulse gently, transfer back to pan, and take another cup of vegetables to puree. Do this until you have the consistency you prefer, and only now taste for salt and pepper. Sometimes the vegetables are so fresh and sweet, you dont need much addition.

Serve with plenty of love.