Tag Archives: chili

O’Gourmet Food Hall Chili Chocolate Mousse

3 Apr

Chili and chocolate is a wicked, wanton pairing. Chocolate is deep and dark; spicy notes with a bass pounding beat. Chili is bright and spicy – a spark of fire like the river of sound from a sharp sexy saxophone. Together, they play off each other and intensify their own qualities to create an extraordinarily beautiful fusion.

This mousse was created as the last dish in a Spanish red wine tasting at O’Gourmet Food Hall. It was paired with a Humiliat 2008 – a red that is complex, with a depth of flavour and contrast. The pairing of chili and chocolate brought out the various notes in the red wine, and deepened its complexity even further.

Do note that I used organic eggs for this recipe – and this is crucial because the egg white is not cooked. If you have concerns, use pasturised eggs if possible. And do balance the amount of chili to suit your taste. I used Kashmiri chili from O’Gourmet – which is full of fire, and yet smooth and gorgeous. The thing I love about this chili is that in sweet dishes (I used it in a vanilla ice cream before as well), it really allows for stages of flavour – the first hit you get is chocolate, and then suddenly, fire. Its very more-ish, and brings about a flush of passion in those who consume it.

This is not a diet dessert by any standards – chocolate, lashings of cream, butter and eggs. Its rich, but the chili somehow adds a fresh, wild note. And as laden as it is with calories, it uses very simple ingredients – and if you make sure they are top quality, the taste will be sublime. You also cant have huge bowlfuls of this dessert – it is best served as a delightful, delectable taste, may be with a dark cup of coffee.

Do please note that I made this mousse to feed about 20 – 30 people (albeit in tiny little cups). You could probably feed 8 – 10 people with leftovers. Make in little individual serving pots, or one large, luscious bowlful – its up to you. But do make sure you add the whipped cream on top (and a few chocolate shavings or nuggets) – its all about the contrast and layers of flavour.

Makes about 4 – 5 cups

  • 10 ounces best quality bittersweet chocolate (at least 72%) broken into chunks
  • 6 tbsp butter
  • Pinch of salt
  • 1 + 2 tbsp vanilla extract
  • 6 eggs, separated
  • 3 + 3 tbsp light brown sugar
  • 2 + 1 cups cream
  • 2 tsp chili powder (or to taste)
  • Chocolate chunks or curls to decorate

Fill a saucepan with boiling water, and place a small metal bowl on top. Melt the chocolate in the small bowl, and add the butter. When the butter is melted, whisk in the egg yolks (they will stiffen the mixture), salt, and vanilla. Stir well, and take off the heat. Pour the chocolate mixture into a large bowl, and set aside.

Whip the egg whites, adding 3 tbsp of light brown sugar, until the egg whites are very stiff, and hold high peaks. Fold about 1/3rd of the egg whites into the chocolate mixture to lighten it, and then gently fold the rest in. Cover the bowl, and place in the fridge.

Whip 2 cups of cream until stiff, and then remove the chocolate mixture from the fridge. Fold the cream in gently. Sprinkle the chili over the mousse in 1/2 tsp portions, and fold until completely incorporated. Taste and keep adding until to your taste. I like it hot!


Chill the mousse for at least half an hour. If you are serving it in individual portions, spoon or pipe into cups. If you are serving in a large bowl, spoon into the bowl and cover.


Whip  the remaining 1 cup of cream, 2 tbsp vanilla extract and 3 tbsp light brown sugar together and pipe or spoon over the prepared and chilled mousse. Decorate with chocolate and cool in the fridge for 2 hours minimum, or up to 24.

Serve with joy!

Spicy Cheese Crackers

27 Dec

I really dont like the crackers that you can get at the stores. They taste like they are full of chemicals. And when the process of making crackers is so very simple, its a wonder that we buy them at all. This past Christmas, I was going to dinner at Jobby’s house. I wanted to bring some lovely but simple things, as I had been immersed in cooking these last few days. I decided on a raspberry-gooseberry fool, which is just whipped cream, scented with vanilla and a touch of icing sugar, folded into cooled stewed raspberries and gooseberries. That sweet tart cool creamy combination is beautiful – and it takes minutes to make.

I knew Jobby would probably make her wonderful hummus. So crackers were a good addition – and they are delicious enough to eat on their own. Unfortunately I did not get a photograph because Nana chowed down more than half before we even left the house! But suffice to say, these crackers are wonderful – such a complex blend of flavour. You could spice them up with anything you like, but I used chili powder, mustard seeds, and English mustard powder. The combination is divine, spicy and cheese-y all at the same time. The crackers are crisp and flaky and can be cut into rounds, squares, or whatever your heart desires. Poke a few holes in them, pop them in a hot oven, and watch them brown up and puff a little. Beautiful.

These crackers will keep, in an air tight box, for about a week, but if you have a Nana around the house they wont last!

Makes about 100 crackers, depending on how you cut them

  • 1 cup bread flour (OO flour)
  • 1 cup polenta
  • 1 tsp salt
  • 1 tsp baking soda
  • 1 tsp chili powder
  • 2 tsp mustard seeds
  • 1 1/2 tsp English mustard powder
  • 1 cup cheese – cheddar/parmesan mix
  • 3 tbsp cold butter
  • 1 cup buttermilk

Preheat the oven to 190 C (375F).

Line a baking sheet with parchment paper.

In a large bowl, combine the flour, polenta, salt, baking soda, chili powder, mustard seeds and English mustard powder. Toss to combine.

Grate the cheese over the flour mixture, and stir well.

Grate over the cold butter, and stir again, gently.

Pour over the buttermilk, and combine. Turn the dough out onto a working surface and knead, gently until it all comes together.

Form the dough into a ball, and refrigerate, covered for about half an hour.

Once the dough has rested and cooled, divide it into quarters.

You can now roll the dough out very thin, and cut it into shapes, or roll the dough into a log, and slice very thinly.

Arrange on the baking sheet, and using the tines of a fork, poke a few holes in each cracker. This is optional, but it will help keep the crackers flat and less puffy.

Bake for about 8 – 10 minutes, or until the crackers are golden and cheesy.

Let cool for at least 10 minutes before gobbling up!


Chili Tomato Marmalade

17 Nov

With Cheddar SconesI am completely utterly besotted with my Cheddar Cheese Scones. Who knew that something so quick and easy could taste so very very good. I stored them, wrapped in wax paper, in a ziploc plastic bag, and today they were fresh, moist and tender. I toasted one for breakfast, and started dreaming up things that would be delicious with this gorgeous cheesy rich bread…. and suddenly, Im not sure from where, chili tomato marmalade popped into my head.

Now let me be honest here. Ive never made marmalade before. I have made apple butter and simple jams, so I decided to basically apply those principles – fruit (tomato and lemon), a bit of water, sugar and low low steady heat. I also wanted to scent my marmalade – because as much as I love the scones, their richness was calling out for something tart and sweet and hot and wild to augment and accent them. Chili and ginger and all spice seemed like a good mix… and oh they were!

In jam making, youre supposed to add equal amounts of sugar to fruit. So for example, I had six cups worth of chopped tomatoes, which called for six cups of sugar. But I just couldnt do it. Since I was venturing into uncharted territory, I decided to halve the amount of sugar used (plus a bit for the lemon rind). I made up for it by cooking the mixture long and slow and low … and it worked. With patience, and a little stirring (not much, I promise), I created a stunningly pretty and decadent tasting chili tomato marmalade.

You could use this marmalade in so many ways. It would be sublime in a grilled cheese sandwich, as a condiment in a cheese platter, as a replacement for cranberry sauce at Thanksgiving. Its spicy notes are very seasonal and fresh – and its jewel like colour is festive and happy.

Easy to make, in one evening, this marmalade is something you must try for yourself. Its wonderful!

Makes approximately 3 cups marmalade

  • 5 lemons
  • 1/2 cup + 3 cups light brown sugar
  • Approximately 1.4 kg / 3 lb / 6 cups chopped tomatoes – I got a good mix – beef, Holland, Roma, etc.
  • 1 tsp all spice
  • 1 tsp ginger
  • 1 tsp crushed red chili
  • 1 tsp mustard seed
  • 1 tsp salt
  • 1 1/2 tbsp balsamic vinegar

First, prepare the lemons. Wash them well, and cut off the peel – leaving as much of the pith on the lemon as possible. Chop the peel roughly, and place in a large, heavy bottomed saucepan with 1/2 cup of sugar and 1/2 cup of water. Juice 2 of the lemons, and add the juice (should be about 1/2 cup as well) to the mix. Bring to the boil over high heat, lower the heat and simmer for about 20 minutes to soften the peel up.

Skin the remaining lemons of their pith, and chop the flesh up roughly. Set aside.

Put a kettle onto the boil, and prepare the tomatoes for skinning by marking crosses at stem and bottom with a sharp knife. Place all the prepared tomatoes in a large bowl, and when the kettle comes to the boil, cover the tomatoes with boiling water until they are all completely covered. Count to 30, drain the tomatoes, and refresh them under cold water. You should have encouraged a lot of the tomato skin to start to peel off from the flesh. Use a sharp knife to peel the tomatoes (it should be relatively easy), and chop them roughly.

Do not seed the tomatoes – keep the seeds for the marmalade. Tomato seeds have a lot of pectin in them, and will help the marmalade gel.

You should have about 6 cups of chopped tomatoes. Take the lemon peel off the heat, and add the tomatoes directly to the saucepan, along with the chopped lemon that you set aside. Add the all spice, ginger, red chili, mustard seed, salt and balsamic vinegar and stir well to combine. Add the remaining 3 cups of light brown sugar, and place the saucepan back onto the stovetop at medium heat, and bring the entire mixture to the boil, stirring as you do so.

Once the mixture has come to the boil, turn the heat right down to the lowest you can accommodate, and simmer the marmalade, stirring occasionally until thickened to your liking.

I cannot tell you how long it will take for this mixture to morph into marmalade because different tomatoes will gel at different speeds. What I can tell you is this. It took my marmalade about 2 hours, on very low heat, to set up to my liking. The tomatoes will shed a whole load of water, and the entire mixture will seem very loose and thin – like a very light soup. Keep simmering, and watch as the mixture reduces, thickens and darkens in colour. I started out with pale tomatoes, but the cooking process created a ruby red marmalade.

Err on the side of caution. Burnt marmalade is irretrievable, and it does set up and thicken further once taken off the heat. I took mine off when it was thick enough to stand on a spoon, but not thick enough for marmalade. It set up very well as it cooled, and is now very sticky and scrummy and thick. If your marmalade does not set up as you like, put it back onto the heat for half an hour at a time.

Enjoy this morning noon and night, with those you love. Hopefully on a gorgeous Cheddar Scone!


Adi’s Cookies

26 Oct

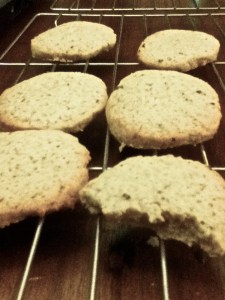
Inspirational!Today was a lovely chilled day, reconnecting with the KL I love so much … seeing friends, being inspired and challenged by strong women. My beloved friend, Adi, gave me a beautiful gift – an astonishingly lovely vanilla bean paste that she brought back from holidays in Bali … and this paste was truly magical. It was a mix of vanilla bean, cacao nibs and chili! What a taste combination … and what a scent. When I opened the jar this deep spicy dark chocolatey vanilla musk wafted out and assailed me with its deliciousness.

I couldnt wait to cook with it … and it set me to thinking. Pastes are such a lovely conglomeration of tastes – this one in particular has a balance of dark deep flavours, invigorated by a faint sting of chili. Beautiful! I decided I was going to make refrigerator cookies with the paste, and I also dreamed up a whole variety of other pastes I could make inspired by this one.

If you cant put your hands on a vanilla, cacao nib, chili paste (and unless youre in Bali, and visiting the Puri Ganesha Villas where it was concocted, I doubt you can!), you can make your own paste from any number of wonderful combinations.

Just pound together a few ingredients that inspire you – a mortar and pestle would do well by you here – and bake some cookies or make a cake with the paste as your flavouring inspiration.

Here are a few that come to mind:

  • Crystallised ginger, cranberries and cinnamon
  • Grated lemon and orange peel, hazelnuts and raisins
  • Mint, cacao nibs, and pineapple
  • Dried blueberries, saffron, and almonds
  • Macadamias, a touch of honey, and nutmeg

Once you have a paste that you love, you can add it to so many things – to cakes and glazes. You could stir some into a pudding or ice cream. Use it to perfume a cupcake or frosting. Rub it onto an apple before baking, or stir it into a fruit crumble… you will have a haunting, unique flavour that will intrigue and delight.

Or you could make these cookies. I love refrigerator cookies. Basically, you make a simple cookie dough, lushly rich with creamed butter and sugar, and flavoured with the paste of your choice, and refrigerate the dough, rolled into logs, for at least a few hours. This allows the butter to firm up, and then you just slice the cookies and bake for a few minutes. Any left overs, you can freeze for up to six months, so you always have fresh cookies to hand. What a pleasure and a luxury! And once you have a paste that you love, the entire process takes literally 20 minutes to put together!

Enjoy this recipe, and be comforted. And thank you to Adi for inspiring me in so many ways!

Makes about 48 cookies / 2 logs

  • 2 sticks (16 tbsp) butter, at room temperature
  • 1 cup light brown sugar
  • 1 egg
  • 1 tbsp sour cream (or you could use cream cheese – or even leave this out – I just love the slight tang this provides)
  • 2 – 4 tsp vanilla, cacao nib and chili paste (or one that you make up!)
  • 2 1/2 cups unbleached organic cake flour
  • 1 tsp baking powder
  • 1/4 – 1/2 tsp sea salt (I used 1/2 tsp because I wanted to bring out the spice note of the chili – use less if your flavour combinations are softer)
  • 1 tbsp milk or buttermilk

In a stand mixer, fitted with a flat paddle, or a electric hand beater, cream the butter and sugar until light and fluffy. This takes a few minutes, so be patient. Its not just mixed together, but actually starts to fluff up…

Add the egg and sour cream and mix well. Add 2 teaspoons of the vanilla paste and taste – adjust if needed.

In a separate bowl, mix together the flour, baking powder and sea salt. Add to the butter mixture in three batches, adding a touch of milk in between each batch to keep the dough soft and pliable. Mix in the flour very briefly, just until the dough comes together, then add a bit of milk, mix again, etc.

Once all the flour has been incorporated, turn the dough out onto a long strip of waxed paper. Divide the dough into half, and roll out into a thick log. Wrap tightly in separate pieces of waxed paper, and refrigerate for at least 2 hours, or freeze until you are ready to use.

When you are ready to bake some cookies (and I have to ask myself, when am I not?!), preheat the oven to 200C (400F)

Line a cookie tin with greaseproof paper, and take out a log of cookie dough. Cut slices about 1/8th inch thick from the log, and arrange on baking sheet. They wont spread very far, so they dont need to be very far apart.

Bake for 6 – 10 minutes, until the edges are just starting to brown, and the cookies are firm to the touch. Cool on racks for a few minutes before devouring.

Enjoy and be inspired!

PS – forgive the blurry photograph, am still sorting through my luggage looking for my camera!

Malaysian Dinner

5 Oct

Last night, after a long journey back home from NYC, I was confronted by a quiet empty kitchen. M had gone upstairs to put Z to bed, J had gone to have her shower, and I realised that we would all be hungry in about half an hour. I wanted to make a REALLY fast, but really delicious meal that would be warm, and full of the flavours of home.

We didnt have much in the fridge, but we did have some tempeh, a half bag of frozen spinach, some milk (for vegans, you can replace with a bit of coconut milk), some salsa with chopped tomatoes and garlic, an onion and jasmine rice. Chili and soy sauces provided heat and flavour, along with a drizzle of toasted sesame oil. This was such a good meal, and took only a few minutes to put together.

Serves four hungry people on a cold rainy day, with the remembrance of sunshine and heat.

Prepare some jasmine rice.

While the rice is cooking, chop an onion, and saute, with a bit of olive oil and a bit of toasted sesame oil, in a medium sized non stick pan until translucent. Sprinkle over some soy sauce and some chili sauce until the onion is very dark and sticky looking. Slice up the tempeh, bring the heat up high, and quick fry the tempeh, ensuring it is covered in the onion sticky mix. You should fry the tempeh in an even layer, and then flip it over. Add more soy or chili sauce if you want it stickier, saltier or hotter. Once the tempeh has been cooked on both sides (it will get a bit brownish and will start to burn on the edges), stir fry it a bit, and transfer to a bowl. Set aside to serve. This should take you about ten minutes total.

Clean out the frying pan, and put half a bag of frozen spinach (or 2 – 3 cups fresh, chopped) and a few tablespoons of salsa into the pan. Put the heat on to low, and let the mixture melt and come to room temperature. Add the milk or coconut milk (I used about half a cup), and about a teaspoon of soy sauce. Let the mixture come to a boil, and let it bubble down a bit. Taste for saltiness and adjust. If you have it, sprinkle over a half a teaspoon or more of garam masala for a soft hint of spice.

Serve the spinach and tempeh with rice for a simple, easy Malaysian meal.

PS – We were so hungry, and it smelled so good, I forgot to take a picture! But trust me, its easy, delicious, and it looks beautiful, with the deep creamy green of the spinach, the sticky golden chili tempeh and the pure white rice.

Vegetarian Chili + Tacos

11 Jul

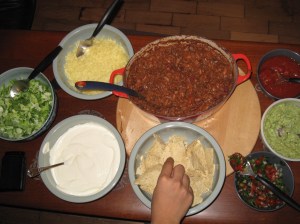
Taco DinnerThis is a meal for a celebration. A birthday, a party, a World Cup final. Or even just because. Its so delicious – and its good for you too! No cream or butter, and lots of fresh vegetables. You can make it vegan by cutting out the sour cream and cheese sides (or finding wonderful alternatives – soy cheese is surprisingly tasty). It looks lush and bountiful, and making it is really the work of one afternoon. There are lots of fiddly bits, and I admit, I dont make my own tacos, and I supplement my salsa by purchasing a good branded one (I used Paul Newman’s peach salsa this evening). The heat is also up to you. I give measurements for a medium spicy chili, but really do what feels natural to you.

I also use dried pinto beans. Why? Well, in part because I am stubborn, and Ive always made it that way. But also because even with an overnight soaking, they need at least 3 – 4 hours to cook. This forces you to cook the chili for long enough so that it really becomes thick and luscious, and for all the flavours to meld.

Feel free to halve this recipe, but really, its a meal for a big group of people!

Serves 8 – 12

Vegetarian Chili

  • 500 g pinto beans
  • 3 – 4 tbsp olive oil
  • 1 medium onion minced
  • 7 cloves of garlic, sliced
  • 2 stalks of celery, chopped
  • 2 carrots, chopped
  • 4 large portobello mushrooms, peeled and chopped
  • 1 red pepper, deseeded and chopped
  • 1 – 2 red chilis, deseeded and chopped
  • 1 bay leaf
  • 1 tsp dry basil
  • 1/8 tsp cinnamon
  • 1/2 tsp mixed herbs
  • 1 tsp crushed chili pepper flakes
  • 1 tsp cayenne
  • 1/2 tsp coriander
  • 1 tsp cumin
  • 1 tsp oregano
  • 1/4 tsp smoked hot paprika
  • Salt and pepper
  • 250 g can white beans
  • 250 g lentils
  • 250 g can kidney beans
  • 500 g can pomodoro tomatoes in their own sauce
  • 1 – 2 c fresh tomatoes
  • 1 tbsp mustard
  • 1 tbsp cocoa powder
  • 1 tsp sugar
  • 1/2 cup red wine
  • handful of dried chanterelle and portobello mushrooms reconstituted in hot water for 15 minutes
  • juice of 3 small limes
  • Handful of Italian parsley (or fresh coriander if you really must)

In a saucepan or heatproof bowl, rinse and sort the pinto beans. Make sure there are no grit or stones in the beans – a nasty bite of food if there ever was. Cover with water and leave overnight.

The next day, about 4 – 6 hours before you want to eat, in a large, heavy pan (I use a dutch oven or heavy bottomed 5 quart stock pan), over medium low heat, heat oil and soften onions and garlic. Saute until glossy, and then add the celery, carrots, mushrooms, pepper and chilis, mixing well after each addition. Cook for about 3 – 5 minutes until the mixture has softened and let go of some of its liquid.

Add the bay leaf, basil, cinnamon, herbs, pepper flakes, cayenne, coriander, cumin, oregano, and smoked hot paprika, and mix very very well. Season with salt and pepper.

Add about 3/4 of the pinto beans (you can freeze the rest and use in a soup or stock), the white beans, lentils, and kidney beans, mixing well after each addition. Add the pomodoro tomatoes and their liquid and stir to combine. Cover and let simmer over low heat for about 15 minutes, stirring every five minutes or so.

After about 15 minutes, uncover the pan. It will be very liquid. Add the fresh tomatoes, the mustard, cocoa powder, sugar, and red wine. Chop the dried mushrooms fine, and add to the stew, along with the juice of 3 small limes. Cook, over very low heat, for at least 3 hours and up to 6 if you want, stirring every 10 – 15 minutes so it doesnt burn on the bottom. The chili will go from liquid to a very thick savoury stew. Taste for spice and salt and pepper, and adjust to your liking.

Just before serving, sprinkle over some chopped fresh parsley. If you like fresh coriander (I hate it), please feel free to substitute!

Tomato Salsa

I dont add any spice to this salsa because I think it would interfere with the chili and the bought salsas I am serving. However, if this is the only salsa youre serving, feel free to add 1 – 2 chilis, chopped fine.

  • 1 – 2 cups baby roma tomatoes (or 2 – 3 large juicy tomatoes)
  • 1/4 – 1/2 yellow onion, minced
  • Salt and pepper
  • 1/4 – 1/4 cup mixed fresh basil and Italian parsley, chopped
  • Juice of 4 – 5 small limes

Chop the tomatoes in a small dice. Add the minced onions, and salt and pepper, and mix well. Chop the basil and Italian parsley, and add and mix well. Juice 4 – 5 small limes, and add this liquid to the salsa. Mix, cover and store in the fridge until serving time.

Guacamole

I am a purist. I like guacamole simple – as many avocados as I can afford, mashed with a bit of salt and pepper and lime. Unbelievably delicious.

  • 4 ripe avocados (dark skinned)
  • Salt and pepper
  • Juice of 5 small limes
  • 1 avocado pit

Cut your avocados in half lengthwise, using the pit as a guide for your knife. Using a spoon, carve out chunks of avocado into a pretty serving dish. Make sure you scrape out all the beautiful dark green flesh that is right next to the peel.

Mash the avocado with a fork until it is a smooth paste. Add salt and pepper to taste, and the juice of 5 small limes. You wont taste the limes in the finished guacamole, just a really intense avocado flavour.

Pop the avocado pit into the serving bowl to ensure that the avocado does not brown, and store, covered, in the fridge until time to serve.

To serve

To serve this feast, you will need:

  • White and yellow corn tacos, heated briefly in the oven (figure 3 taco shells per person, or 2 if you add the wraps)
  • Soft burrito wraps, warmed briefly in the oven
  • Vegetarian chili
  • Tomato Salsa
  • Store bought salsa as an addition, refrigerated
  • Guacamole
  • Shredded lettuce (I use a combo of lettuce, baby spinach and parsley)
  • Sour cream
  • Shredded cheddar or jack cheese

Arrange on pretty serving platters, and let your guests make their own! So much fun!

All photos copyright Chan KY

Hand: Ezril

Mushroom and Chili Pasta

27 Jun

Angel Kitten asked if we could have some chili in the food (I think I might make a veg curry soon…) It made me think about why I havent made a lot of spicy chili dishes. I think its because when I was quite small, I was in the kitchen with my Kak Gee. She was preparing a meal for an embassy function, and she had some sesame seeds next to the chopping board where she was preparing the chili. I was sneaking finger-fulls of the sesame seeds, and of course accidentally consumed some chili seeds as well. Oh my good goddess, they were so bloody hot! I cried my 5 year old eyes out! I think I have been nervous about cooking with chili ever since! But I decided today I was going to face my fears (unlike the England team), so AngelKitten and I had a chat and dreamed up a pasta we wanted.

We thought up a mushroom, chili and blue cheese pasta, because we were so enamoured with the blue cheese bread pudding from the other night. However, once we started cooking, the blue cheese just didnt go with the chili and mushrooms, so we left it out. This is an example of cooking on the fly 😉 If we had stuck with our initial daydream pasta, it would have tasted totally crap (kind of like England’s play) so we adjusted, and it was yummilicious.

This follows a basic pasta outline that I have used before. Infused oils, seared mushrooms, sauce, and quick mixing with angel hair. Mainly its what you do with your similar ingredients which changes the taste, flavour and texture.

For 6 people you will need:

  • 1/4 cup olive oil + 2 tbsp for cooking
  • 4 red chilis (NOT chili api)
  • 4 cloves of garlic, minced
  • 10 – 12 portobello mushrooms
  • 1/2 tsp sugar
  • Salt and pepper to taste
  • Butter
  • Red wine
  • 1 packet or less angel hair pasta

Put olive oil in a clean small bowl. Clean your chilis, and cut off tops, and (depending on the heat you prefer) clean inside – split chili in half and clean out chili seeds and stringy bits with the tip of a butter knife. Be careful here because the chili seeds are the most hot part of the chili and you could do harm to yourself if you rub your eyes or mouth while doing this job. The more chili seeds you leave, the hotter the finished dish will be. Dice the chili finely and put into the olive oil to infuse.

Meanwhile, heat 2 tbsp oil in a large pan over medium high heat. Add minced garlic. Let it soften. Clean and chop the mushrooms roughly. Add about half to the hot oil (the garlic should be sizzling) and sear it – mixing it well in the oil and making sure that it burns a bit. Add the sugar to encourage caramelisation. As the mushrooms burn slightly, add the rest. This will encourage the mushrooms to let go of their juices. Add a few splashes of red wine and a couple small slices of butter to the top of this mushroom mixture, and a wonderful rich sauce will start pooling at the bottom of the pan. Add all the chili and olive oil and mix through for richness and heat. Season with salt and pepper and taste to adjust seasoning.

If you want it creamy, feel free to add milk or cream, but it really doesnt need it.

Prepare 3/4 packet or so of angel hair pasta. Drain. Add pasta to pan with tongs and mix well. Enjoy your comfort food even if your team does crap 😛