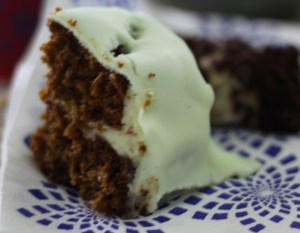
Tag Archives: recipe

What I Cooked Today – and an Apology

17 Aug

Yes, I know. I havent posted in literally months. I was so excited about the prospect of blogging Ballymaloe Cookery School – and when I got there, I was quite good … but suddenly … I was just immersed. Its not that I didnt have time – it was just that there was so much going on internally and externally, that I needed a moment, every day, to just be.

And unfortunately, that moment that I took for myself on a regular basis, would be the moments when I would have, should have, blogged instead. Apologies. To you, and to myself, for not having documented this extraordinary experience as it was happening. But it was so deep, so life-changing that … to be honest, I didnt have the words.

However, I took loads of photographs … and over the next few days, I will go over them, and share some of my most special Ballymaloe moments with you.

As for now … I am sitting in Provence, in the golden sunshine, at the home of my dear friend… and I am cooking in a brand new way. I learned so many techniques at Ballymaloe which enriched the way I cook, and also the way I see food. Nothing goes to waste… a grapefruit eaten for breakfast gets considered, and the peel gets turned into candied fruit. Stale bread becomes breadcrumbs. And raspberries, which were fresh yesterday, but might not be utterly perfect today, get turned into raspberry jam.

Simple Easy and Gorgeous

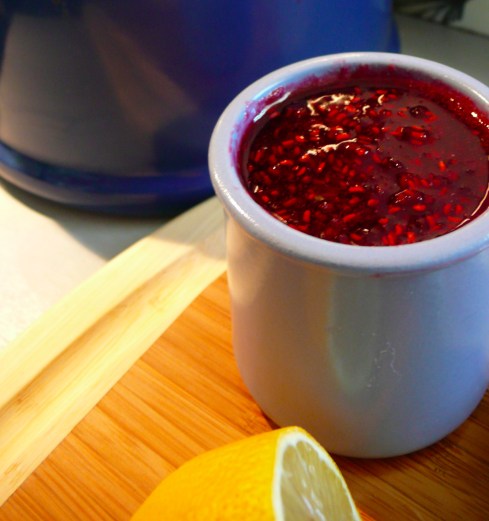
And thats what I made today. Raspberry jam – dark, deep, so delicious slathered on a fresh croissant, perfect and bursting with the sunshine and the fruit. And simple beyond words.

To make this jam, you need equal parts fruit and sugar. And thats it. Yes, its really that simple.

I had 125 grams of fresh raspberries, which I washed quickly under the tap. With the water still clinging to them, I put them in a little pot, over a medium high heat. They began to sizzle and disintegrate, and I helped them along a little with a spoon. As soon as they became a glowing red mush (a matter of a few minutes), I added an equal amount (125 grams) of sugar. The sugar melted into the raspberries, and I boiled this mixture for about 4 minutes, or until it had “set.”

You can tell that jam has set if a little of the jam spooned onto a cold plate sets into a wobbly sort of solid consistency. You can draw a line through the jam with your finger, and the line stays.

I poured the jam into a little pot (gorgeous isnt it? It was a yogurt pot from the supermarche!) and set it down to cool. And then I decided to write.

I am glad to be back. If you have a few berries, consider making some jam today. Fresh jam is like nothing else, and it really takes only a few minutes.

Be well!
Ms Tina’s Gluten-Free Granola

4 Apr

Since I decided to take a pause in my life – and yes, thank you, I managed to turn 40 very successfully with the help and love of some dear friends – I havent been cooking a lot. Other life issues demanded precedent. I needed something to get me moving again, and of course, I do love a challenge. My dear friend, Ms Tina gave me a challenge that was intriguing and exciting. She asked me to create a truly tasty and delicious gluten-free granola for her.

Gluten-free is basically a diet that is completely free of any gluten containing cereals, specifically wheat, spelt, barley, and rye – and ensuring that no ingredients used have any gluten based cereals as an additive or filler, and even that non gluten flours / ingredients have not been processed on machines which also are used for wheat. This is a moment which calls for vigilance in shopping! I am lucky in that I have O’Gourmet Food Hall as a wonderful resource for hard to find ingredients that are also natural, not overly processed, and organic.

While the recipe is very open to interpretation, you must make sure that all ingredients are gluten-free – and the best way to do that is by reading the small print. I found some rice flour for this recipe, but I did not read the small print. When I got home, I found that the rice flour had been processed on machines that were also used for wheat flour – so I ended up using gluten-free buckwheat flour instead. I had to search quite hard to find gluten-free ingredients, but the effort was worth it!

This makes about 10 cups of granola. Its not labour intensive, but it does take quite a bit of time in the oven, with checking and turning every 20 minutes or so. Bake it in the still of the night, or on a lazy Sunday. Please also do feel free to chop and change ingredients. You may not like nuts in your granola as much as I do – add raisins, cranberries, apricots, etc. I could not find gluten-free oats (and remember, not every oat is gluten free!) so I used gluten-free muesli instead – it already had raisins and apricots, so I decided not to add any more. You need about 11 cups of mixed granola ingredients. I also tried to add as little oil as possible to the granola – but the result was a granola which did not clump together as much as I would have wished it to. Add up to 1/2 cup more oil to really bind the mixture together.

With a bit of care and creativity, you will find that this granola is well worth the effort – delicious, gluten-free and vegan to boot!

Makes 10 cups

  • 4 cups gluten-free oats (or gluten-free muesli if you cannot find pure oats)
  • 2 cups quinoa flakes
  • 1 cup sunflower / sesame seeds
  • 1 cup raw whole macadamias, roughly smashed
  • 1 cup raw hazelnuts, roughly smashed
  • 1 cup raw pistachios
  • 1 cup raw cashews
  • 3 tbsp rice flour
  • 3/4 cup best quality honey (I used a mix of leatherwood and manuka)
  • 3/4 – 1 1/2 cups canola or sunflower oil
  • 1/2 cup organic juice (I used an organic raspberry and pear juice)
  • 1 tbsp vanilla extract
  • 2 – 3 tsp cinnamon
  • 1 tsp ginger
  • Large pinch of sea salt

Preheat the oven to 115 C (250F). Line your largest baking tin with parchment paper and set aside.

Mix the oats/muesli, quinoa flakes, sunflower/sesame seeds, macadamia, hazelnuts, pistachios, and cashews together in a very large bowl. Use your hands, and really ensure everything is mixed well. Sprinkle over the rice flour, and combine again.

In a small bowl, whisk together the honey, oil, juice, vanilla extract, cinnamon and ginger. Pour this mixture over the dry ingredients, and using your hands, mix well to combine. The granola should be quite soggy. Sprinkle sea salt over, and combine again with your hands. Taste and adjust seasonings.

Turn the granola out onto your prepared baking sheet, and pat it into a very large, well packed rectangle. Place in the oven and bake for up to three hours, removing it every 20 minutes or so, and turning the granola over  in sections to make sure it crisps every where.

After about 3 hours, remove the granola from the oven, and pat and pack the granola down quite well, and switch the oven off, but return the granola back to the cooling oven. Leave, undisturbed for at least another 2 hours, or even overnight.

Break the granola into large chunks, and store in air tight containers, for up to 2 weeks.

Enjoy!

O’Gourmet Food Hall Chili Chocolate Mousse

3 Apr

Chili and chocolate is a wicked, wanton pairing. Chocolate is deep and dark; spicy notes with a bass pounding beat. Chili is bright and spicy – a spark of fire like the river of sound from a sharp sexy saxophone. Together, they play off each other and intensify their own qualities to create an extraordinarily beautiful fusion.

This mousse was created as the last dish in a Spanish red wine tasting at O’Gourmet Food Hall. It was paired with a Humiliat 2008 – a red that is complex, with a depth of flavour and contrast. The pairing of chili and chocolate brought out the various notes in the red wine, and deepened its complexity even further.

Do note that I used organic eggs for this recipe – and this is crucial because the egg white is not cooked. If you have concerns, use pasturised eggs if possible. And do balance the amount of chili to suit your taste. I used Kashmiri chili from O’Gourmet – which is full of fire, and yet smooth and gorgeous. The thing I love about this chili is that in sweet dishes (I used it in a vanilla ice cream before as well), it really allows for stages of flavour – the first hit you get is chocolate, and then suddenly, fire. Its very more-ish, and brings about a flush of passion in those who consume it.

This is not a diet dessert by any standards – chocolate, lashings of cream, butter and eggs. Its rich, but the chili somehow adds a fresh, wild note. And as laden as it is with calories, it uses very simple ingredients – and if you make sure they are top quality, the taste will be sublime. You also cant have huge bowlfuls of this dessert – it is best served as a delightful, delectable taste, may be with a dark cup of coffee.

Do please note that I made this mousse to feed about 20 – 30 people (albeit in tiny little cups). You could probably feed 8 – 10 people with leftovers. Make in little individual serving pots, or one large, luscious bowlful – its up to you. But do make sure you add the whipped cream on top (and a few chocolate shavings or nuggets) – its all about the contrast and layers of flavour.

Makes about 4 – 5 cups

  • 10 ounces best quality bittersweet chocolate (at least 72%) broken into chunks
  • 6 tbsp butter
  • Pinch of salt
  • 1 + 2 tbsp vanilla extract
  • 6 eggs, separated
  • 3 + 3 tbsp light brown sugar
  • 2 + 1 cups cream
  • 2 tsp chili powder (or to taste)
  • Chocolate chunks or curls to decorate

Fill a saucepan with boiling water, and place a small metal bowl on top. Melt the chocolate in the small bowl, and add the butter. When the butter is melted, whisk in the egg yolks (they will stiffen the mixture), salt, and vanilla. Stir well, and take off the heat. Pour the chocolate mixture into a large bowl, and set aside.

Whip the egg whites, adding 3 tbsp of light brown sugar, until the egg whites are very stiff, and hold high peaks. Fold about 1/3rd of the egg whites into the chocolate mixture to lighten it, and then gently fold the rest in. Cover the bowl, and place in the fridge.

Whip 2 cups of cream until stiff, and then remove the chocolate mixture from the fridge. Fold the cream in gently. Sprinkle the chili over the mousse in 1/2 tsp portions, and fold until completely incorporated. Taste and keep adding until to your taste. I like it hot!


Chill the mousse for at least half an hour. If you are serving it in individual portions, spoon or pipe into cups. If you are serving in a large bowl, spoon into the bowl and cover.


Whip  the remaining 1 cup of cream, 2 tbsp vanilla extract and 3 tbsp light brown sugar together and pipe or spoon over the prepared and chilled mousse. Decorate with chocolate and cool in the fridge for 2 hours minimum, or up to 24.

Serve with joy!

Red Wine Poached Figs Baked with Fourme D’Ambert

27 Feb

I could eat these figs all day. They are sensuous, sweet, sticky, salty, just a little burnt… totally delectable. I created them for the O’Gourmet Food Hall wine tasting, and they were paired with (and poached in) a Luberri 2009. The figs interacted extremely well with the wine, opening it up and accenting its unique properties.

This is an easy dish to prepare, as long as you take your time, and are aware of the quality of ingredients. I used large, soft Turkish dried figs to start with, and slowly poached them in a bottle of red wine until they were succulent and very soft. I then drained them, and allowed them to cool for a few hours.

When they were ready, I split them sideways, and stuffed them with a dream of a cheese: one of the oldest French cheeses, Fourme d’Ambert. This blue is nutty, semi-hard and complex. Its manufacture dates back to Roman times, and it has an ageless grace and elegance. Baked stuffed in the figs, the cheese goes soft and slightly burnt around the edges, capturing and contrasting with the sticky sweetness of the figs. Fourme d’Ambert also has wine notes, so it also picks up and amplifies the flavours of the wine the figs have been poached in.

These gorgeous babies can be prepared a few hours in advance, and still be incredibly delicious. I must admit though, they are phenomenal straight out of the oven, with the Fourme d’Ambert bubbling away, and the scent of wine and cheese tantalising. I would serve a few with a bitter salad as a starter.

I made 20 figs for the wine tasting. Do adjust to your own crowd 😉

Red Wine Poached Fig baked with Fourme d'Ambert

  • 20 large, soft dried Turkish figs
  • 1 bottle Luberri 2009 (or other complex red Spanish wine)
  • 300 g Fourme d’Ambert (or other semi-hard blue cheese)

Place the figs in a large saucepan. Cover the figs with wine, and bring to the boil over medium high heat. As soon as the wine is boiling, turn the heat down to medium low, and poach / simmer the figs for at least 20 – 30 minutes or until very soft and yielding.

Drain the figs out of the wine (reserve the wine for the optional sauce below), and leave to cool for at least 2 – 3 hours, or even over night.

Preheat the oven to 180C (360 F). Line a large baking sheet with parchment paper.

Using a scissors or very sharp knife, split the figs in half side ways – though if you really want to do it top to tail, who am I to stop you?

Stuff about a tablespoon of cheese in the centre of each fig, and place the fig on the baking sheet, stem side up.

Once you have stuffed all the figs, bake in the hot oven for 5 – 10 minutes, until the cheese has melted, and is bubbly and starts to burn just around the edges. The wine soaked figs will also become shiny and sticky.

Serve hot, or at room temperature.

These figs will keep for 2 – 3 days, covered in the fridge. To serve, bring to room temperature.

For optional wine glaze:

If you are serving the figs as a starter, you could glaze them with a reduction of red wine.

  • Remaining wine from poaching figs
  • 1/2 tsp cinnamon
  • 1 tbsp honey
  • 1 tbsp balsamic

In a medium saucepan, combine the wine, cinnamon, honey and balsamic. Simmer over medium low heat until reduced to a thick shiny glaze. Taste and adjust seasoning. Drizzle over figs just before serving.

Marinated Red Peppers with Feta + Smoked Paprika

26 Feb

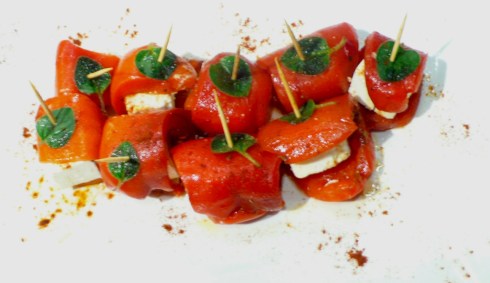
These marinated red peppers with feta and smoked paprika were the second tapas served at the recent O’Gourmet Food Hall Spanish red wine tasting. They were paired with a Gotes 2009, and the sweet-salty combination of the peppers and feta served to deepen and highlight the wine. The smoked paprika added depth and flavour without overwhelming the lush combination.

While this seems to be an easy dish, if you are preparing the peppers from scratch, it can be time consuming. When using fresh pepeprs, I blister them in a very hot oven, or over the fire on the stovetop. However, I have found that jarred or canned peppers work just as well – as long as you ensure an overnight marination in spices and herbs. I also feel that this is best assembled just before serving – the creaminess of the feta can leech into the peppers, and you end up with a scraggly looking mess. Put it all together a maximum of an hour before you serve it, and it stays gorgeous and clean. And as with the tapenade, a little fresh herb (in this case an oregano leaf) adds a pretty texture and taste to the final presentation.

This is a really easy and yet visually pleasing starter. You could serve it with, or even atop some french bread toasts, or you could add a salad and serve a few plated for a pretty starter.

I made approximate 20 individual tasters, but you could make as many as you please, by adjusting the amounts of peppers and feta.

Marinated Peppers with Feta and Smoked Paprika


Marinated red peppers

  • 1/3 cup extra virgin olive oil (organic if possible)
  • Salt and pepper
  • 1 – 2 tsp mixed Italian herbs
  • 5 – 6 garlic cloves, sliced thickly
  • 1 tsp smoked paprika
  • 1 tbsp balsamic vinegar
  • 4 – 6 jarred / canned / blistered red peppers

In a large bowl, combine the olive oil, salt and pepper, herbs, garlic, smoked paprika and vinegar. Taste and adjust seasonings.

Prepare the peppers. They should be slick and soft. If you have blistered/roasted them from fresh, ensure that all seeds have been removed, as well as the skin. I use scissors for this next step. Cut / slice the peppers into long strips. You want something that will wrap itself around a cube of feta.

Place the strips of pepper into the olive oil mixture, cover and allow to marinate for at least 2 – 3 hours, preferably overnight.

To serve:

  • Marinated red pepper strips
  • Goat’s milk feta (approximately 2 cups), cubed
  • Fresh oregano
  • Toothpicks
  • Additional smoked paprika

Choose your prettiest red pepper strips. Wrap a strip of red pepper around a cube of feta, and place an oregano leaf on top. Skewer with a toothpick, and arrange prettily on a serving plate. Just before serving, sprinkle with additional smoked paprika for a deep bass note.

Tapenade with French Bread Toasts

26 Feb

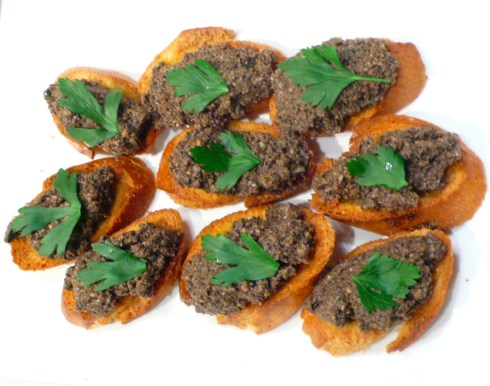
I made this tapenade for a wine tasting at O’Gourmet Food Hall. It was paired with a Santanegro Syrah 2008 – a light red wine. I think tapenade is one of the most delightful of the vegan/vegetarian starters – its so easy to make, and yet has such complex flavours, particularly if you get the balance right. Because its so simple, its important to ensure that all the components are beautifully presented.

I used a really good quality french bread for the toasts – sliced on the diagonal, and then brushed with a mixture of virgin olive oil, Maldon salt and a few cloves of garlic. Baked in the oven until golden brown, they were then covered with the tapenade, and a small sprig of parsley. Obviously, the parsley isnt neccessary, but it makes it look so pretty and elegant.

I love the lemon in this tapenade. It brightens the dark complexity of the olives and oil, and brings a freshness and clarity to the taste of the paste. You could use this as a starter, or in so many other things – a few tablespoons mixed with angel hair pasta gives you a quick and satisfying dinner; a teaspoon or so spread on bread is the basis for a sandwich with intriguing depth, and as a dip for crudites, this is strong and delicious.

This recipe makes about 2 – 2 1/2 cups. I made 20 appetisers and had enough left over for a snack later!

Tapenade with French bread toasts

For the Tapenade

  • 2 cups black olives (drained and pitted if needed)
  • 1 cup green olives (drained and pitted if needed)
  • 1/4 cup extra virgin olive oil (organic if you can find it)
  • 1 lemon
  • 2 cloves of garlic
  • 2 – 3 tbsp caper berries

In a large bowl, combine the olives, about half the olive oil, the grated zest of the lemon (I use a Microplane lemon grater), the garlic cloves cut in half, and the caper berries. You can use a food processor to blitz everything, but I actually like using my immersion blender. It gives much more control, and you can decide when the tapenade is of the consistency that you prefer. I personally like it a little chunky, but you can process until almost smooth.

Squeeze the juice of half the lemon into the mixture, and stir well. Taste and adjust flavourings. You shouldnt need salt as the the olives are usually quite salty, but if you really want it, add. I usually adjust the lemon a little, or the caper berries.

Cover the tapenade with the remaining olive oil, and set aside for at least 2 hours, or overnight to let all the flavours meld.

For the toasts and to serve

  • 2 small (or 1 large) loaves fresh, crusty French bread
  • 3 – 4 tablespoons extra virgin olive oil
  • large pinch of Maldon Salt
  • 2 cloves of garlic, sliced thickly
  • Small bunch of Italian parsley

Preheat your oven to 180C (350F). Line a large baking sheet with parchment or baking paper.

Slice the loaves on the diagonal, and place the sliced bread on the baking sheet.

Mix the olive oil, salt and garlic together in a small bowl, and using a pastry brush, brush the bread with the olive oil mixture. Add extra olive oil if needed, but you dont want it too oily.

Bake the toasts in the oven for approximately 5 – 10 minutes until light golden.

Can be prepared up to 2 days in advance.

To serve, spoon about a tablespoon of tapenade on each toast. Top with a small sprig of parsley, and serve.

Enjoy!

Raspberry Vanilla Cake

15 Feb

I have to admit… I love cake. Any kind of cake, really, is a friend of mine. Chocolate, vanilla, carrot, yellow, white, ginger… Damp cake, fluffy cake, spicy cake or pound cake. I am an equal opportunity (cake) lover … and I really enjoy tasting and baking new cakes.

Recently, my dear friend Tins, asked me to bake a cake for her daughter’s 3rd birthday. There were a few pre-requisites. It had to be pink (obviously), have a princess doll theme, and have no nuts. AngelKitten and I decided on that old standard from our childhoods (though they might be decades apart) – a doll cake – the skirt a cake, and a doll sticking straight out of it! We also decided to bake a larger round cake as the base, and fondant the whole thing (in pink) with pretty roses and and decorations.

Hopefully, we will get this right, but I decided to see if I could create a cake that had elements of pink in it too! I decided to see if I could make a raspberry vanilla cake – light yet firm, buttery, scented with vanilla, with a swirl of pink cake in the centre – a beautiful looking cake that tastes good too.

This cake is very pretty – and its perfect for decorating or fondanting because it also has a certain heft and structure. Do bake it the day before decorating to let it set up a bit. It will keep, fondanted, for at least 3 – 5 days. The great thing about this cake, though, is that it is perfect as a tea cake, unadorned, or as a layered celebration cake. Its just lovely, and has now joined my list of favourite cakes to make!

This recipe will yield 2 9 inch layers

  • 3 cups flour (I used 1/2 all purpose 1/2 cake)
  • 2 1/2 tsp baking powder
  • 3/4 tsp salt
  • 1 cup (8 oz) butter, room temperature
  • 2 cups sugar
  • 4 eggs
  • 2 tbsp (or more) vanilla
  • 1 cup milk
  • 1/2 cup raspberry puree (approximately – depends on quality of puree)

Preheat your oven to 165C (325F) and line two 9 inch cake pans with parchment paper. Set aside

In a small bowl, soft together the flour, baking powder and salt, and set aside.

In an electric stand mixer, cream together the butter and sugar until light and fluffy. Add the eggs one at a time, and then add the vanilla. You should have a creamy batter, but dont worry if it looks a bit curdled – it does that sometimes!

Fold in (dont beat in) the flour mixture, alternating with the milk.

Divide the batter into half (though if you like more pink, you could go up to 2/3rds  vs 1/3). Divide half the batter between the two prepared cake tins, smoothing up the sides.

Fold the raspberry puree into the second half of batter. You want quite a pink cake, so make sure that the puree gets integrated fully. Add more if you think it is needed. Pour the raspberry batter evenly between the two cake pans, and smooth the tops of the cakes.

Bake for approximately 25 – 30 minutes, or until a cake tester comes out with scant crumbs attached. Cool in the pan for at least 10 minutes, before turning out and cooling to room temperature.

You can ice, frost, glaze, fondant or even serve this lush cake naked! Its delicious and beautiful.

Enjoy!

Zucchini Chocolate Spice Bread

12 Feb

I love zucchini bread – bold in its simplicity and perfectly comforting. Its a good bread, one that is easily frozen and surprisingly easy and quick to make. I thought of this bread when I saw some luscious zucchini at O’Gourmet last week, and thought that it might be a nice idea to try a new twist. I found Bentong ginger powder at PastryPro – organic, sun-dried and so deep and complex in scent its almost overwhelming. I wanted to use it in a bread, and with my beautiful zucchini to hand, I set about inventing a new, enticing version of my beloved old standard.

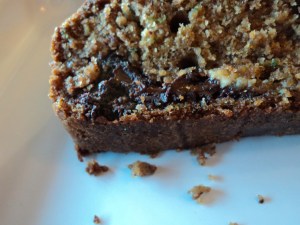
I have to admit, this new zucchini bread is pretty spectacular. It is damp, lush, complex and dark. I really decided to go all out in this bread … I used dark and light brown sugar, freshly grated nutmeg, cinnamon and the amazing Bentong ginger, a touch of ground hazelnuts, beautiful Tasmanian Leatherwood honey, and both white and bittersweet chocolate. I realise, its full on! I thought to myself, when I put the loaves in the oven … either this is going to be delicious, or its going to taste like a muddled mess!

Luckily, its a wonderful, complicated, intriguing bread. Its very moist and it will get better over a few days – the flavours compounding and playing off one another. It freezes well, and its wonderful lightly toasted, as a snack, breakfast or tea time treat. Plus, what a wonderful way to get people to eat their zucchini and love it too!

I know that this seems a load of ingredients to bring together. If you cant find ground hazelnuts, or dont want to make them, substitute ground almonds, or even just plain flour. Chop and change as you wish, its a very forgiving recipe. Try though to include the honey and the spices … they really deepen and improve the bread immensely. And who doesnt like chocolate? Hehe … though if you want to be more healthy, try a few seeds or dried fruit instead. And do try and wait at least 10 minutes after you remove the bread from the hot oven – its very delicate at first, and needs a moment to firm up! Says she, who never waits 😉

Makes 2 loaves

  • 2 medium-large zucchini (approximately 2 – 3 cups grated)
  • 2 eggs
  • 1 cup canola or other vegetable oil
  • 1 scant cup sugar – half dark brown, half light brown
  • 1 heaping tbsp honey
  • 1 tbsp vanilla extract or 1 vanilla pod, beans scraped
  • 2 cups flour
  • 1/2 cup ground hazelnuts
  • 1 tsp salt
  • 3/4 tsp baking soda
  • 3/4 tsp baking powder
  • 2 1/2 tsp cinnamon
  • 1/2 tsp dried ginger (I used Bentong ginger, which is very flavourful – you may want to up the amount of ginger – may be 1 – 2 tsp –  depending on the quality of your source)
  • 1/2 whole nutmeg, grated
  • 2 cups chocolate chips, drops or chopped (I used half bittersweet, half white, best quality chocolate)

Preheat the oven to 175 C (350 F). Line two loaf pans with baking paper. I usually cut out a large piece of baking paper, centre the loaf pan, and cut in at a 90 degree angle on all four corners. I can then fold in the paper, and have a bit of nice overhang. Set aside the pans.

Set a sieve over a small bowl, and grate the zucchini into the sieve. I use the very fine grater, but depending on the texture youre going for, you might want to grate it slightly more coarsely. Press the zucchini into the sieve to encourage as much water out as possible (you will probably get about 1 cup worth). Set aside while you prepare the rest of the ingredients (and reserve both the zucchini and its liquid!).

In a large bowl, place the eggs, vegetable oil, sugars, honey and vanilla. Whisk together well until everything is well combined and integrated. Set aside.

In a small bowl (or large measuring jug, which is what I use) combine the flour, ground hazelnuts, salt, baking soda, baking powder, cinnamon, ginger, and nutmeg. Stir to combine completely. Set aside for a moment.

Measure out about 1/2 cup of zucchini water.

Stir the flour and zucchini water into the sugar/oil mixture, in thirds, mixing gently but thoroughly. You might not use all of the zucchini water – just add a splash each time to really help the flour to integrate into the sugar/oil.

Add all the zucchini and mix well, and finally add the chocolate and mix well.

Divide the batter evenly between the two loaf tins.

of Zucchini Bread!Bake, switching the tins in the oven half way through if youre concerned about hot spots, for about 45 minutes – 1 hour. A cake tester inserted into the loaf will either come up covered in chocolate (in which case, wipe down and try again!) or with scant crumbs attached.

Allow the bread to cool for 10 minutes or so before devouring. This freezes exceedingly well, and will stay good in the fridge for a week or more (though its always finished up by the first day or so in my house!).

Enjoy!


Truffle Potato Salad

6 Feb

For a Party!Recently, I cooked for my dearest friend Jobby’s baby shower. I wanted to create dishes that would be easy to eat, tasty and also a little decadent to mark the celebration. When AngelKitten and I were talking about the menu, potato salad popped up into the radar, and we put it on the list as a may be. But then, a few weeks later, I found that I was in possession of a divine truffle. And I suddenly thought of that potato salad again.

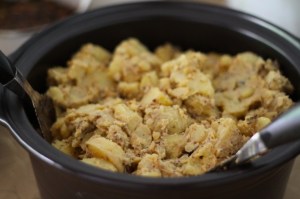
I knew I was going to be feeding at least 50 – 60 people, so a singular truffle on its own was not going to do much. But add it to the mix of a potato salad (and add some truffle oil to enhance and intensify), and you get something very familiar with a wonderfully luxurious edge to it. The inimitable scent of truffle permeates this entire dish, teasing and seductive. Its lush, and gorgeous, and a wonderful way to celebrate your love for your friends.

If you dont have a truffle (and yes, I know theyre expensive!) use truffle oil in place of the olive oil as well. If you can, prepare early and make home made aioli, which is very very delicious. However, given that I was making the salad for a baby shower (and pregnant women should not eat raw eggs), I decided to use best quality prepared mayonnaise. This potato salad can be made the evening before serving, and refrigerated. And of course, this makes a lot of potato salad! You can easily feed 30 people with this salad as a side dish – and depending on how many other dishes there are, you could feed many many more. Do feel free to halve this recipe if youre not cooking for hordes!

Serves approximately 30 + people

  • 1/4 cup olive oil
  • 1 truffle
  • 2 kg waxy potatoes (I used Australian chat potatoes)
  • 1/4 cup truffle oil
  • 4 – 6 tbsp very good, very old balsamic vinegar
  • 1 tbsp mixed dried Italian herbs
  • 2 – 3 tbsp mustard seeds
  • Salt and pepper to taste
  • 3 – 6 tbsp red wine or balsamic vinegar
  • 2 – 3 tbsp dijon mustard
  • 1 tsp honey
  • 2 – 3 tbsp heavy cream
  • 1/3 – 1/2 cup aioli or mayonnaise
  • 1/2 cup fresh chopped herbs (basil, parsley, thyme) – optional

Before you start cooking, ensure that the truffle really infuses into the oil. Place the oilive oil into a small bowl. Grate (I used a Microplane lemon zester) the truffle directly into olive oil and stir well. Set aside while you prepare the potatoes.

Fill a large stock pot or saucepan with water, and a pinch of salt. Place on stovetop, on medium high heat, and allow to come to the boil.

Meanwhile, fill a large bowl with cold water, and begin to prepare the potatoes. Use only waxy potatoes for a potato salad, as they hold themselves together well. Starchy potatoes will just fall apart. Wash the potatoes under running water, and chop into large chunks. I keep the skins on because I love the flavour and extra texture, but if you really want to peel, go right ahead! Place prepped potatoes in the cold water as you work.

Once all the potatoes are ready, drain well, and place all the potatoes in to the boiling water. Stir well, and allow to simmer until done. This can take upwards of 30 minutes (though its usually more like 20). Taste test every 10 minutes or so just to make sure.

While you are waiting for the potatoes to be done, prepare the vinaigrette that will receive the potatoes. Wipe the large bowl you used earlier down, and pour in the reserved olive oil and truffle oil. Make sure you get every last bit of truffle, and have a whiff of that amazing scent! Whisk in the truffle oil and old balsamic vinegar. The mixture will probably (especially if you use high quality ingredients) emulsify in such a way that it becomes almost gel-like. Whisk in the herbs and mustard seeds and a a good pinch of salt and freshly ground pepper. Set aside.

In a small bowl, whisk together the red wine vinegar, dijon mustard, honey, cream and mayonnaise. Taste and adjust seasonings if you like. Set aside.

Once the potatoes are done to your liking, drain well, and immediately toss in the set aside vinaigrette. Mix extremely well. The heat of the potatoes will ensure that the vinaigrette is soaked up well, and incorporated into the flesh of the potatoes. Taste, and add the reserved mayonnaise mix. Stir again and adjust for salt and pepper (or in fact any other ingredient that you feel needs a little additional boost).

Let the salad cool to room temperature, and refrigerate up to 24 hours. Just before serving, mix in about half a cup of freshly chopped herbs if you desire.

Enjoy!

O’Gourmet Food Hall Trifecta of Ginger Cake

4 Feb

Everyone loves ginger cake. I certainly havent met a ginger cake that I didnt like, even those slightly stodgy, heavy ones. Its the magical melding of ginger and dark sugar, of molasses and heat that creates layers of flavour. Ginger cake is complex. Its a full frontal experience because the spice perks up the taste buds, while the richness and sweetness tease the palette. I have always loved ginger cake, but when I got a whiff of the Bentong ginger available at O’Gourmet Food Hall, I knew I wanted to try my hand at remaking it anew.

Bentong ginger is considered the best in the world. It is fresh, crisp, stark and sharply spicy, but it has undertones of sweetness. O’Gourmet Food Hall has organic, locally grown and incredibly fresh Bentong ginger. The scent assails you as soon as you peel the root. The firmness of the ginger, the clarity of the flesh, and the taste. Absolutely gorgeous.

I decided I wanted to make a ginger cake with this particular varietal, but I wanted to add more depth to it if possible. I found some ginger curd which has a more muted caramel deep throbbing hum of ginger to it, and some beautiful fresh ground ginger powder which adds a musky beat. A trifecta of ginger in one cake. Would it be too much? Turns out, if youre careful and you add the fresh ginger in stages, you can find a balance of taste that is close on perfect. Add to that the dark tones of brown sugar and molasses, fresh organic eggs, and a frosting of cream cheese and fresh vanilla bean. Sublime. Happy making. And amazingly easy.

Do note that if you want a very simple ginger cake, you could just halve the recipe and leave out the frosting. You will then have what is more like a tea cake, still stunningly gingery but a little more sedate and less full on. If you cant find ginger curd, leave it out, but do try and find the freshest, crispest, firmest ginger you can, and use organic ingredients as much as possible.

For a two layer cake (serving 12 people… or more!)

  • 3 cups organic pastry flour
  • 2 tsp baking soda
  • 1/2 tsp salt
  • 2 tsp ginger powder
  • 3/4 cup dark brown sugar
  • 1/2 cup molasses
  • 1/3 cup treacle (or corn syrup or honey if you dont have treacle)
  • 2 – 3 tbsp ginger curd (optional but very good)
  • 2 eggs
  • 1 1/2 sticks (12 tbsp) butter, melted
  • 1 cup hot water
  • 1/2 – 1 cup fresh ginger, peeled and grated finely
  • 8 oz cream cheese
  • 1/2 cup icing sugar
  • 2 vanilla beans or 2 tbsp (or more) vanilla essence
  • 1 – 2 tbsp cream (if needed)

Preheat your oven to 175C (350F), and butter two cake tins, and line with baking paper.

In a small bowl, combine the flour, baking soda, salt and ginger powder. Set aside.

In a large bowl, whisk together the sugar, molasses, treacle, ginger curd and eggs. Set aside while you melt the butter into the hot water in a small saucepan, over medium heat.

Whisk the melted butter and water into the sugar/molasses mixture, and stir in the fresh ginger. It really depends on how strong your ginger is – so I always add 1/2 cup first, and then taste. Add more until you get a peppery almost overwhelmingly ginger taste. Remember that the heat of the oven will mute some of that sting.

Stir the flour mixture into the large bowl, and mix until just combined. Pour the batter into the prepared cake tins, and bake in the oven for 20 – 25 minutes, or until a cake tester is inserted and comes out with a few crumbs clinging to it.

Remove the cake from the oven, and allow to cool, in the pan, for about 5 – 10 minutes. Turn out onto a rack to cool to room temperature.

Meanwhile, add the cream cheese to a stand mixer bowl, and beat for a few minutes until it attains a softened consistency. Add the icing sugar, a tablespoon at a time, and continue to beat. I always like to taste the frosting at each tablespoon of sugar, because I dislike icing that is too sweet. Split the vanilla pods and scrape out the beans and add to the frosting. Beat for a few seconds more until the vanilla is totally integrated. Add a tablespoon of cream (or milk) if the mixture is too stiff.

A Trifecta of Ginger CakeCentre a cake round on a serving plate, and ice the top. Place the second cake round on top, and ice the top and sides of the cake. Refrigerate until half an hour before serving.

Enjoy!