Tag Archives: tea

Sayang Scones – Gluten Free Orange Vanilla Scones!

21 Nov

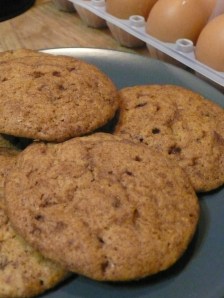
Scones!Today, I had tea with my most beloved of GoddessMothers. We talked, as usual, about love, family, hopes, dreams, secrets, spirit, happiness, joy … well, life in general. As we sat and chatted, laughed and cried, reconnected and restrengthened, we nibbled on these rather luscious orange vanilla scones. They were pretty damn good if I might say so myself (I am munching on one, as I type this, sandwiching some cheddar cheese and damson jam).

The thing is, my GoddessMother just found out she has a gluten intolerance. Basically, she cannot eat anything with wheat in it, or she becomes ill. My friend S also has the same issue, and so I am aware of the need to adapt and adjust recipes for gluten-intolerance. My GoddessMother was coming for tea, which immediately suggested scones… but gluten-free scones? I had this image of hard little rocks of wedgy dough tasting strangely of fake flour… Not an appetising look!

I went out and got some gluten-free flour (mainly maize and tapioca in my mix) – and you need to check ingredients. The flour needs to have some sort of xanthan gum or vegetable gum in it – this helps the softness and stretchiness of the dough. Without it, you should add about 1/2 tsp of xanthan gum, which you can get at any good healthfood shop. Because the scent and texture of gluten-free flour is so different, I decided to really layer on the flavour  – the grated rind of an orange for a bit of brightness, and a tablespoon of vanilla and honey each for some voluptuousness! You could scent it with just about any flavouring you like, but this combination made uniquely delectable sweet scones.

There are a few things you should keep in mind when making these scones. First and foremost, preheat the oven before you start mixing all the ingredients. From the time when you add the (cold) butter to the time the scones go into the oven, should be no more than 10 minutes or so. Work quickly and gently, and keep the integrity of the cold butter intact if you can. I added about 4 tsp of baking powder to the mix because I was going for slightly nubbly crumbly (but still tender and gentle) scones – if you want them fluffier, add 2 tsp more! And when you work with gluten-free flour, add a few tablespoons of milk powder. This adds to the lusciousness of the dough, but also adds to the depth of flavour of the scones.

Makes about 18 scones

  • 3 1/2 cups gluten-free flour
  • 3 tbsp milk powder
  • 1/2 tsp salt
  • 1/2 cup light brown sugar
  • Grated peel of 1 (washed) orange
  • 12 tbsp cold butter
  • 4 – 6 tsp baking powder (the more baking powder, the fluffier)
  • Liquid of up to 10 fl oz (about 1 1/4 cup) which should include: 1 egg, a few tablespoons sour cream and/or yogurt, a few tablespoons of cream (if you like), 1 tbsp liquid honey, and the rest whole milk
  • 1 tbsp (or to taste) vanilla
  • 1 tbsp milk + 1 egg for glaze

Preheat your oven to 215C (425F), and line a jelly roll tin or baking pan with parchment paper.

In a large bowl, mix together the flour, milk powder, salt, and light brown sugar. Mix together gently with a fork. Using a superfine grater, grate the peel of a washed orange into the bowl, and mix together again.

Using a large hole grater, grate the butter directly into the flour mixture and stir lightly to combine and coat the butter with the flour mixture. You will have an oatmealy texture, and everything should smell brightly of orange.

Add baking powder, and mix again lightly.

In a large measuring jug, mix together the egg, a tablespoon each sour cream and yogurt, the honey, and make up to 10 fl oz (approximately 1 1/4 cup) with milk. Whisk this together with a fork to ensure everything is combined.

Add the vanilla (either as essence, paste or vanilla bean scraped) to the liquid mixture and whisk to combine again. Pour over the flour, and using your hands, quickly mix and knead the mixture into a soft pliable dough. Allow to rest, for about 3 minutes, in a cool place (even your fridge). This will allow the gluten-free flour to really come into its own, and makes it much easier to cut out the scones.

Flour (with gluten-free!) a working surface, and turn the dough out onto the surface. It should feel very tender and soft. If you think it needs more flour, add by a tablespoon at a time. Pat out into a 1 1/2 inch thick rectangle, and cut out scones, and place on prepared baking pan. Lightly glaze with milk, and bake in the preheated oven for 10 minutes. Remove from the oven, and turn the pan. Before putting it back in, however, glaze again with egg. This will really encourage browning without burning. Bake for a further 10 – 15 minutes until the scones have risen, and baked through.

Cool on pan for 5 minutes before removing to serving plate. Wonderful with cream and damson jam, with tomato marmalade and cheese, or buttered, hot from the oven. Delicious! Enjoy.
 

Suji (Semolina) Cake

2 Nov

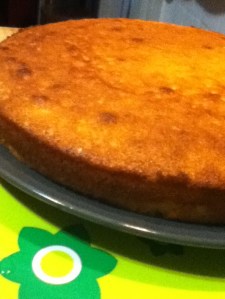
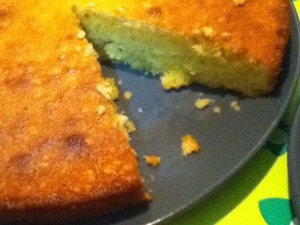
CakeLast weekend, at the family BBQ, my Mak Enda and Kak Manja really enjoyed the lemon bundt cake. They liked its simplicity and charming tartness, the fluffy texture, and as well as the addition of whipped cream and strawberries! But of course, they are Malaysians… and so, they started to dream about the next cake they wanted to taste, whilst reveling in the lemon one 😉

And the cake they wanted was suji (aka sooji aka sugee aka semolina) cake. Suji is the coarse, purified wheat middlings of durum wheat – and it is an extraordinary and much used grain all over the world. The Italians use it to make pasta and pizza and breads. Indians use it to make dosa and uppam. And the list goes on and on. I have posted a recipe for white chocolate semolina pudding that sent some friends into total ecstasies. I love suji, and suji cake is a particular emotive memory for me.

Malaysians (of all races, creeds and kinds) are very attached to suji cake. Its kind of like our version of pound cake. Buttery, fluffy, rich and yet incredibly simple. It is pure deliciousness. The suji cake of my memory has almonds in it – crushed ground almonds, and little chunks of almonds. You can leave them out, but why would you want to? They give the cake a wonderfully grainy texture that stands up to the semolina, and enhances the crumb. We Malaysians serve this little cake at almost all the high holidays, and though many people adorn it (with rose syrup, glazes and icings), I am not in that camp. I like my suji cake plain and unadorned, perfect in its simplicity and golden beauty.

For me, suji cake is the ultimate coffee cake. Its not too sweet, its immensely satisfying and very very comforting. When people taste it they smile, and remember a time when things were easier, less complicated, when they were more connected. Its a cake to give to those you love, wrapped carefully in aluminum foil, knowing that they will appreciate it for its clean loveliness as much as you do.

But know this. Despite its almost stark simplicity, suji cake does have its secrets. You need to soak the suji in butter, sugar and a touch of milk to allow the grains to plump up a bit. Some recipes ask that you do this overnight, but I am too impatient and have found that about an hour will do me. You need to beat the eggs and sugar for at least five minutes to get air into the mix, but also to get a almost puddingy consistency. And you need to watch the cake – the top burns easily, so I almost always put a little foil cap on it for the last half of the baking time. And it really does help if you have a stand mixer, but a hand held, or your own strength will do – it will just be rather tiring!

Follow these instructions closely, and you will have a cake that tastes like home… no matter where you are 🙂

  • 1 3/4 sticks (14 tbsp/200 gm) butter, softened to room temperature
  • 1/2 cup + 1/2 cup fine (caster) sugar – brown or white is fine – and make these scant cups – suji cake is not overwhelmingly sweet
  • 3 tbsp cream or milk
  • 3/4 cup suji or semolina
  • 3 eggs + 2 egg yolks (whites reserved for another use)
  • 2 – 4 tbsp vanilla
  • 2/3 cup all purpose flour (it needs to be all purpose to stand up to the suji and the almonds)
  • 1 tsp  baking powder
  • Large pinch of salt
  • 2/3 cup ground almonds
  • 1/2 cup almond nibs or finely chopped almonds

Start by preparing the suji mixture. In a medium bowl, cream together the butter and 1/2 cup of sugar for about a minute or so, or until light and fluffy and completely combined. Add the cream, and mix briefly – it will loosen up the butter mixture substantially. Fold in the suji by hand, cover the bowl and leave in a cool place to let the mixture really get to combine well for at least an hour, and up to three.

While youre waiting, read a book, play with a child, listen to music or cook something else 😉

Once the hour is up, preheat the oven to 180C (350F) and butter a cake pan extremely well. Line the bottom of the pan with grease proof baking paper, and butter that too. Set aside.

Beat together the remaining 1/2 cup sugar, the eggs, egg yolks and vanilla for five minutes. It would help if you have a friendly kitchen gnome to do this for you whilst you get on with other things (that or a stand mixer!).

In a small bowl combine the flour, baking powder, salt, ground almonds and almond nibs. Just a note on ground almonds. They tend to be rather expensive, so I often pound almond nibs into ground almonds – this is very easy if you measure out the almonds, stick them in a zip loc bag and bash away with a rolling pin or other heavy object. You can also use a mortar and pestle, but thats sometimes more trouble than its worth. Either way, I always use almond nibs for this recipe, without the skins on, and give them a good whack till they are pulverised. Combine the flour mixture well and set aside.

By now, the eggs should have been beaten for at least five minutes. They should have increased in volume, and they will look golden and creamy. Uncover the butter-sugar-suji mix, and get ready to combine everything.

Gently, using a wooden spoon or silicon spatula, fold about half of the egg mixture into the butter mixture. Do this quickly, surely and gently. Fold about half of the flour in, and then add the remaining eggs, and finally the remaining flour, folding gently but confidently after each addition.

Transfer the batter into your prepared cake tin, and bake, in the centre of your oven for between 30 – 45 minutes. Check at about 15 minutes to make sure the top is not burning, and if it is, cover the cake with a bit of tin foil. The cake is ready when a tester goes in, and comes out clean.

YummmLet the cake cool, in the pan, for about ten minutes on a rack. Then turn out onto the rack, and turn right side up again. Cool further, or if you are like me, and your happiness cant wait, serve yourself a slice, warm, crumbly, buttery, almondy, vanillay, delectably evocative, warm from the oven.

This cake will keep, wrapped well in foil for at least 4-5 days in the fridge. But I have never managed to keep it for that long 😉

Iced Fruit Tea

24 Oct

TeaThis is the absolute perfect iced tea to serve at large gatherings. Its refreshing, lightly sweet, and the rooibush (red bush) tea is naturally cleansing – it helps cut through the richness that is usually present in group meals. I love this fruit tea because you can really adjust it to your preference. I like it bright and fruity. If you want it sweeter or deeper, use more juice and less tea.

Frozen fruit is a wonderful addition here – I used seedless grapes. They act as sweet, gorgeous ice cubes, so ice doesnt water down the tea. They also add a distinct taste to the tea which creates layers of lovely flavour. By the way, if  you want to make this into a sangria, feel free to add a bottle of wine! 😉

This ice tea should serve 10 – 12 people. We served it in a large punch bowl, with extra in big jug. It was all finished by the end of dinner … and it was goood.

  • 1 large bunch seedless grapes
  • 3 starfruit
  • 5 rooibush (red bush) tea bags
  • 1/2 cup fresh lemon or orange juice
  • 1 litre fruit juice (I used Ceres mixed fruit juice)
  • 1 litre sparkling apple juice (I used Appletiser – no sugar or preservatives added)
  • 1 litre sparkling water

Wash fruit. Halve grapes, and slice star fruit thinly. Place all the fruit in a large zip loc plastic bag, and freeze for at least 1 – 2 hours.

Boil 1 1/2 litres water and pour into a large pot or heat proof bowl. Add the rooibush tea bags, and allow to steep for 1 – 2 hours, or until cool.

Just before serving, fish the tea bags out, and mix the cooled tea with the fresh lemon juice, fruit juice, sparkling apple juice and sparkling water.

Add the frozen fruit and mix well. Serve happily.

Cinnamon Sugar Cookies

11 Aug

perfect happy memoryI wrote in an earlier post about my late father’s love of white buttered toaste with a sprinkle of sugar. He ate it as a treat, even though he could have most any gourmet food he wished. This taught me that food is about memory as much as it is about taste… And one of my earliest memories is staying over at an Aunt’s house, one sharp sparkling autumn day, with my sister. We woke up in the morning, and she offered us cinnamon toast. We had never had it before (I think I was probably 6 to my sisters 4 years), and eagerly accepted.

What a taste. What an amazing combination. White toast, crispy and warm, melting butter, crackling sugar … and cinnamon. Its a dark scent, almost woody and powdery. Hits of spiciness, sweetness, flowers. Its not a description that comes easily, but when you taste cinnamon, especially for the first time, its as if your taste buds wake up. I have always loved the scent and taste of cinnamon, and its warming fragrance brings memory of autumn, cider, Christmas. When I sat down to write about the actual taste of cinnamon, I realised this is another taste which is intricately wrapped in memory for me.

So today, on the first day of the Ramadan, after an exceedingly hot, busy day, I wanted comfort. Food that is a combination of memory and laughter, and wonderful easy taste. I turned to this recipe for cinnamon sugar cookies which I think I have been making as long as I can remember cooking. These cookies are really delicious, quick to put together, and delightful to give away. The recipe makes a very soft dough. Dont over beat it or you will get tough cookies. Just let it sit, in its creamy buttery sugary-ness, and handle with care when you dip in cinnamon sugar.

Enjoy with much love, and the memory of warmth during the cold…

Makes about 32 cookies, depending on how big or small you want them!

  • 3 tbsp fine granulated white sugar
  • 1 – 2 tbsp cinnamon (depending on how deeply cinnamon you like your cookies – I always use 2 tbsp!)
  • 1 1/2 cups sugar – a mix of dark brown, light brown, and white (I use 1/2 cup of each)
  • 1 cup / 2 sticks butter, slightly softened
  • 2 eggs
  • 1 1/2 tbsp vanilla extract
  • 2 1/2 cups pastry flour
  • 1 scant tsp baking soda
  • 1/2 tsp salt

Preheat your oven to 160C.

Mix the 3 tbsp sugar and cinnamon in a little bowl, and set aside. Make sure you combine thoroughly – the sugar will be a dark brown when done. You will roll the cookie dough in this just before baking.

In a stand mixer bowl, combine your three sugars. I usually beat the sugars together to ensure they are combined well. If you dont have a stand mixture, use electric beaters.

Once the sugars are combined, add the butter, cut into chunks. Let your mixer beat the sugar and butter together until very well combined. This could take a few minutes. Just have some patience.

Add the eggs and vanilla, and beat until completely combined. The mixture will be a little soft and fluid. Let it sit for a few minutes minutes. This gives the butter and sugars time to melt into each other.

Combine flour, baking soda and salt in a separate bowl, and little by little, mix into the butter sugar mixture. I use a spoon or spatula at this point as I dont want to over mix the cookies! A tender cookie is one which is allowed to come together of its own accord! Again, let sit for a few minutes before moving on to the next step.

Line baking trays with greaseproof paper.

Using a tablespoon, measure out spoon sized pieces of dough (you can make bigger or smaller, according to your preference – this is just how I like to do it!). I usually get about 8 cookies to a sheet.

Using your thumb, drop the dough straight into the sugar/cinnamon mixture, and gently roll it around to coat it completely. Place on baking tray, and pat down gently, so it is not a ball shape, but a little flatter.

Bake for about 15 – 18 minutes. The cookies will rise, and then fall. They are done when they have turned a slightly darker shade of brown.

Let cool in trays for at least 5 minutes before cooling completely on racks.

You will have a wonderfully soft cookie with a crispy crunchy crust. Perfect balance.

Share! These are too good not to – and you can make sure other people will make wonderful cinnamon memories too 🙂

Sour Cream Almond Coffee Cake

31 Jul

Sour Cream Coffee CakeThis weekend is rainy and damp – the perfect time for baking. Cakes and cookies, the scent of warm cinnamon and chocolate – all these are, to me, the ultimate comfort. A slice of cake, be it carrot, coffee or chocolate, is a welcoming gift to present a visitor, and they pack wonderfully for on-the-go presents. I love cake – the beautiful crumb, the creamy icings, the melding of flavor and texture. Baking a cake is immensely satisfying – the finished product is an act of magic, bringing together simple ingredients and creating a stunning finished product. I dont trust people who dont like cake 😉

And oh, this cake. A humble coffee cake, something you could whip together in half an hour or so, even though it has a filling, topping and batter. Its a simple cake, and it bakes up beautifully – fluffy, cinnamon specked, cream-cheesy interior, with little specs of baked apple, streusel topping. Its surprisingly balanced, and not over-the-top sweet. A wonderful snack, and a delightful breakfast with a cup of hot coffee. My idea of the perfect thing to have in the fridge at all times 🙂

This cake is adapted from Tamasin Day-Lewis from her Kitchen Classics book. She got the recipe from her assistant, who got it from her Auntie Fei. So this recipe has been handed down and redrafted at least four times – which is one of the things I love about cooking. You can tell someone how you made a dish, you can even write out a recipe for them. As soon as they get it home, look in the fridge and realise they have raisins rather than an apple, or creme fraiche rather than sour cream, they substitute and change around and add. Its human nature, but its also what makes cooking so personal. As soon as you have any confidence in the kitchen, you know what you like, and you adapt things to that sense of taste and artistry. Its why I love eating other people’s cooking so much. They expose their sense of taste, colour, texture, flavour and fun through what they cook, and how they cook it.

And I must admit something here. This cake actually has nuts in it! I usually dont go for cake with nuts. Ever. I took the nuts out of the sublime carrot cake from yesterday. I would never make anything chocolate with nuts. I love nuts, but not with sweet, except in this cake (well, may be I would use almond meal in a cake in place of flour in a pinch, but thats another story). Here, the nuts act as the texture component, and elevate the coffee cake with their smoky crunchy bite. They also cut the creaminess of the cake well – its made with sour cream, and layered with cream cheese, so its very rich. The nuts help that richness stay balanced. I use almonds because I find them the least offensive of nuts in sweet things, but you could use hazelnuts, walnuts, pecans, or even macadamias if you like.

Making this cake is not hard, but I would certainly make the filling and topping first, before making the batter. That way, the final assembly is quick and easy. Also, you can make it in a bundt pan, but I didnt want to, so I made it in a cake tin. Cooking time is about 10 – 15 minutes less in a bundt pan so watch for that.

Eat this at breakfast or during a coffee break, for a tea time snack or as dessert. Its delicious any which way, but I particularly like it warm from the oven.

Filling

  • 3/4 cup cream cheese
  • 1 egg
  • 1 tbsp light brown sugar
  • 1/4 tsp salt

Please make sure you get a good cream cheese. That Philadelphia stuff is full of stabilisers, gums and other chemicals. If you can find a natural, organic or locally made cream cheese, get that. The difference is huge.

Beat all ingredients together till light and creamy, and set aside.

Topping

  • 1/2 cup flour
  • 1/2 cup light brown sugar
  • 1 tsp salt
  • 2 tsp cinnamon
  • 1 cup toasted sliced almonds, divided (note: you can use any nut you like)
  • 4 tbsp melted butter
  • 1 tsp vanilla extract

In a medium to large frying pan, toast the almonds (or other nuts) until they become light golden. Divide into 3/4 cup and 1/4 cup. Set the smaller amount aside to use with the filling, and place the 3/4 cup of almonds in a bowl along with the flour, sugar, salt and cinnamon. Melt the butter, add the vanilla extract to the melted butter, and mix into the almond-flour mixture. It will be crumbly. Set aside.

Cake

  • 1/4 cup butter
  • 1 1/3 cup light brown sugar
  • 4 eggs
  • 2 cups flour
  • 1/2 tsp baking soda
  • 1 1/2 tsp baking powder
  • 1 tsp cinnamon
  • 1/2 tsp salt
  • 200 ml (about 1 cup) sour cream (you can substitute creme fraiche if you like)
  • 2 tsp vanilla extract

In a mixing bowl, cream the butter and sugar until light and fluffy. Beat in the eggs, one at a time.

Meanwhile, sift together the flour, baking soda, baking powder, cinnamon and salt. In a separate bowl, mix together the sour cream and vanilla.

Beat the dry ingredients and sour cream into the butter-sugar-egg mixture bit by bit – I usually mix in a couple tablespoons flour, then a couple tablespoons sour cream, etc, until you have a smooth batter.

Assembly

  • Cake batter
  • 1 large apple (I used a Fuji apple) peeled, cored, and diced (you could use dried cranberries, raisins, or any other fruit you like)
  • 1/4 cup reserved almonds
  • Filling
  • Topping

Preheat oven to 180C.

Butter a cake pan, or  a bundt pan with removable sides, well. I usually put some baking paper on the bottom of my cake tin, and butter that as well, just to make removal a bit easier.

Pour about half of the cake mixture into the prepared cake tin, and smooth. Sprinkle on the diced apple, and then the reserved almonds. Spoon over the cream cheese filling, making sure you get it smeared up against the sides, and dropped throughout the interior of the pan. Top with the remaining cake batter. Smooth the top, and sprinkle over the filling. Using a fork or spoon, fold over a little batter so that you have spots of batter peaking through the filling.

Bake for 55 – 65 minutes depending on your pan, or until a cake tester comes out with crumbs.

Allow to cool on a rack for at least 20 – 30 minutes before unmolding, cutting and devouring.

Enjoy with friends.

Butternut and Spinach Tart with a Parmesan or Pecorino Crust

24 Jul

goldorange perfectionI am really in a tarty mood these days. Not sure why. Must be something to do with the moon 😉 I must admit that tarts and pies have always fascinated me. I love the idea of a pastry enveloping delightful fillings – and I have always believed that the pastry should be as good as the interior, if not better. I made a raspberry curd tart the other day, and now I am trying my hand at a savoury one. I love butternut and spinach together – their colours, green and orangegold are so complementary, and, more importantly, they taste so good together. Roasted butternut and lightly sauteed spinach are a knockout taste combination. But what would happen, I wondered, if you made them both very smooth and creamy, a touch of herbs and garlic, and combined them together, side by side. May be some shards of very salty, briney, goats cheese. That would stand up to the spinach and butternut. And a crust that had a hint of pecorino in it, so it too was a taste explosion.

So I set out to make this tart of my dreams … and I must admit it is a process. I made it over one evening, and an afternoon. This is a tart for a family gathering or celebration, a picnic or a birthday. I have to say that the actual cooking processes are easy, and really not focus consuming at all – you just need to be around as things get roasted and sauteed, and you need to let the crust rest, and then prebake it. Its a doddle if you break it down into smaller components (much like life) and then tackle each individual piece slowly and with great enjoyment. I roasted my butternut and prepared my tart dough the night before while watching tv. The actual work time was about 15 – 20 minutes, and the rest was allowing the ingredients to do their magic.

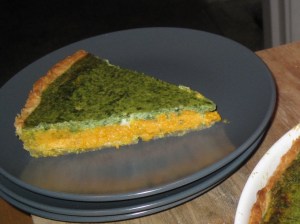
What I adore about this particular tart is that it is layer up on layer of perfection. When you serve it, it looks like a spinach tart, which in and of itself, is pretty damn delicious. Underneath the bronzed deep green spinach, is the goldenorange perfection of butternut, and nuggets of melted goats cheese. What an astounding mixture, what a brilliant taste sensation, what delightful surprises hidden within that beautiful crust.

Tarts are wonderful things because they can feed many people, in great style. They accommodate fillings pretty much at your whim and desire, and can be savoury or sweet at your discretion. A slice of tart will almost never go unaccepted – and when youre in the mood for just a bite, a sliver of tart can hit the spot perfectly. Plus they are so beautifully dramatic to present. Such a wide expanse of pretty colours and melting goodness. And you can serve them warm from the oven (but never hot), or cold from the fridge the next day (if there’s any left!).

If you decide to make this tart, do think about timing. If you make it all in one afternoon, roast the butternut first, make the dough and put it in the freezer while the butternut is in the oven, then cool the butternut, then make the spinach, etc. You will need to give each element time to rest, cool and intensify their flavours and textures, so be aware of what you make and when.

And just a note, I used pecorino in this recipe, but you could just as easily use parmesan. I love pecorino because its a more tangy version of parmesan, and its made with ewe’s milk so it goes easily with the goat’s cheese.

Pecorino Pastry

  • 1 cup all purpose flour
  • 1/2 cup pecorino, grated
  • 1/2 cup / 110 g / 8 tbsp butter, frozen and grated
  • 1 egg
  • 1 tsp dijon mustard
  • 1/2 tsp oregano or sage or rosemary

In a large mixing bowl, combine the flour and parmesan. Grate the frozen butter over, sifting it into the flour with the tips of your fingers. I pause and do this twice as I grate.

Beat the egg, dijon, oregano (or other herb) and salt together, and pour over the flour-parmesan-butter mixture. Bring the dough together with the tips of your fingers and let it rest in the fridge for about half an hour or up to two days.

When you are ready to use the pastry, roll out on a floured board. Drape over your rolling pin, and centre it in your tart pan. Prick with your fork, line with aluminum foil, fill with beans, and bake in a preheated oven for 20 minutes. Take out the foil and beans, prick again with the fork, and bake for about 5 – 10 minutes until lightly browned. Allow to cool a bit before filling with butternut and spinach.

Roasted butternut (and a garlic head!)

  • 3 – 4 cups butternut (about 700 g), roughly chopped
  • 1 tsp or less olive oil
  • Salt
  • Freshly ground pepper
  • 1 head of garlic
  • 3 tbsp light sour cream
  • 2 eggs + 3 yolks, beaten well together

Preheat your oven to about 220C. Prepare a baking tin with greaseproof paper.

Skin and chop the butternut, and arrange it in one layer on the baking tin. Using your hands, lightly coat the butternut with some olive oil. When I say lightly coat, I really mean lightly – you dont want the butternut swimming in oil because it will most definitely steam in the oil rather than roast and slightly char. You want that caramelised burnt butternut flavour, and a tiny bit of olive oil will really help with that. Too much will be a hindrance.

Using a sharp knife, cut about 1/4th inch off the top of a head of garlic, skins intact.

Place the garlic on the baking tin, and pour olive oil into the cloves.

Salt and pepper everything liberally.

Roast in the oven for about 30 minutes, or until the butternut is soft, and slightly burnt around the edges.

At this point, you can refrigerate the butternut, covered, for up to two days. Take the cloves of garlic out of their skins, cut away any very burnt bits (they can be bitter), and store in the fridge too, covered with olive oil. If you are serving the tart that day, go on to the next step.

Using an immersion blender, combine the butternut and 3 tbsp of sour cream.

Beat 3 eggs and 2 egg yolks together until light and frothy. Use 2/3rd of this in the butternut mixture, and reserve the rest for the spinach. Fold the eggs lightly into the butternut.

Set aside.

Spinach

  • 120 g of baby spinach, washed
  • 3 cloves of roasted garlic
  • 3 tbsp roasted garlic olive oil
  • Salt and pepper to taste

Wash a packet of baby spinach well in salted water. Let it sit for a minute in the water while you heat 3 tbsp of olive oil that has been sitting with the roasted garlic cloves, along with three of the cloves, in a large frying pan over high heat. You can mash the cloves into the olive oil.

With your hands, lift the baby spinach out of the water, allowing some water to cling to the leaves. Fry in the very hot oil until it is bright green and soft, about 3 – 5 minutes only. You dont want to over cook the spinach, but you do want it to be wilted completely. Season liberally with salt and pepper.

Transfer the hot spinach to a mixing bowl. Add 3 tbsp sour cream, and using your immersion blender, make sure the spinach has been completely pureed.

Fold in 1/3rd of the egg mixture from the butternut into the spinach and set aside.

Assembly

  • Baked tart crust
  • Butternut mixture
  • Goats cheese – about 3 – 5 tbsp, roughly chopped
  • Spinach mixture

Preheat the oven to 200C.

Pour the butternut mixture into the tart crust. Sprinkle the goats cheese all over the butternut, and then pour the spinach mixture over all, using a spatula to smooth the top completely.

Bake in the oven for 25 – 30 minutes.

tart heavenLet rest for 10 minutes or so before cutting into wedges and serving.

Perfection can be hard work, but it is so bloody satisfying when it comes off!

Raspberry Curd Tart

22 Jul

intense raspberry flavourSometimes, simple is the most beautiful. I made some gorgeous raspberry curd last night, and decided to present it two ways – with a beautiful cold rice pudding, and in a stunning tart. Both are easy to make with the addition of the raspberry curd – and both ways of presentation really highlight the flavour and texture of the raspberry curd. It is incredibly intense, and a wonderful dessert for a dinner party or high tea.

This is an amazingly dramatic and beautiful tart. Such a pretty looking tart – very girly and yet totally sophisticated. I like to serve it with a blossom of lightly whipped cream flavoured with vanilla. The cream helps to balance the strong flavour of the curd, and adds another textural element to the whole.

Preferably, you should prepare this the day before to allow the curd some time to settle into the tart shell… though if you really want to serve it day of, its fine, it will just be a little bit more unctuous, and the curd will flow out when you cut into it.

First, prepare, your tart shell. This recipe makes enough so you can make two thin shells. I often flavour it with lemon instead of vanilla because lemon really complements the raspberry wonderfully.

For a 12 – 14 inch tarte shell, you will need

  • 2 1/2 cups of cake flour
  • 1 cup / 8 tbsp / 110 g of butter, frozen, then grated
  • 3 tbsp of icing sugar, or more to taste
  • 1 tsp of vanilla extract or the seeds from 1 vanilla pod scraped out or 1 tsp of lemon juice and the rind of a lemon, grated
  • 1 egg, beaten
  • 1 tbsp or more cold water

Measure out the cake flour into a large bowl. Grate the frozen butter directly over the flour, stopping twice during the grating to gently mix in the butter shards with the flour. Use the tips of your fingers, and just make sure you dont over mix. You want this to be a very gentle process.

Sieve the icing sugar over the flour-butter mixture, and sprinkle over the vanilla or scrape the seeds from the pod, or lemon if you are using. Mix gently again with your fingers.

Add the egg and toss the flour with your fingers, mixing to make a dough. Taste and add up to 1 more tablespoon of icing sugar if you want a sweeter dough. If the mixture doesnt come together as a pastry dough, add a tablespoon of very cold water. Be gentle. It will come together if you have patience, and mix properly.

Form the dough into a ball, cover in cling wrap, and put in the fridge for at least an hour to firm up.

Once the dough has been refrigerated, roll out on a floured surface, sprinkling with a little bit of flour if needed. Transfer to a pie plate, and prick with a fork.

Cover the pie dough with tin foil, and fill in with beans or other pie weights. Bake in a pre-heated 200C oven for 20 minutes. Remove from oven, remove the beans and tin foil, and prick again with the fork. Brush with some egg white if wanted, to proof the tarte shell so it doesnt get soggy when you add the curd. Bake for another 5 minutes or so or until very lightly coloured.

Let cool.

Assembly

  • 2 – 2 1/2 cups raspberry curd, cooled
  • 1 cooled tarte shell
  • 1 – 2 cups cream, whipped with a little icing sugar and vanilla

mmmmmmmmmmmmmPour the cooled raspberry curd into the tarte shell, cover with cling wrap and refrigerate for at least 6 hours, preferably overnight.

Just before serving, whip the cream with a little icing sugar and vanilla.

Serve in wedges, with a few tablespoons of whipped cream.

Welsh Rarebit (Rabbit!)

18 Jul

Rarebit Rabbit All Tastes YUMI recently read a post on things on toast. I adore just about anything on toast – from gorgeous glowing tomato bruschetta to a poached egg and mushrooms to simple toast, butter and sugar (a firm favourite of my late Ayah’s). Oooh Nutella and banana!

But when I thought of things on toast at that moment, I thought of Welsh rarebit – that divine burnt cheese creation that comes from poverty (instead of rabbit, you used cheese in an alchemical mix with ale and spices). Goddess, this is good food. Simple, warming, easy to make.

And wonderfully enough, any extra is quite long lasting! You can put it in the fridge where it will firm up. From there, you can slice this cheese-beer mixture and use it to top more toast… or whatever else catches your fancy! Its phenomenal stuffed into portobello mushroom caps and grilled. Its ambrosial as the centrepiece of a grilled cheese and tomato. Im sure you can think of many other uses.

The one issue I had with rarebit is that it is mostly made with Worcestershire sauce as its primary spice ingredient. Worcestershire has many good things – vinegar, molasses, tamarind, onion, garlic and other spices (including clove and cinnamon). Unfortunately, one of its major ingredients is anchovies – a big no no for vegetarians. So I had to find an alternative, and I found it in A1 steak sauce, amazingly enough! It had most of the same ingredients as Worcestershire sauce, but without the anchovies, which would have un-vegetarian-ed this delectable meal.

Because this is basically burnt cheese on toast, you need to really layer flavours. I added some old balsamic vinegar and a touch of soy to the recipe to make up for the “lack” of anchovies. I also rubbed a cut garlic clove over the toast before putting on the cheese – subtle, but it imbues the final dish with a whisper of flavour. Its delicious, easy to make, and a perfect supper or dinner for friends and family.

For the cheese sauce you will need:

  • 2 tbsp unsalted butter
  • 2 tbsp all-purpose flour
  • 1 – 2 tsp Dijon mustard
  • 1 – 2 tsp A1 sauce
  • 1 tsp old Balsamic vinegar
  • 1/2 teaspoon freshly ground black pepper
  • 3/4 cup ale – I used Leffe
  • 3/4 cup heavy cream
  • 3 cups grated cheese (I used a mix of 2 parts Cheddar to 1 part red Leicester with a tad of pecorino grated in)
  • 2 eggs, well beaten
  • 2 – 9 drops hot sauce
  • Salt to taste
  • 1/2 tsp or so soy sauce (optional to taste)

In a medium saucepan, over low heat, melt the butter. Once the butter has completely melted, add the flour, and mix well. Cook this mixture (a nominal roux), stirring all the while, until lightly toasted in colour – a light tan is good. This should take you about 3 – 5 minutes. Add the Dijon mustard, A1 sauce, balsamic and ground pepper, and mix well.

Add the ale, and stir to combine. I usually start using a whisk at this point. The roux will start to deepen the sauce, but you will be adding a few more elements to get a very rich thick final result. Add the heavy cream, and cheese, and whisk well after each addition. Continue whisking as the cheese melts well into the sauce. Make sure it does not come to a boil.

Once the cheese has completely melted, drip the beaten eggs very slowly into the mixture, whisking all the while. Once the egg is completely incorporated, continue to whisk until it is thick to your liking. It should coat the back of a spoon, and when you draw a line through the sauce, the line should stay clean. Taste. Take off heat, and add hot sauce. I usually add 9 drops because I like it a little spicy, but do what tastes good to you. A few drops will be barely traceable but it will add to the final sublime flavour.

Add salt and soy to taste. The cheese should have added quite a bit of salt already, so be gentle.

Leave to cool for a while, as you prep the toast and oven.

To serve (for 2 people – you can adjust for the number of people in your house – the cheese mixture will serve up to 8 people):

  • 4 slices good toasted bread (I used multigrain and sourdough from my favourite bakery)
  • 1 cut clove of garlic
  • a handful of micro-greens (I used pea shoots), washed and cleaned
  • a lick of olive oil and vinegar for the greens
  • 1 vinegar onion each
  • a few baby tomatoes
  • A little minced Italian parsley

First, preheat your oven broiler, and arrange your oven rack to the highest level.

Toast your bread very well. You want it well browned on both sides (this is caramelisation, and flavour!). Rub one side of each piece of toast with a cut garlic clove.

Arrange the toast, garlic rubbed side up, on a baking sheet lined with greaseproof paper. The paper will capture any cheesy bits that come off the toasts – usually the most tasty bits!

Spoon about 2 – 4 tablespoons (depending on the size of your bread and your greed, obviously) of cooled cheese mixture over the toasts.

Broil for about 5 – 10 minutes until the cheese is burnt on top and bubbling.

While the toasts are broiling, toss the micro-greens with a tiny lick of olive oil and vinegar, and slice a few baby tomatoes.

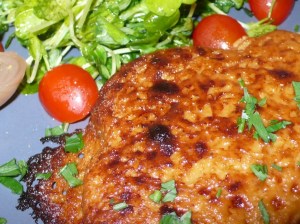
Serve 2 toasts per person, with some micro-green salad, a few tomatoes, and a vinegared onion. Sprinkle a little minced parsley over all.

I specifically chose sharp and vinegary side dishes to cut the serious richness of the cheese toasts, but if you hate micro-greens or vinegar onions, obviously, choose what you love as sides!

Pure heaven.

Cream Scones with Strawberries (or Strawberry Shortcakes!)

14 Jul

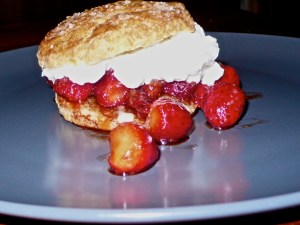
Scone with strawberries and creamEither way you cut it, scones with strawberries (English) or strawberry shortcakes (American) are delicious – and they highlight one of the most beautiful, sensuous, tangysweetsourjuicy products of summer – the strawberry. I love strawberries every which way – plain, with yogurt, cream, ice cream, with balsamic drizzled all over, in pies, crumbles, smoothies. I could go on and on and on. Strawberries, especially fresh summer berries, are a little love explosion in your mouth. But please, if you dont have strawberries, do not buy the frozen berry. Of all the different berries, strawberries just die when you buy them frozen – I find that they turn mushy and pulpy. Strangely enough, fresh picked, home frozen strawberries dont have that problem so much. Not sure why.

Scones and devon cream have always been a favourite – as have strawberry shortcakes the other side of the pond! Amazingly enough, the recipe is basically exactly the same. And so simple, as long as you do a little prep work (if you can call shoving some butter in the freezer and cutting up some berries prep) a few hours beforehand. The frozen butter is a must. It ensures soft, fluffy, rising scones, with plenty of layers. Try and handle this dough as gently and as little as possible. You dont want to melt the butter. Work quickly especially in the heat and humidity of summer.

Makes 6 – 8 scones / shortcakes

  • 1 stick / 8 tbsp / 115 g butter, frozen
  • 2 cups all purpose flour + bit extra for roll out
  • 2 tsp baking powder
  • 1/4 cup light brown sugar
  • 1/2 tsp salt
  • 1/2 cup cream/half and half/milk + 1 tbsp
  • 1 egg
  • 1 tbsp vanilla extract
  • 1 tbsp rough granulated sugar
  • 1 – 3 cups strawberries
  • 1 – 2 tsp caster sugar
  • 1 tsp balsamic vinegar
  • 1 – 2 cups heavy whipping cream

First of all, freeze your butter. You need to do this at least an hour or so before you start the recipe. Then, if you like, prep the strawberries. Cut about 1/3 of the berries into slices, and crush with a few teaspoons of caster sugar. Cut or slice the rest of the strawberries into the crushed juices, and if you have it, pour a teaspoon of balsamic vinegar over. Leave in the fridge to get juicy and gorgeous.

When you are ready to start, preheat your oven to 200C.

In a large mixing bowl, combine flour, baking powder, brown sugar, and salt. Mix with your fingers to combine well. Grate the frozen butter over the flour mixture, and using the tips of your fingers, mix till just combined, and all the butter is coated with flour.

Measure out 1/2 cup of cream or milk, beat egg lightly into milk, and add a glugg of vanilla extract. Pour this over the flour/butter mixture, and using your hands, combine lightly. Knead once or twice to form a soft dough. Refrigerate if you are not using immediately.

Flour your work surface lightly, and roll out dough to about 1 inch thick. You should be able to get about 6 – 8 scones from this. I used a glass as my cutter. Place at least 1 inch apart on your baking paper lined baking tin, and using your fingers, glaze with a little heavy cream. Sprinkle some rough granulated sugar over the top. Bake for 12 – 15 minutes, or until tops are golden brown, and baked through.

While scones are baking, whip 1 – 2 cups of heavy cream until soft peaks form. Once scones have cooled down to warm, split apart, pile with strawberries, and top with cream. Devour.

Banana Cake

1 Jul

This cake is soooooooo good! Its got such a beautiful banana taste, light, fluffy, perfect crust. It does not bake up high, so if you are going to stuff it with salted caramel, make sure you make two layers. You wont be able to slice in half lengthwise because of the tenderness of this cake, and the gentleness of the crumb, so dont try!

If you are serving this as a dessert for a nice dinner, it would be perfect iced with a cream cheese and vanilla frosting (beaten with a few tablespoons of powdered sugar), or stuffed with salted caramel. However, if its for an afternoon tea, or just because… it needs no embellishment. Its beautiful and light, satisfying and happy making!

My Toh used to eat pisang mas (the tiny gold banana common here in Malaysia) and so, in memory of him, that is one of my favourite fruits. I look for it everywhere, and was so thrilled when my wonderful organic delivery guy had them. I used pisang mas for this recipe, but please feel free to use any very ripe (even black) sweet banana.

  • 2 1/4 cups cake flour
  • 3/4 teaspoon baking soda
  • 1/2 teaspoon baking powder
  • 1/2 teaspoon salt
  • 1 1/2 cups mashed ripe bananas
  • 1/3 cup buttermilk
  • 1 teaspoon plus 1 tablespoon vanilla extract
  • 1/2 cup unsalted butter, room temperature
  • 1 1/4 cups sugar
  • 2 large eggs

Preheat oven to 175°F. Lightly butter two 8-inch-diameter cake pans with 2-inch-high sides; dust pans with flour.

In a small bowl, combine cake flour, baking soda, baking powder and salt. Set aside.

Mash bananas well and measure – we used about 8 or 9 small pisang mas. Mix bananas with buttermilk and vanilla and set aside.

In an electric mixer, beat butter and sugars in a large bowl until blended well, and light. Add eggs one at a time, beating after each addition.

Add dry ingredients alternately with banana in 3 – 4 additions, beating for a few seconds until just blended. Let rest for a few minutes.

Divide equally between the cake pans, and bake, one at a time for approximately 25 minutes, or until a cake tester comes out with a few crumbs attached.

Let cake cool on a cake rack, in the cake pan, for about 10 minutes, and then turn out and allow to cool completely.

Ice (or stuff) with salted caramel, and sprinkle with a little bit of Maldon.

Try not to eat before the guests come – unlike me (as you can see from the picture!)